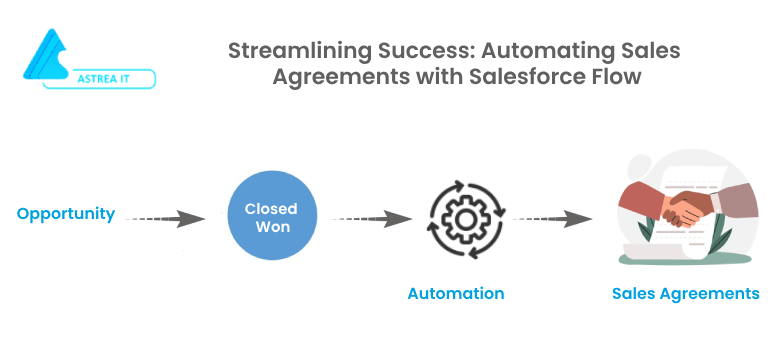
In the fast-paced landscape of modern business, efficiency is the name of the game. One of the key challenges sales teams face is managing complex processes while maintaining accuracy and speed. Salesforce, the industry-leading CRM platform, provides a solution that can revolutionize your sales operations: automating the creation of Sales Agreements when an Opportunity reaches the "Closed Won" stage. In this blog, we'll delve into the power of Salesforce Flow, guiding you through the process of setting up a dynamic automation that seamlessly generates Sales Agreements, giving your sales team the edge they need to succeed.
Understanding the Challenge:
As businesses navigate intricate sales processes, the transition from Opportunity to Sales Agreement can be a pivotal moment. When an Opportunity reaches the "Closed Won" stage, it's time to solidify the deal and create a Sales Agreement. This process, if done manually, can be time-consuming and prone to errors. But fear not, Salesforce Flow has the solution!
Introducing Salesforce Flow:
Salesforce Flow is a powerful tool that allows you to design and automate processes, bringing a new level of efficiency to your sales operations. In this case, we're going to create a flow that listens for an Opportunity to reach the "Closed Won" stage and then automatically generates a Sales Agreement based on the Opportunity's details.
Here's a step-by-step guide on how to create this flow:
Step 1: Access Flow Builder:
- Click on gear Icon on top right of org.
- Search Flow in Quick Find Box.
- Click on the "New Flow" button to create a new flow.
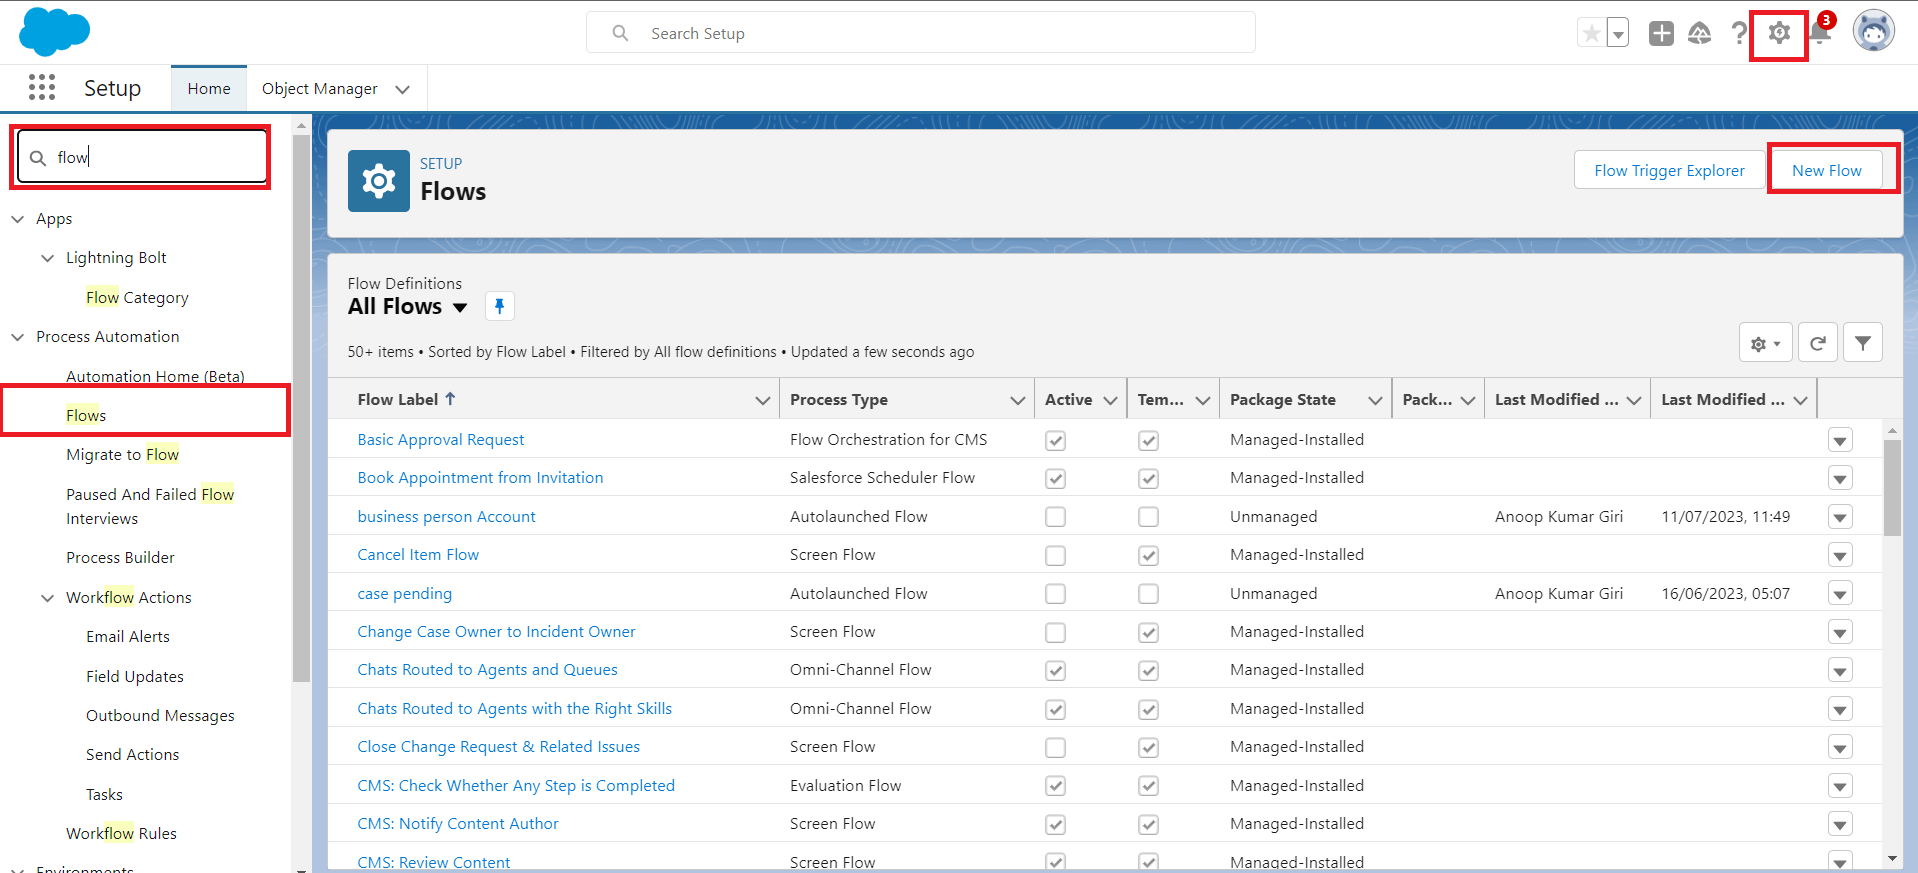
Figure 1. Click on Flow to open Flow builder.
Step 2: Set Flow Details:
Select the Record-Triggered Flow option, and click on Create and configure the flow as follows:
- Object: Opportunity
- Trigger the Flow When: A record is created or updated
- Set Entry Criteria Condition Requirements: None
- Optimize the Flow For Action and Related Records
- Click Done.
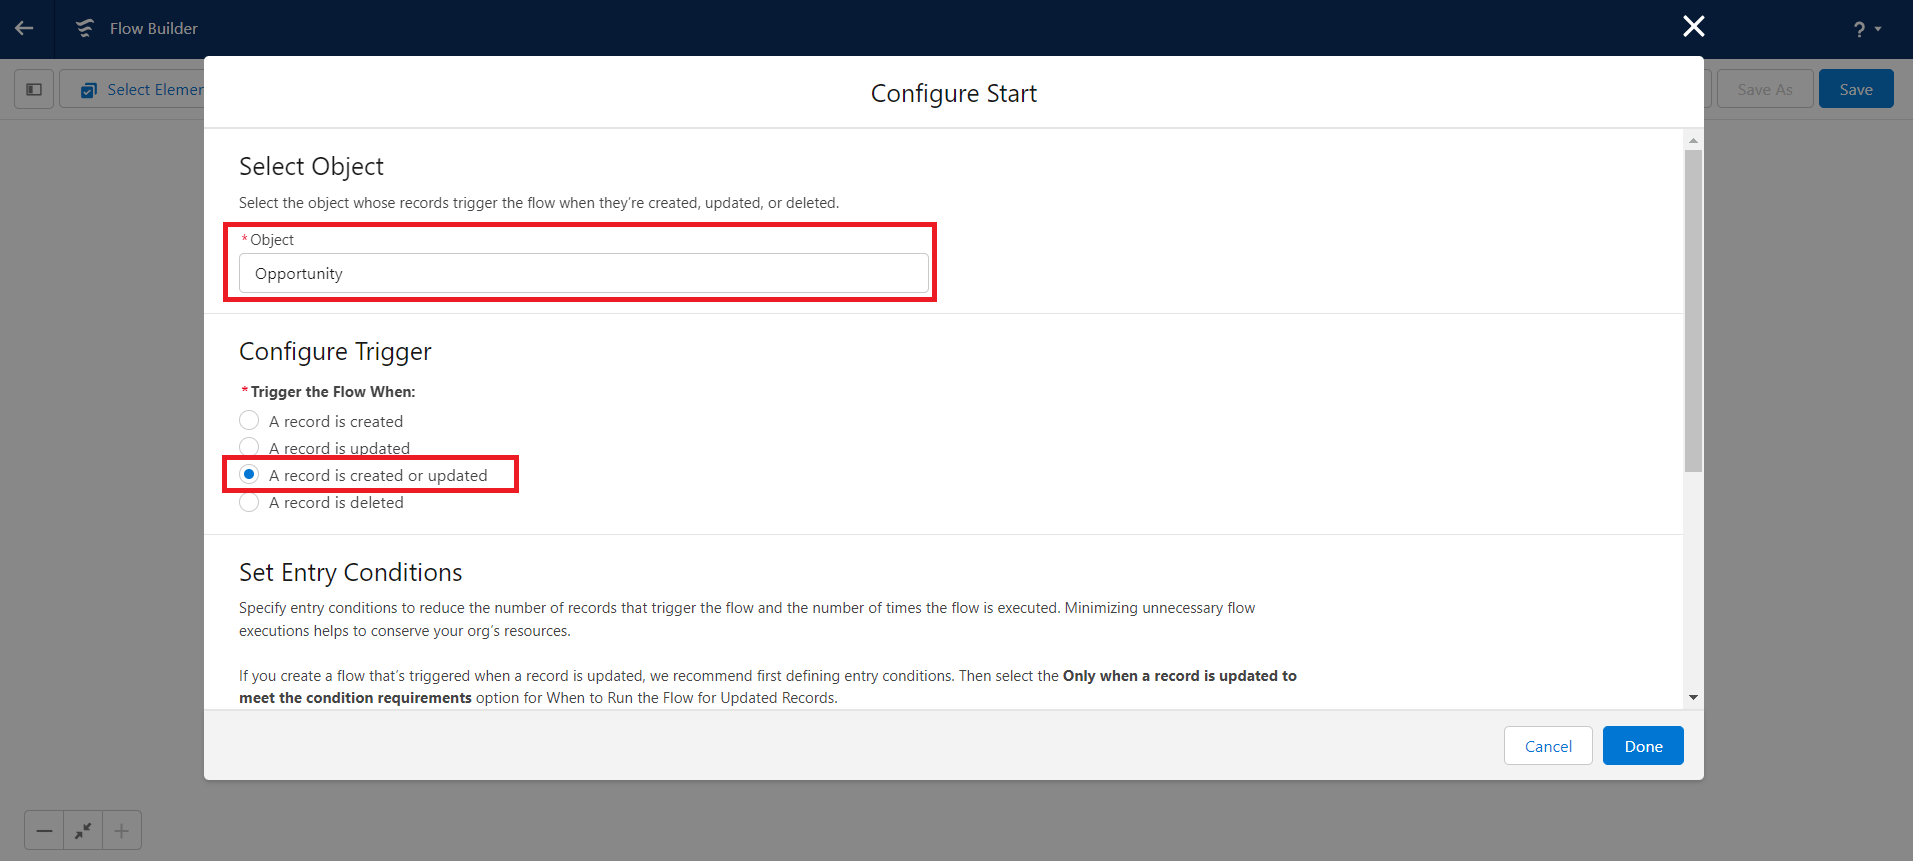
Figure 2. Configure the flow and set the entry condition.
Step 3: Using Decision Element to Check Opportunity Stage
- On Flow Designer, click on the + icon and select the Decision element.
- Enter a name in the Label field; the API Name will auto-populate.
- Under Outcome Details, enter the Label the API Name will auto-populate.
-
Condition Requirements to Execute Outcome: All Conditions Are Met (AND)
Row 1:
- Resource: {!$Record.StageName}
- Operator: Equals
- Value: Closed Won
- Click Add Condition
-
Condition Requirements to Execute Outcome: All Conditions Are Met (AND)
Row 2:
- Resource: {!$Record.AccountId}
- Operator: Is Null
- Value: {!$GlobalConstant.False}
- When to Execute Outcome: Only if the record that triggered the flow to run is updated to meet the condition requirements
- Click Done.

Figure 2. Use decision element to check opportunity stage=’Closed won’ .
Step 4: Add Action – Create a Record Element to sales-agreement.
- On Flow Designer, click on the + icon and select Created Records element.
-
Input the following information:
- Enter Label the API Name will auto-populate.
- How Many Records to Create: One
- How to Set the Record Fields: Use separate resources, and literal values
- Object: Contract
-
Set Field Values for the Contract
- Row 1:
- Field: AccountId
- Value: {!$Record.AccountId}
- Click Add Row
- Row 2:
- Field: ContractTerm
- Value: 12
- Click Add Row
- Row 3:
- Field: StartDate
- Value: {!$Record.CloseDate}
- Click Add Row
- Row 4:
- Field: Status
- Value: Draft
- Click Save.
Figure 4: Add create record element to create contract for sales agreements.
Step 5: Activate the Flow:
- Once you've configured the action, click on "Done."
- Give the name to flow and click on save
- Activate the flow by clicking on the "Activate" button in the Flow Builder.
Step 6: Activate the Flow:

Figure 5: FInal flow looks like this.
Step 7: Test the Flow:
- Create or update a new Opportunity and set its stage to "Closed Won."
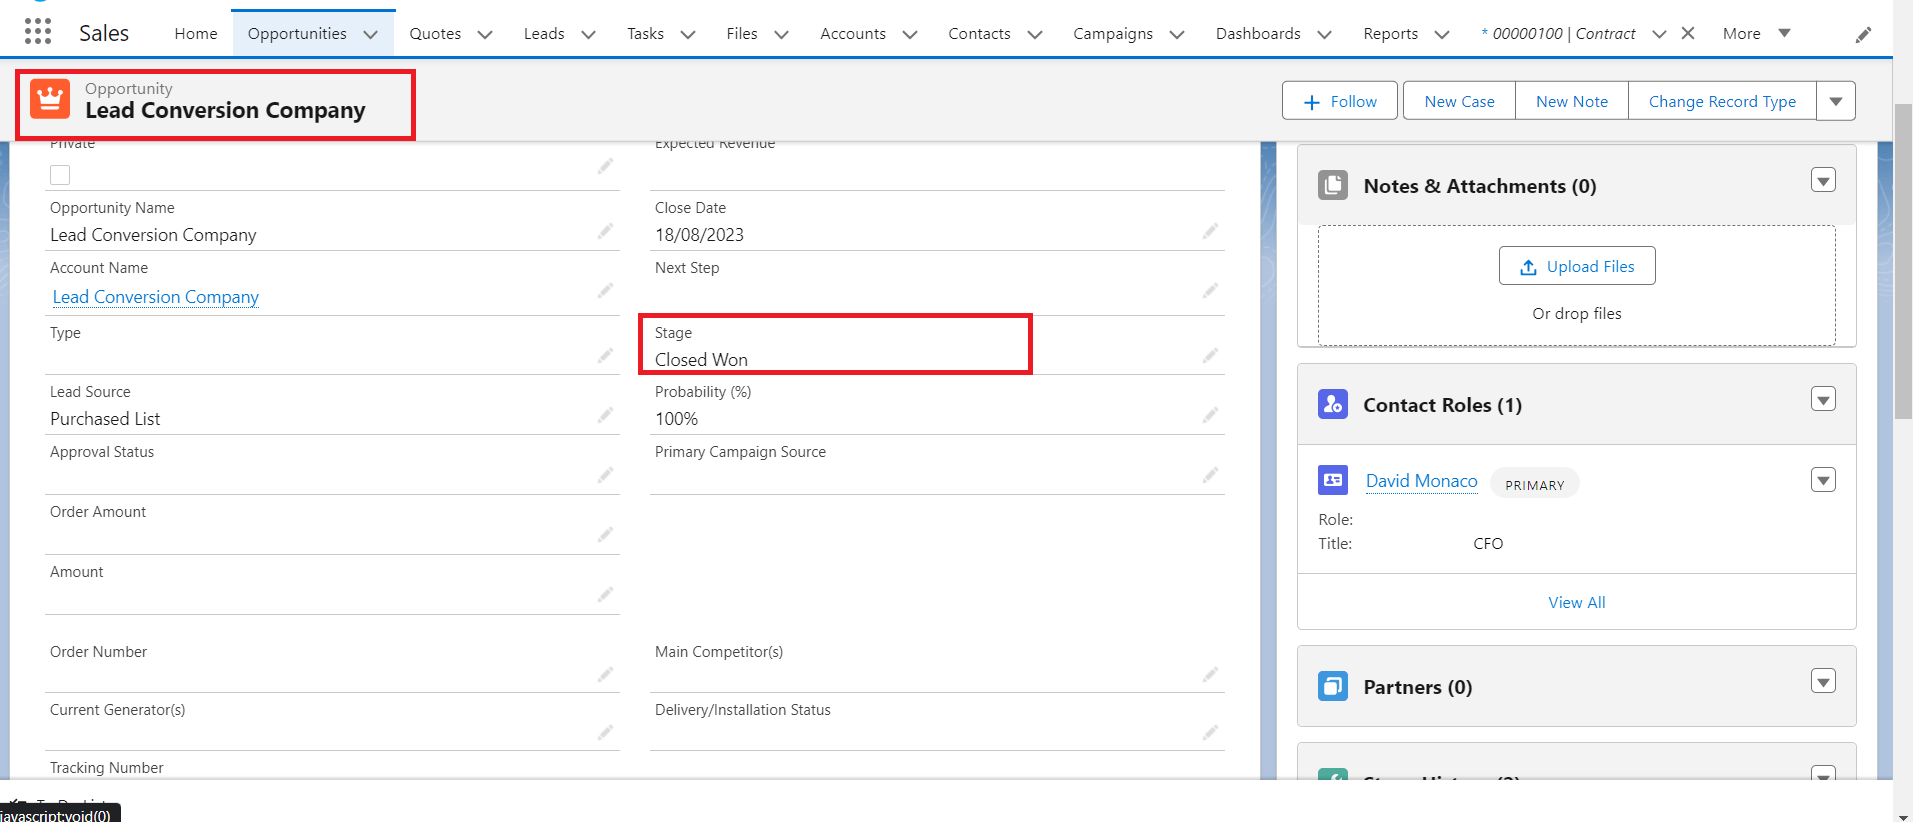
Figure 6: Opportunity records with Stage=’Closed won’.
- The flow will automatically trigger and create a new Sales Agreement based on the Opportunity details.
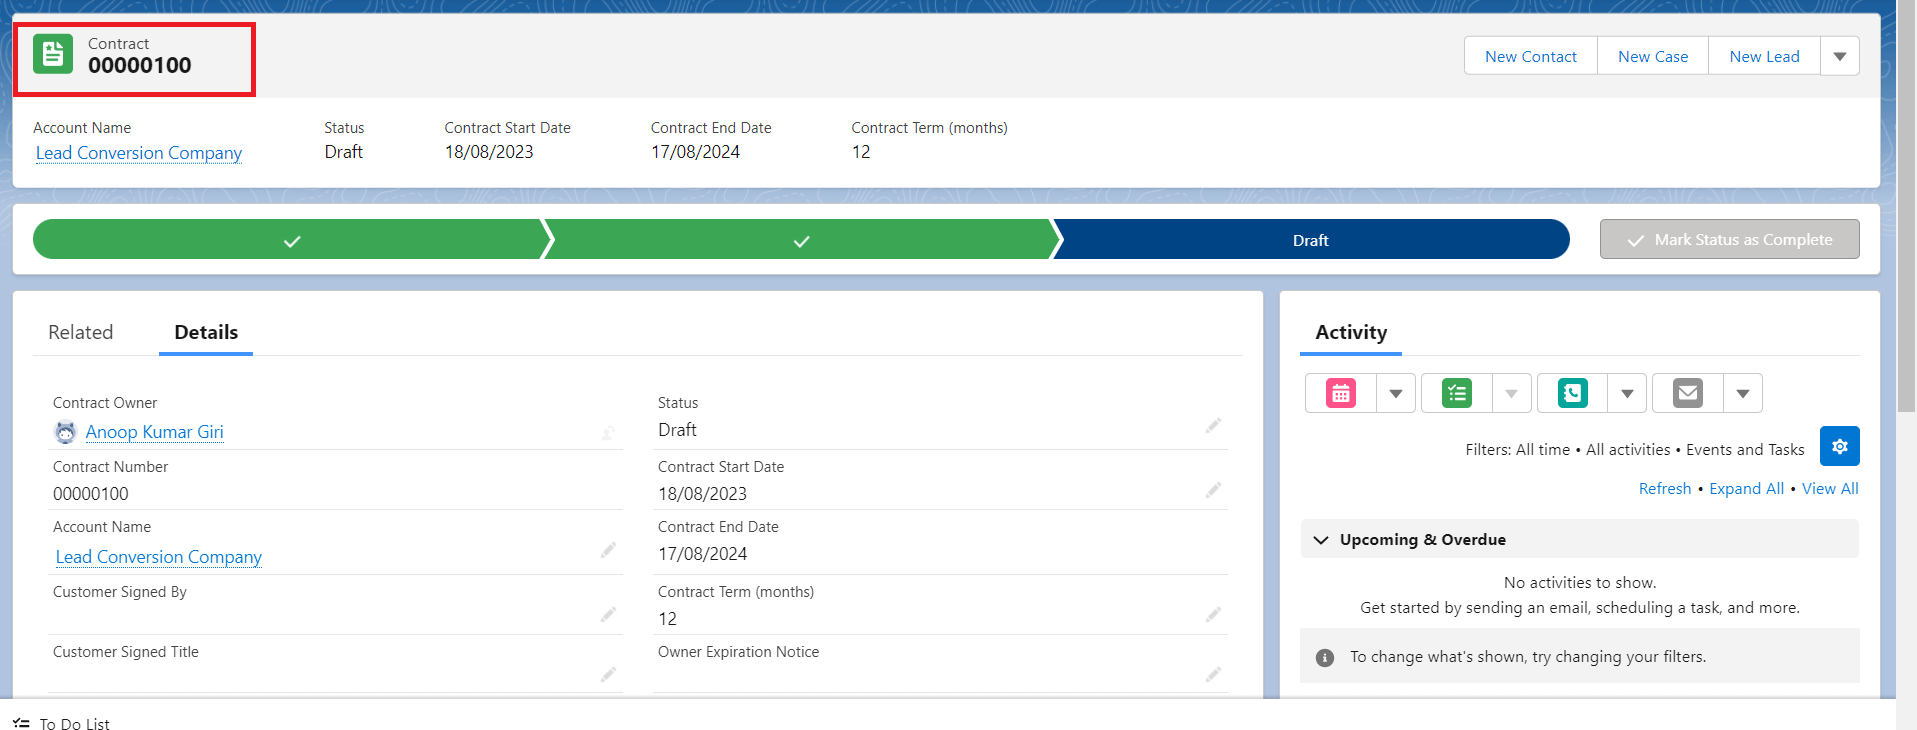
Figure 7: New contract record will be created when flow is triggered.
Benefits of Automated Sales Agreements:
1. Time Savings: With an automated flow, Sales Agreements are generated instantaneously upon Opportunity closure, eliminating manual data entry and saving valuable time.
2. Reduced Errors: Automation reduces the risk of human errors that can occur during manual data input, ensuring accurate and consistent Sales Agreements.
3. Consistency: Automated processes ensure that every "Closed Won" Opportunity leads to a Sales Agreement, creating a standardized workflow.
4. Enhanced Productivity: Your sales team can focus on nurturing customer relationships and closing deals, rather than spending time on administrative tasks.
Conclusion:
By harnessing the power of Salesforce Flow, businesses can elevate their sales operations to new heights of efficiency and accuracy. Automating the creation of Sales Agreements when Opportunities reach the "Closed Won" stage is a game-changer. It streamlines processes, reduces errors, and frees up valuable resources to focus on what truly matters: fostering customer relationships and driving business growth. Embrace automation and watch your sales team thrive in today's competitive landscape.
For any queries please reach out to support@astreait.com.