INTRODUCTION:
Quip for Salesforce is another step for increasing productivity & collaboration by Salesforce. Quip is a simple platform for teams to enable collaboration and better document management. It combines chat, docs, task lists, and spreadsheets in one app — making collaboration fast and easy. Salesforce Quip integration allows the user to skip the endless chain of emails, meetings, chats and document versions by working simpler and faster with Quip on your desktop, tablet and phone.
The functionality of Quip is similar to Microsoft Online or Google docs where as Quip for Salesforce being a native SFDC product comes with an added advantage to get data from Salesforce to show dynamic information into Quip.
WHY QUIP for Salesforce
Quip for Salesforce creates a platform where developers can integrate solutions directly into the Quip canvas. The Apps that are built with Quip & Salesforce integration works on cross-platform and inherit collaboration and social features as well as notification and offline capabilities.
Building live apps for Quip opens the door to creating collaborative, real-time business solutions. Organizations often extend these capabilities by integrating Salesforce with modern web application frameworks like Meteor to build highly responsive, data-driven applications.
REQUIRED INSTALLS
LANGUAGES TO BUILD QUIP APPS
- ReactJS
- Javascript Libraries
Instructions below are based on the Quip standard documentation[1],[2].
SETTING UP ENVIRONMENT
- Create a Quip login account first.
- Install Node version v6 and NPM version v3 or higher installed.
- Make Sure your Python installed version is at least v2.7.
- Run npm install -g create-quip-app in your terminal.

- Open your browser to allow self-signed certificates on localhost for HTTPS:
- In Chrome, copy this URL and open it in a new tab: chrome://flags/#allow-insecure-localhost Then click "Enable" and click the "Relaunch" button at the bottom of the page.
- In Firefox and Safari, go to https://localhost:8888, then click "Advanced → Add Exception → Confirm Security Exception".
STEPS FOR CREATING YOUR APP
- To create your live app, Go to the https://quip.com/dev/console/ and click "Create a Live App".
- Copy your App Id and paste it somewhere.
- From CLI run create-quip-app my-app in your terminal. After this step you will get the project structure similar to below:
my-app |---package.json |---node_module |---webpack.config.js |---app |____manifest.json |---src |____App.less |____App.jsx |____root.jsx - Go to CLI and run cd my-app.
- Open the file app/manifest.json.
- Paste your app ID in manifest.json.
- Give the name of app Hello World. This `Hello World` will be the title of your app.
- Save app/manifest.json file. So that changes will reflect on the Quip document.
STEPS FOR DEPLOYING YOUR APP:
Follow these steps for live your app on Quip document.
- Go to app directory “my-app” using CLI.
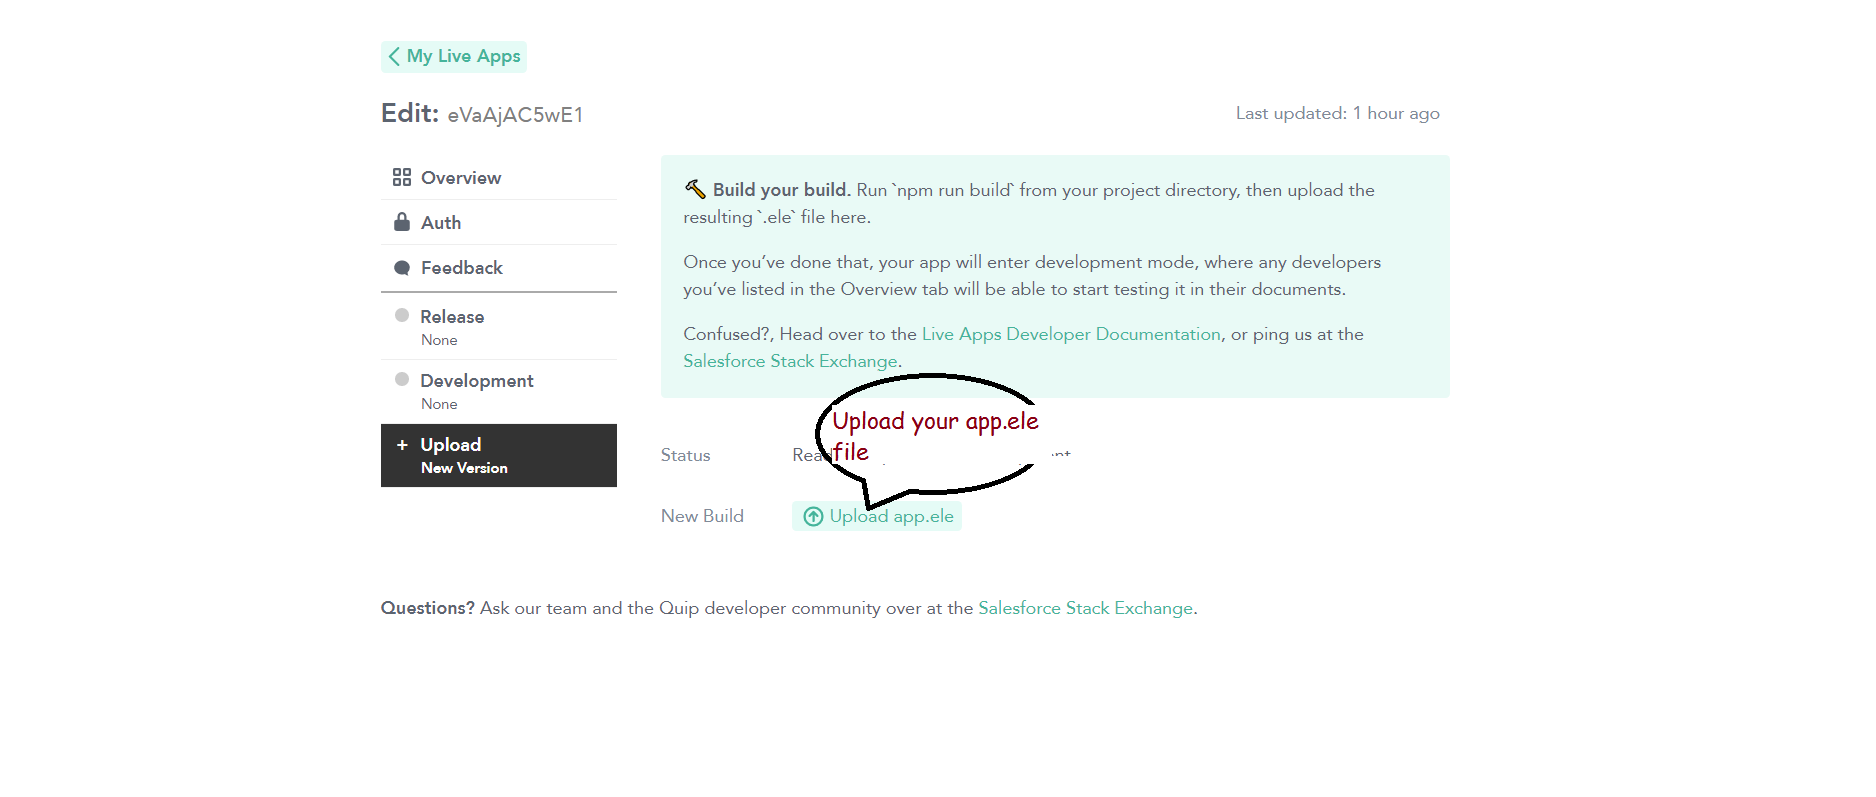
- Run npm run build in your CLI.
- Click on the “Upload app.ele” button in the https://quip.com/dev/console/.
- Select your app/app.ele file then click the "Upload" button.
- Open https://quip.com/ and create a new document.
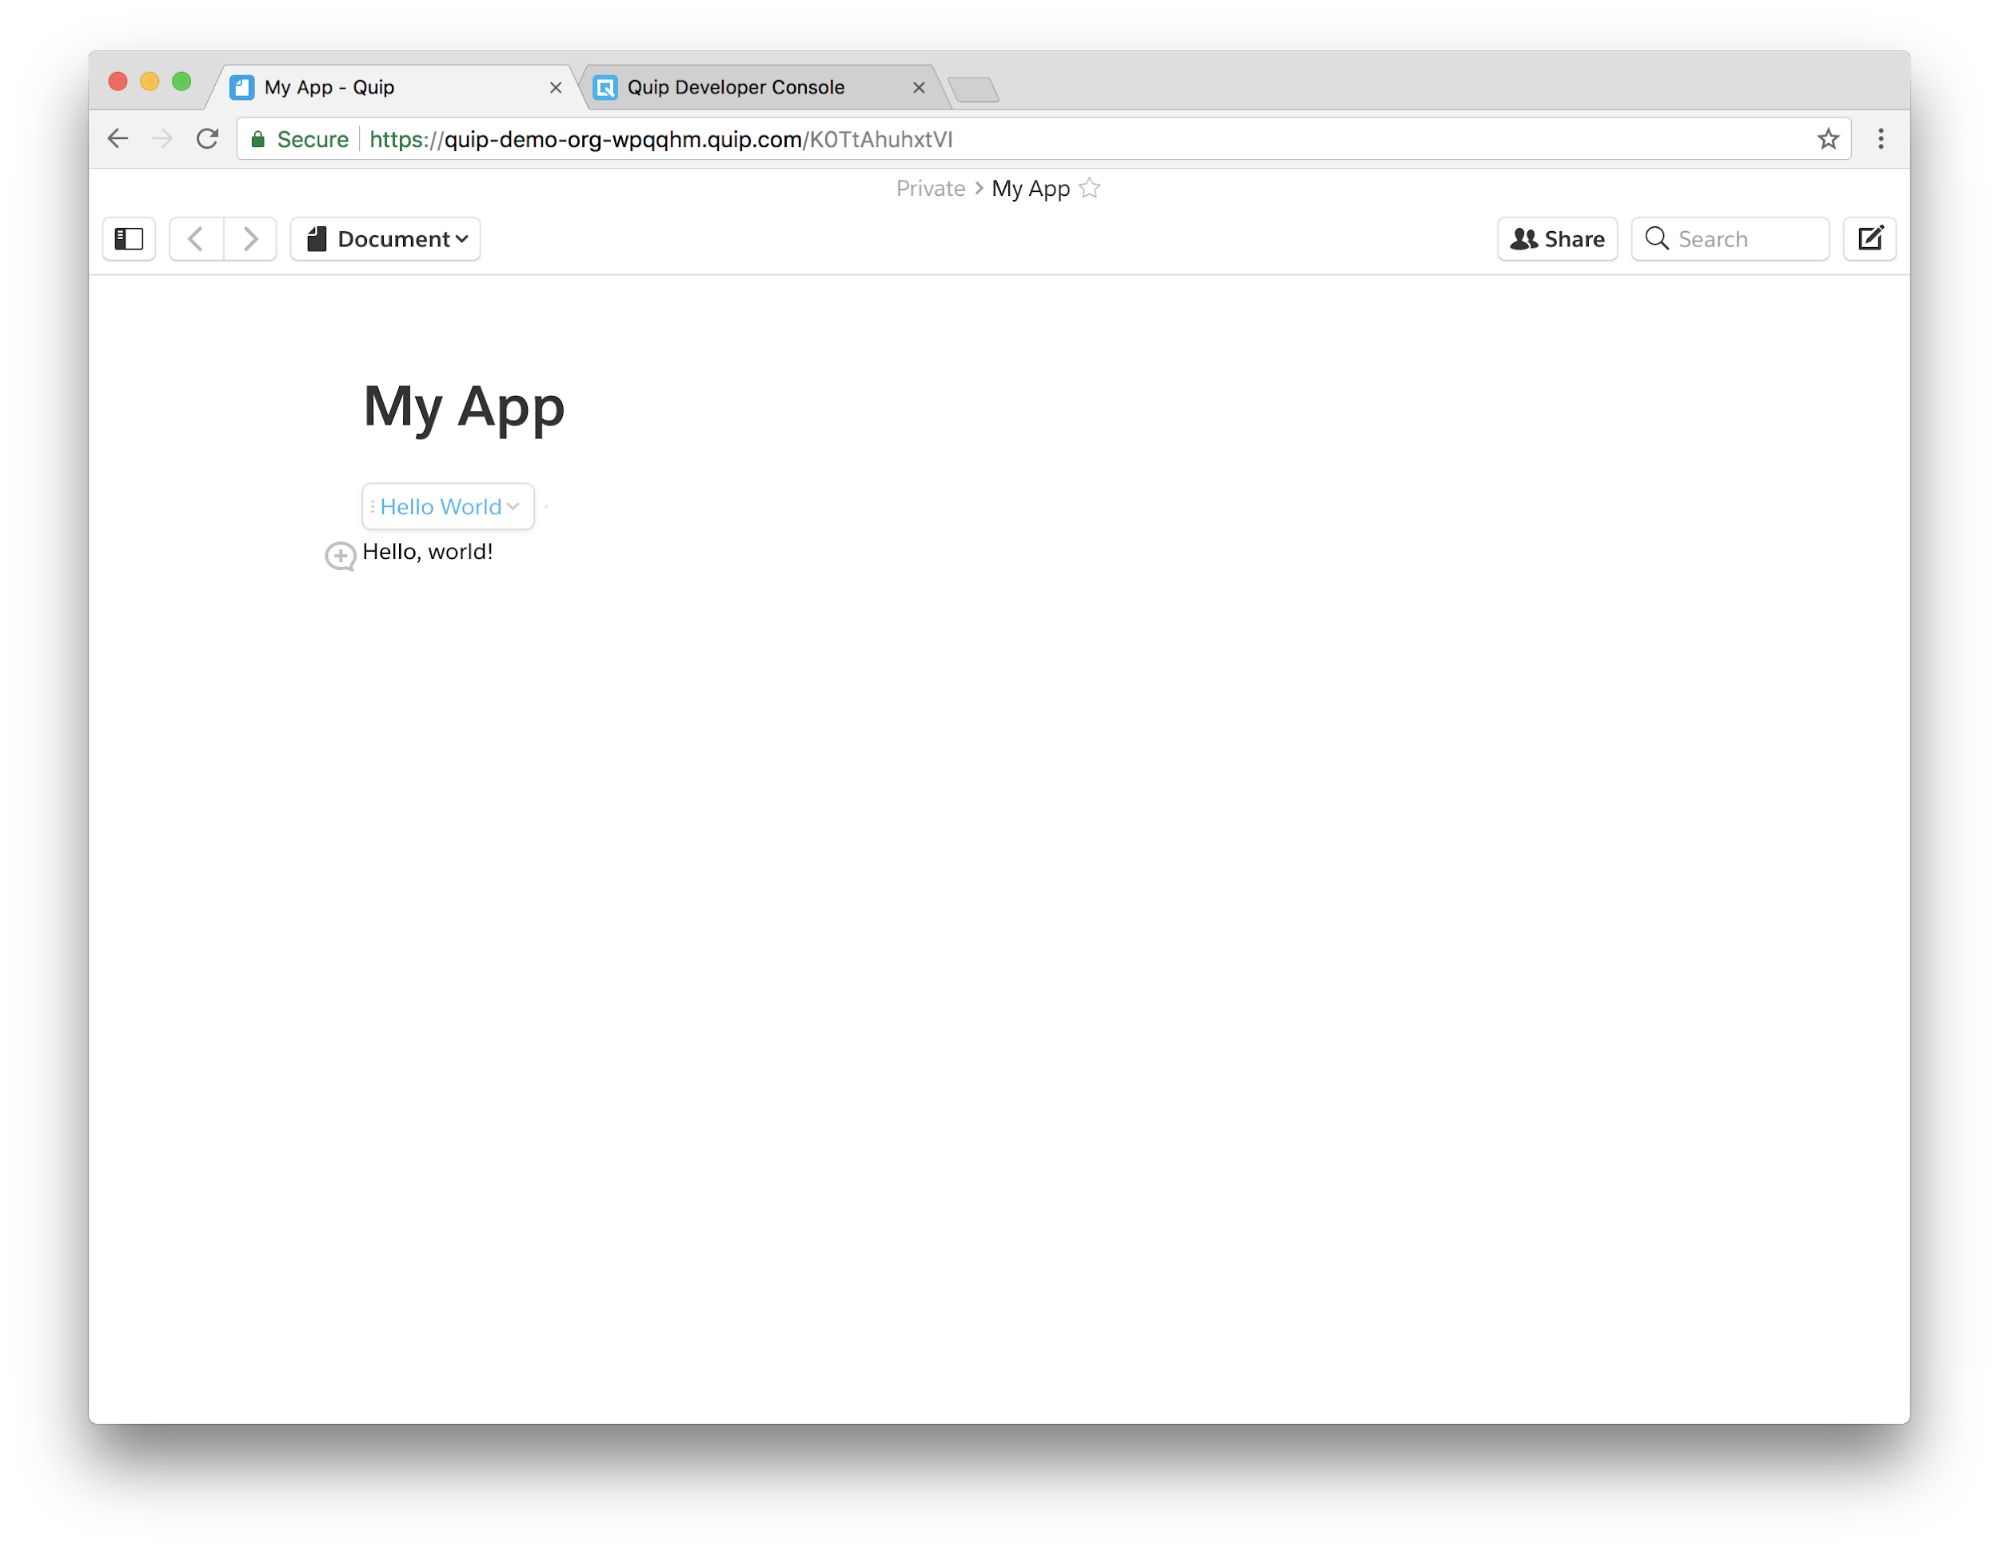
- Create new document and write @Hello World or your app’s name from app/manifest.json file.
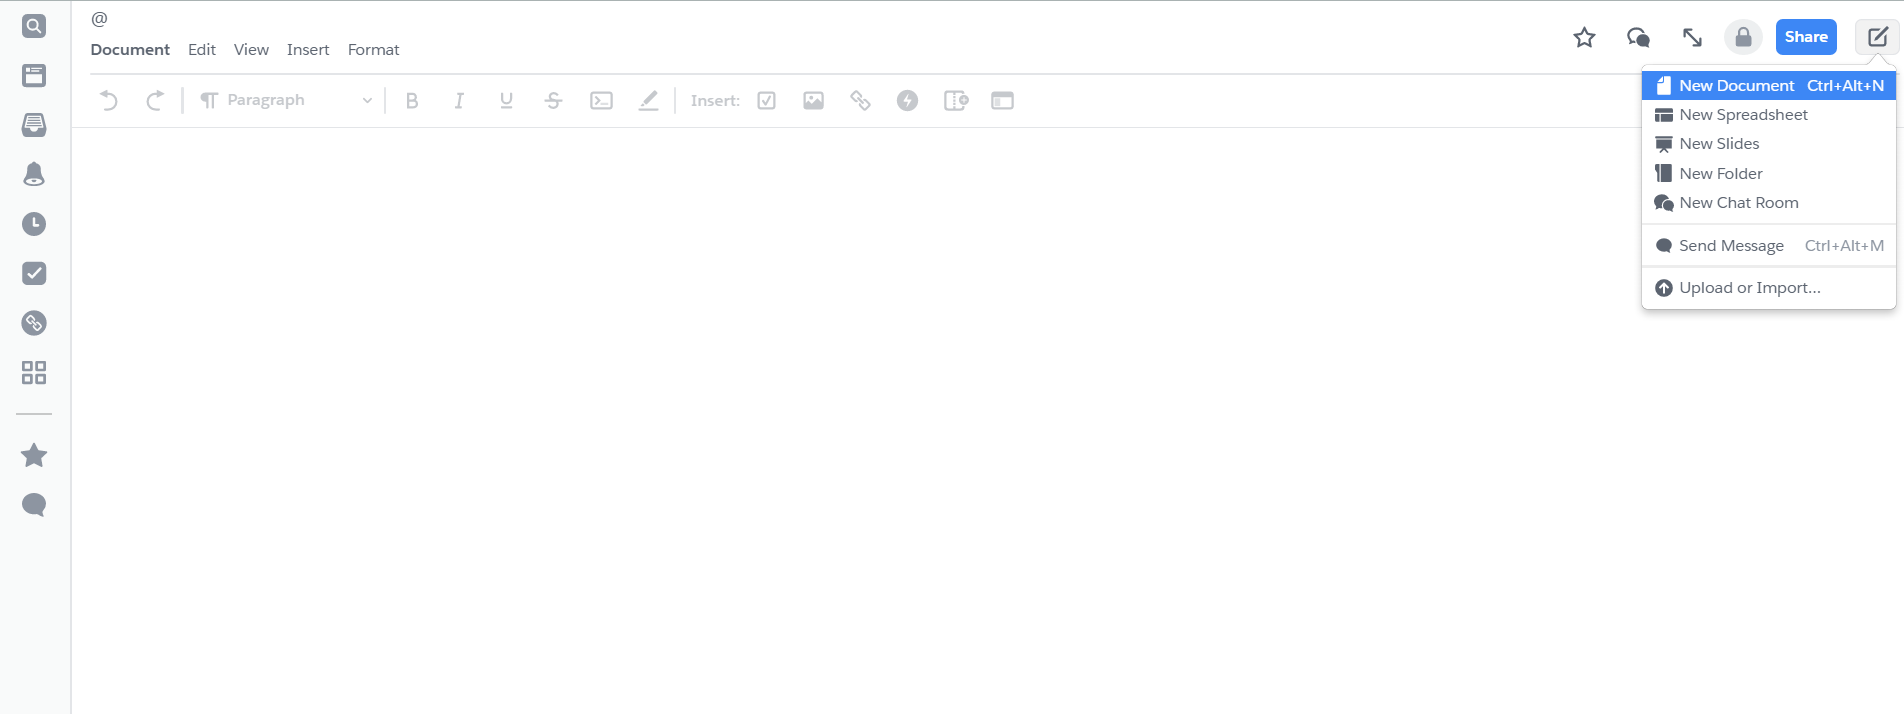
- Press ENTER or click on insert for insert an app to the document.
- Finally, you did it, and if all goes well, your app should be live on quip document.
SETTING A BUILD PROCESS:
You have business logic and some operations to perform with quip app. So you need to iterate your app locally many times. So follow below steps.
- Make sure you are in my-app directory, run npm start from CLI.
- This command will compile your code and update the changes.
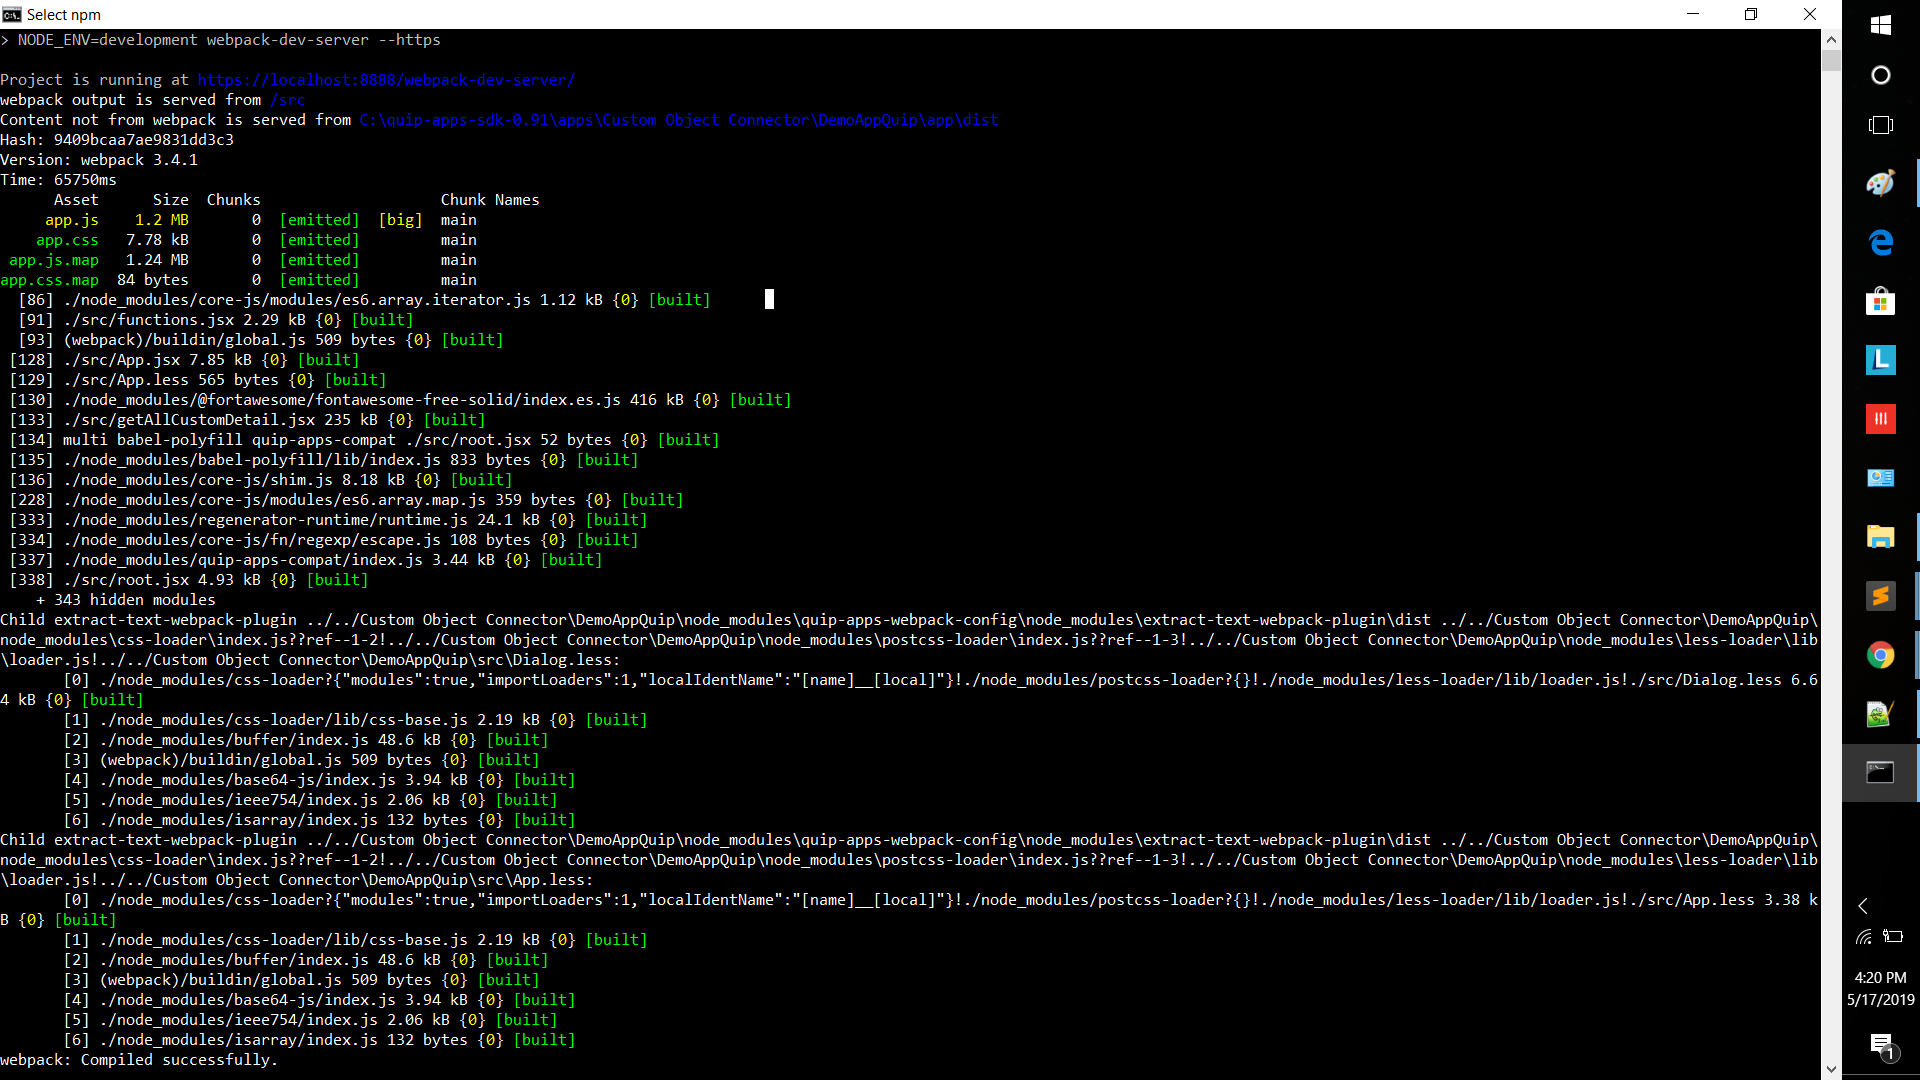
- If the code compiles successfully, then upload app.ele to Quip.
- This command will compile your code and update the changes.
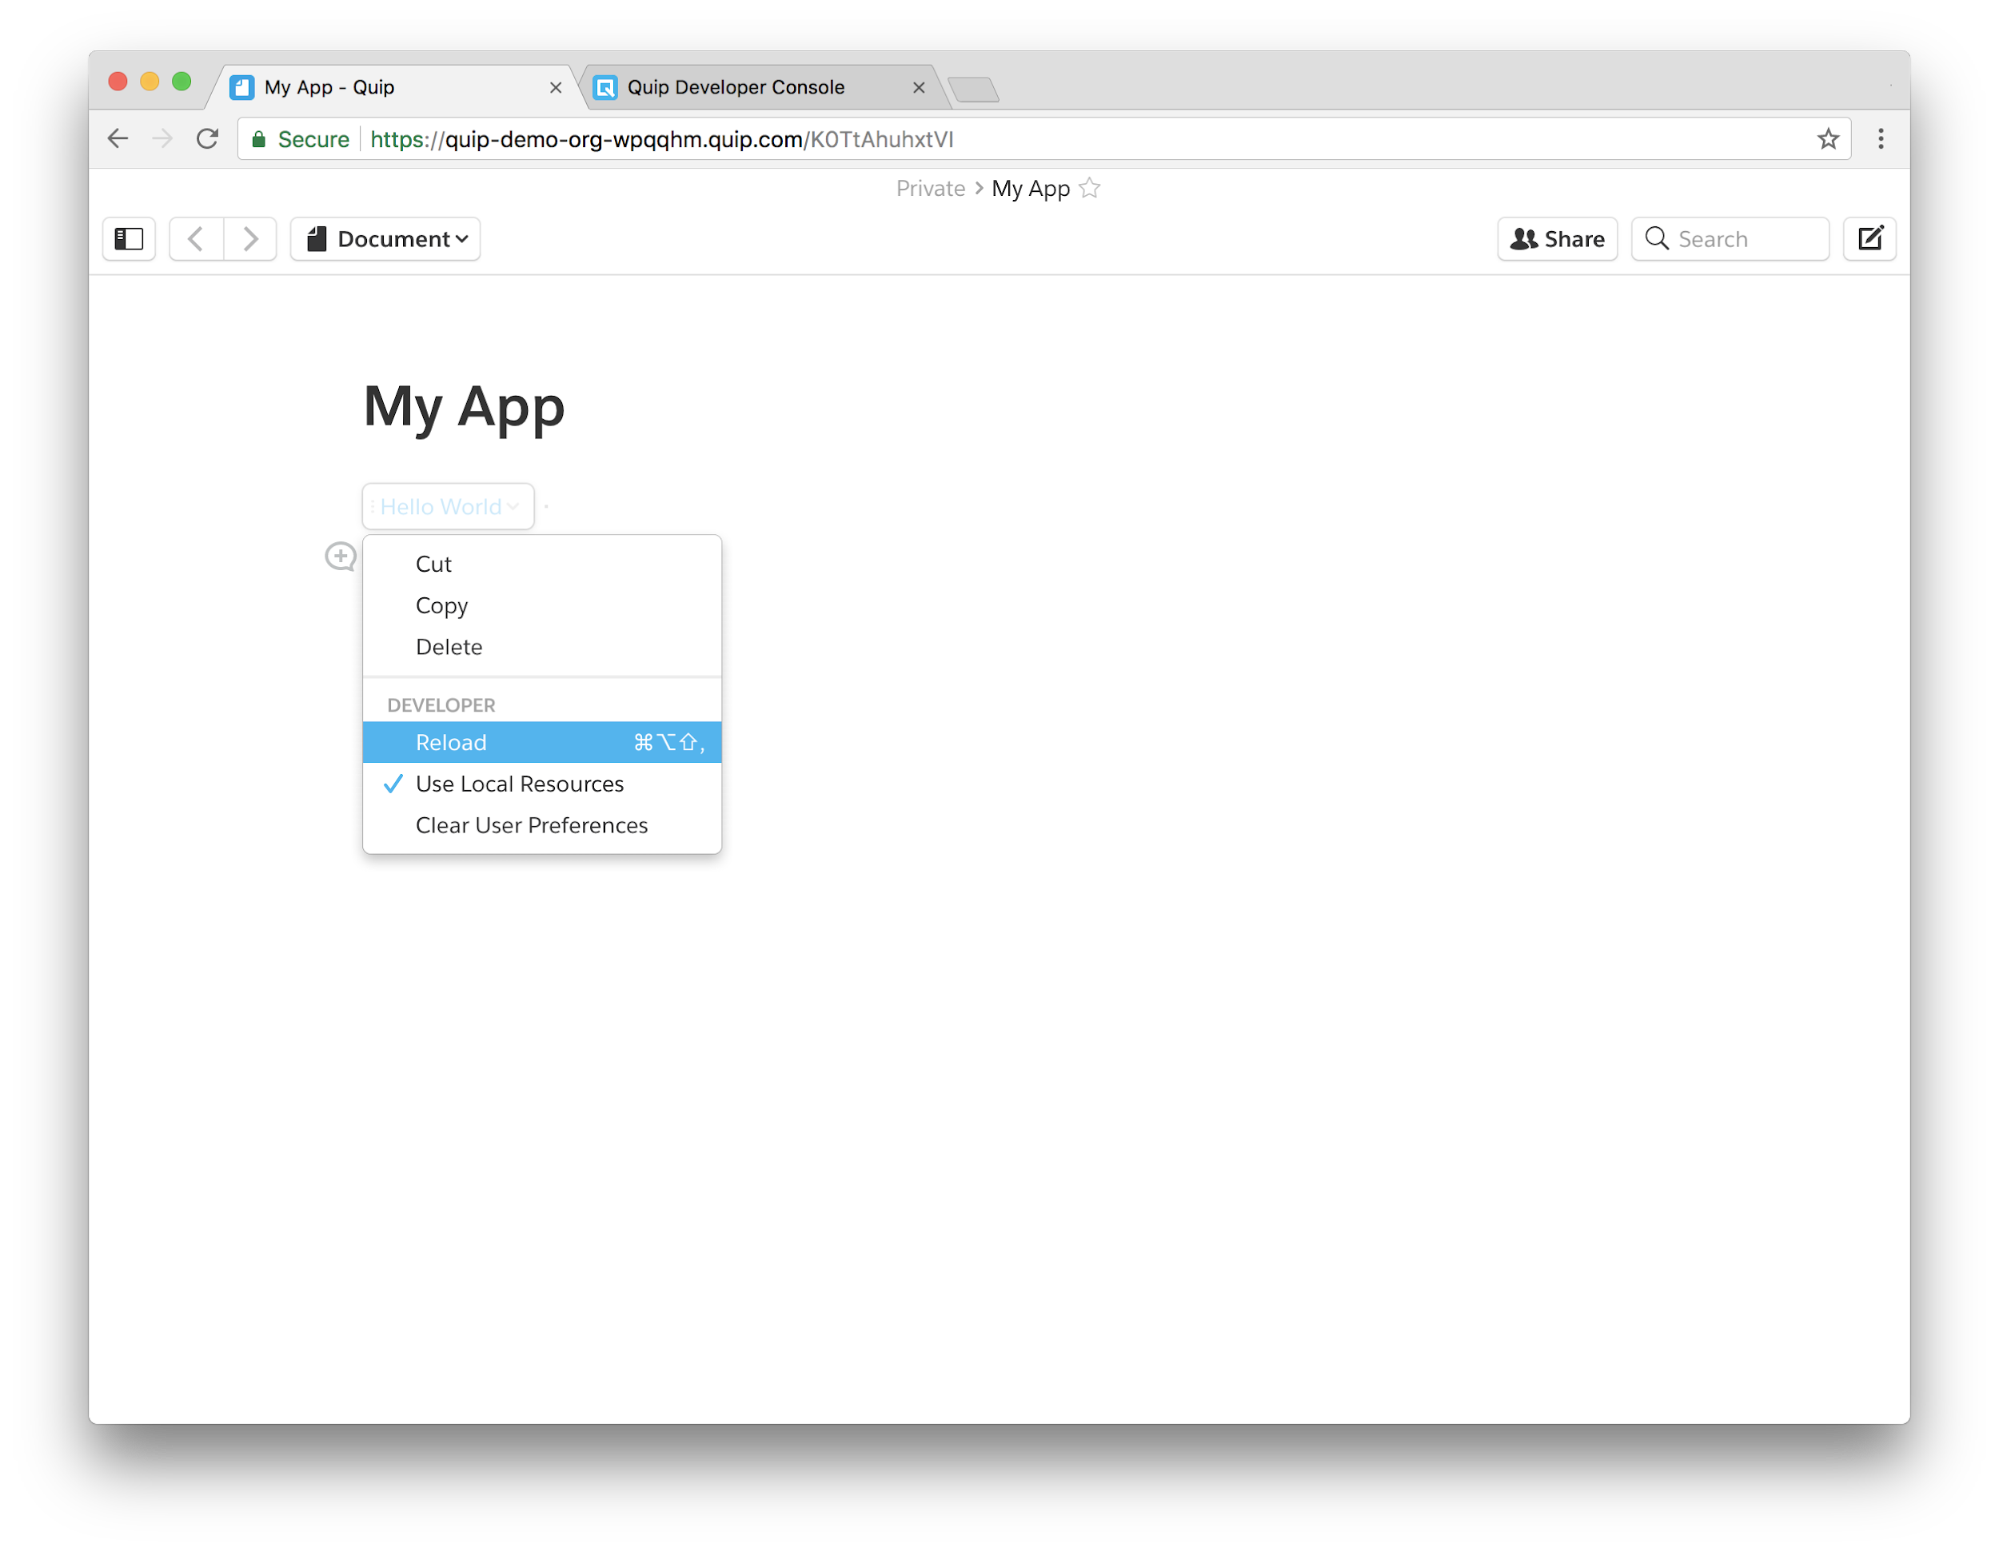
- To get all changes reload your app by clicking on Reload
- Open my-app/src/App.jsx file, find the text "Hello, world!", and change it to something like “I did it!”:
import Styles from "./App.less"; export default class App extends React.Component { render() { return <div className={Styles.hello}>I did it!</div>; } } - Again click on Reload button from app’s menu and you will get all your changes to the quip document.
UNDERSTAND YOUR APP CODE:
Let’s understand code of your first app. Go to src/ directory, it contains three files Root.jsx, App.jsx and App.less.
WHAT'S GOING ON:
While Quip Live Apps enable collaboration directly inside documents, many organizations also need seamless data flow between multiple Salesforce environments. Using OmniStudio Integration Procedures, businesses can automate data sharing and synchronization across Salesforce orgs, ensuring teams always work with accurate and up-to-date information.
- quip.apps.initialize() is the starting point. It is loading code and making it ready for setup.
- To check if your instance is ready, quip document makes a call to initializationCallback to notify setup is complete.
- In Quip document iframe rootNode is empty HTML you can add html element.
- In root.jsx file,
tag is used for rendering your html element. ReactDOM.render( , rootNode); - We can import styles.less file by using import Styles from ‘./App.less’; all css part we can write in App.less file.
- As you develop your app, you'll add new .jsx and .less files as component to the src/directory. New .jsx file we can call it component.
NOTE: The term used in document CLI means command-line interface.
Quip Live Apps are just one example of how Salesforce integrations can enhance collaboration, automation, and productivity across teams. From real-time applications and cross-org integrations to advanced workflow automation, a strong integration strategy helps organizations unlock the full power of Salesforce. To explore more integration solutions and best practices, visit our Integrations Expertise page.
References
If you have any requirements related to building Quip apps or need to understand how you can use Salesforce and Quip together, please feel free to connect with our team at quip@astreait.com
For any query on Quip, contact support@astreait.com