Introduction:
Salesforce Flow is a powerful tool that allows you to automate business processes and streamline data interactions within your Salesforce environment. One of the key features of Flows is the ability to integrate with external systems through REST APIs. In this blog post, we will explore how you can call REST APIs from Flows in Salesforce and provide a couple of examples to illustrate its usage.
Understanding REST APIs:
REST (Representational State Transfer) is an architectural style that provides a standardized approach for communication between systems over HTTP. REST APIs enable applications to interact with external systems by sending HTTP requests and receiving responses in a predefined format, such as JSON or XML.
Benefits of calling REST APIs from Flows:
By leveraging REST APIs within Flows, you can extend the functionality of your Salesforce environment and integrate with external systems seamlessly. Some benefits of using REST API integration in Flows include:
- Data synchronization: Sync data between Salesforce and other systems, ensuring consistency and eliminating manual data entry.
- Automating processes: Trigger actions in external systems based on events or data changes in Salesforce, automating complex business processes.
- Real-time updates: Fetch real-time data from external systems and update Salesforce records accordingly, keeping information up-to-date across platforms.
- Enhanced user experience: Utilize data from external systems to provide a more personalized and enriched user experience within Salesforce.
Now, let's dive into the steps to call REST APIs from Flows in Salesforce:
Step 1: Define the REST API endpoint:
Before calling a REST API, you need to identify the API endpoint URL provided by the external system. The endpoint represents the specific resource or functionality you want to access.
Step 2: Create an HTTP Request in Flow:
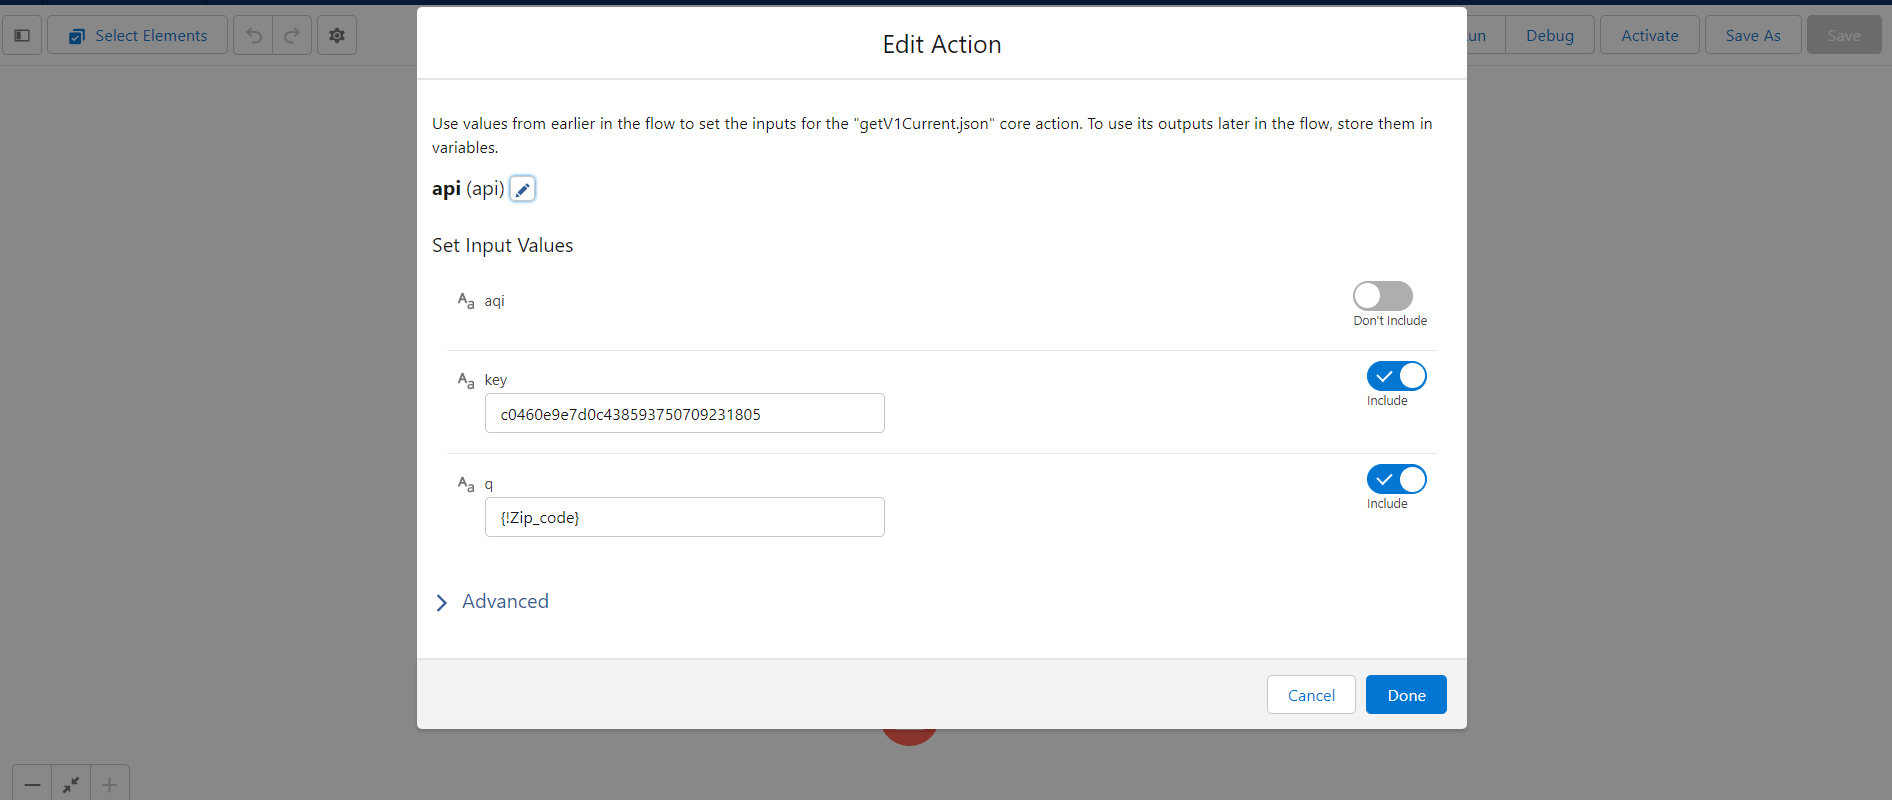
In Salesforce Flow, you can use the "HTTP Request" element to send HTTP requests to the REST API endpoint. Configure the HTTP Request with the appropriate method (GET, POST, PUT, DELETE) and headers required by the API.
Step 3: Handle the API response:
After sending the HTTP request, you can capture the API response in a variable within the Flow. The response can be in JSON or XML format, which you can parse and extract relevant data from.
Step 4: Process the API response:
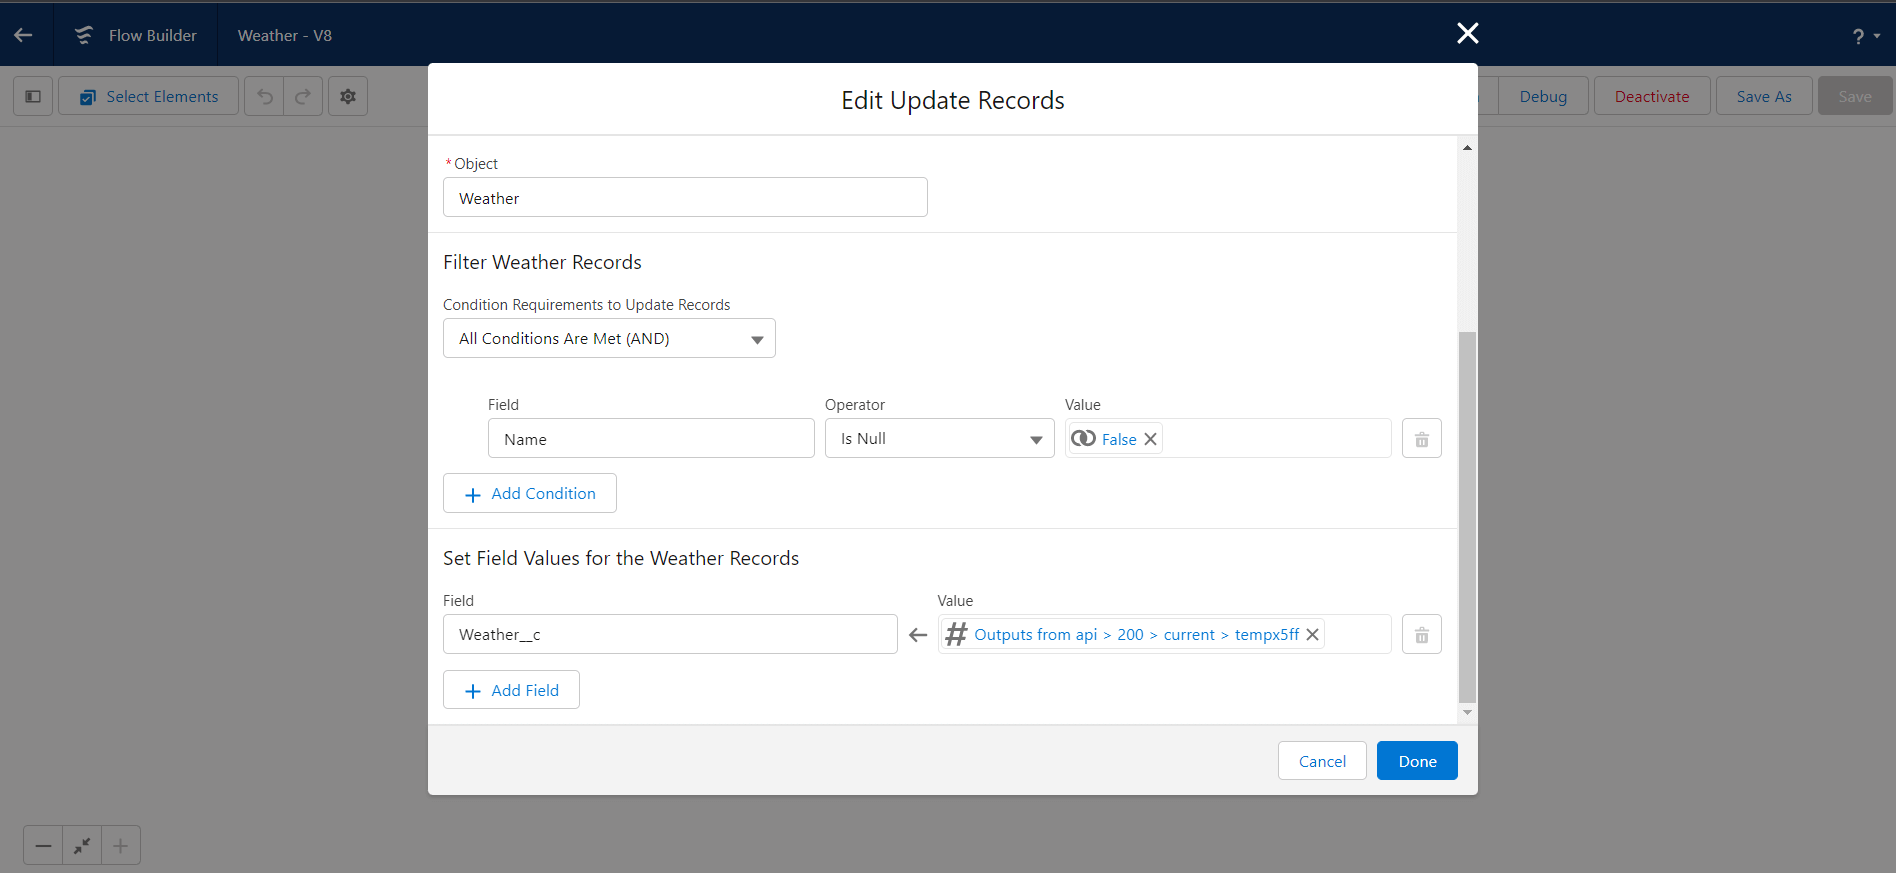
Once you have received the API response, you can perform various operations on the data within the Flow. For example, you can create or update Salesforce records, trigger additional actions, or present the data to the user in a formatted manner.
Example 1: Retrieving weather information from a REST API:
Let's say you want to retrieve weather information from a weather API and update a custom "Weather" object in Salesforce. You can create a Flow with an HTTP Request to fetch the weather data, parse the response, and update the relevant Salesforce records with the retrieved information.
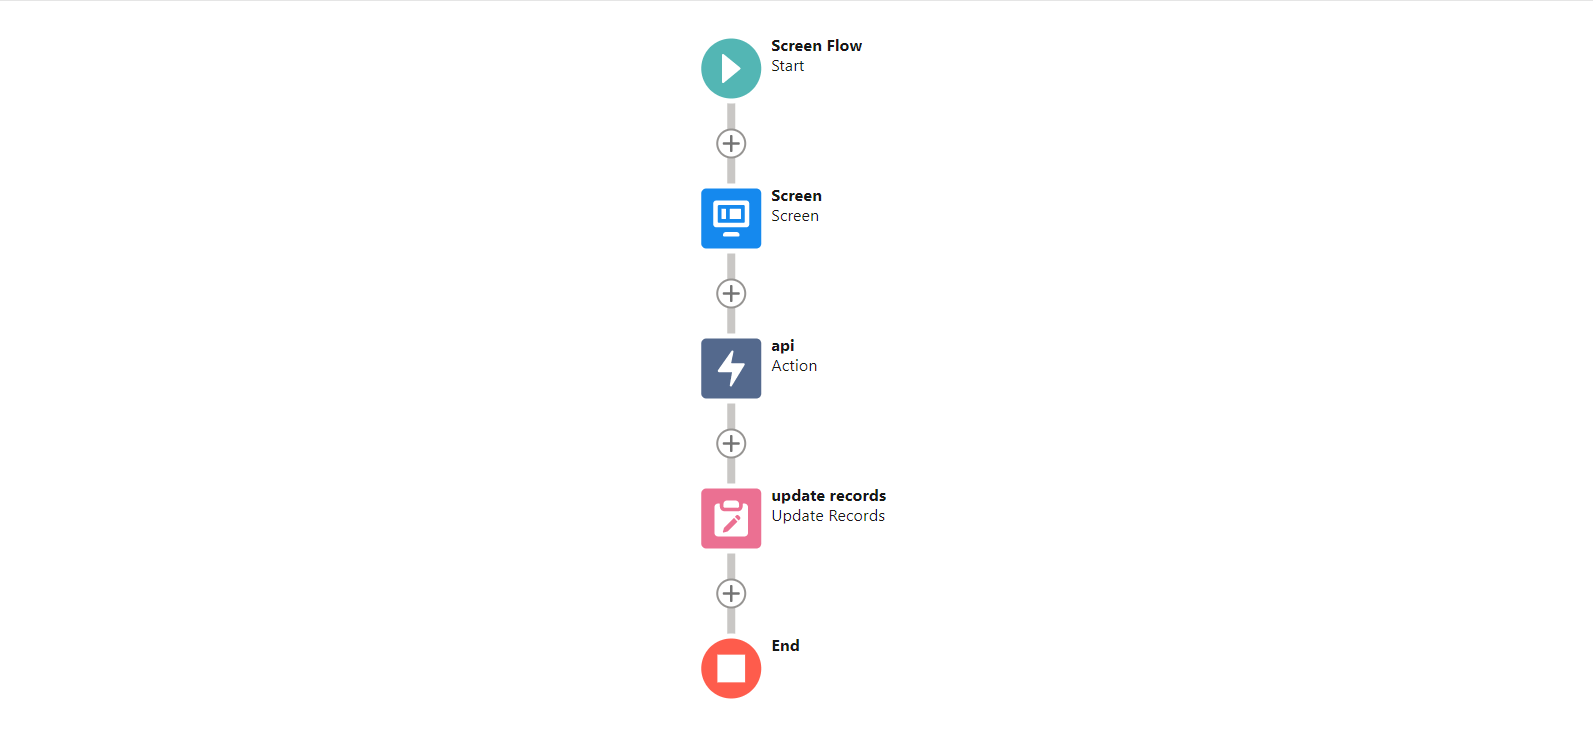
Figure 1: Flow that calls the REST API
Example 2: Creating a lead in an external CRM system:
Suppose you have a Flow that captures lead information from a web form in Salesforce. By integrating with an external CRM system through its REST API, you can create a lead in that system using the captured data. The Flow would include an HTTP Request to the CRM API, passing the lead details in the request body.
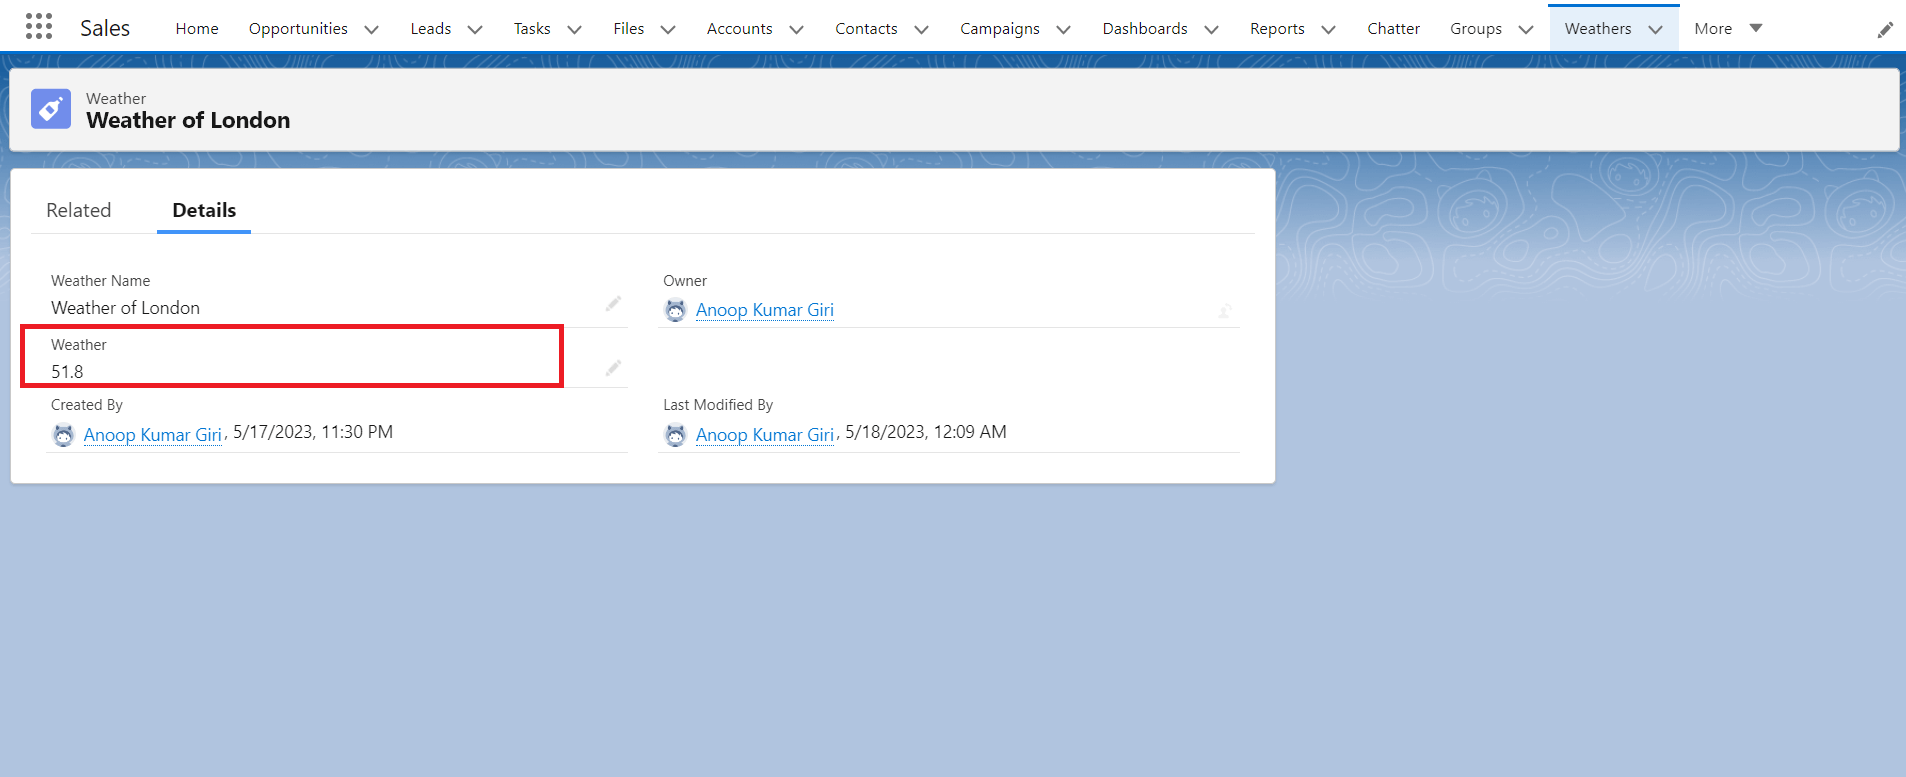
Figure 2: Updated record with data from REST API
Conclusion:
Integrating Salesforce Flows with REST APIs opens up a world of possibilities for extending the capabilities of your Salesforce environment and integrating with external systems. By following the steps outlined in this blog post, you can seamlessly call REST APIs from Flows and harness the power of automation and real-time data synchronization. Leverage this integration to enhance your business processes, provide a better user experience, and streamline data interactions across platforms.
For any queries on calling REST API from Flows, please reach out to support@astreait.com