Lightning Flows is a powerful automation tool that can be used to automate complex business processes without having to write code. Flows let you work smarter, not harder, by saving your time and energy. Flows serve as basic templates and that can be easily modified and extended to enhance the functionality without having to write code.
For example - flows can be used to clone/deep clone records in your org. In this blog, we are going to take a tour to - “How to deep clone records using lightning flow”. In this use case, we are cloning Account records with its related list Contact using “Screen Flow” in this example.
- First query all the fields of Account record using “Get Record element” of flows. Select “Account” for Get Records of This Object, and for condition choose Id equal to recordId. Create a resource variable recordId.
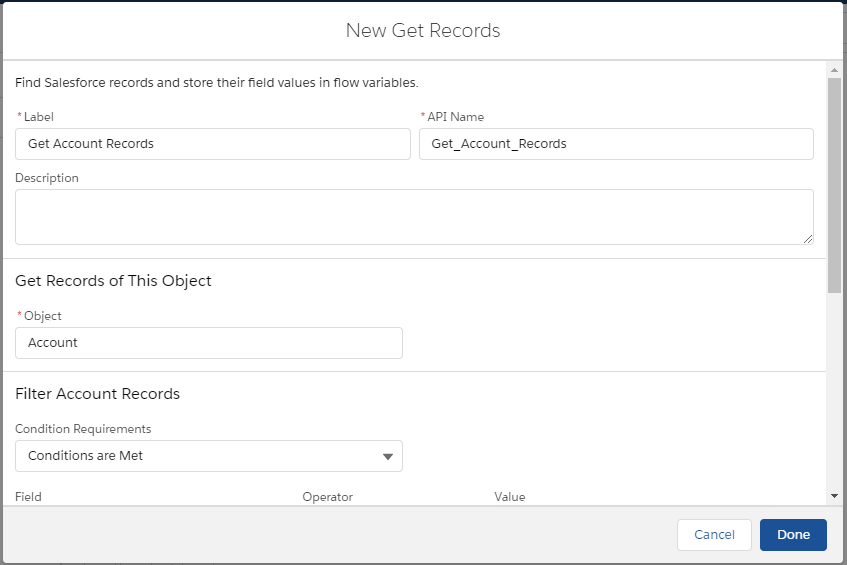
Figure 1: Get Account Records element.
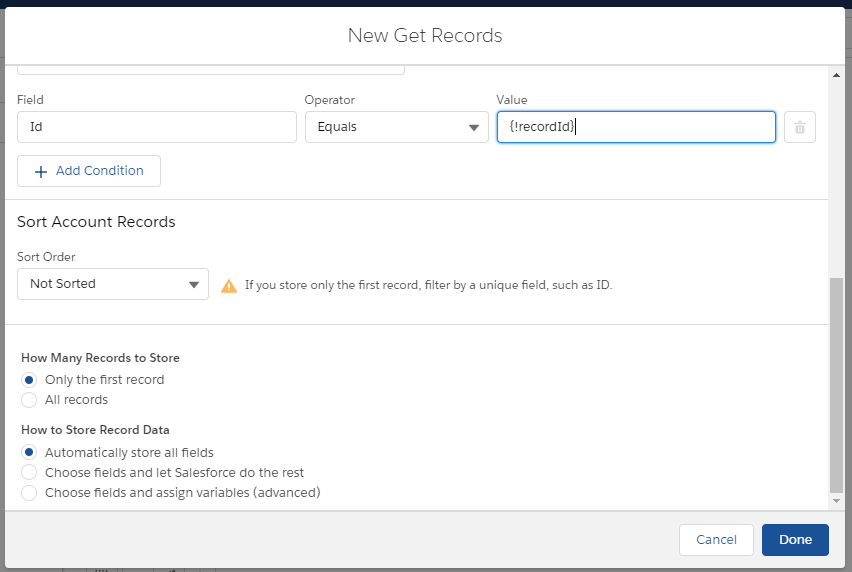
Figure 2: Condition to filter account records in Get Account Records element. - Then, take a screen element to ask the user for a number of clones. And connect the “Get Record” element with this element.
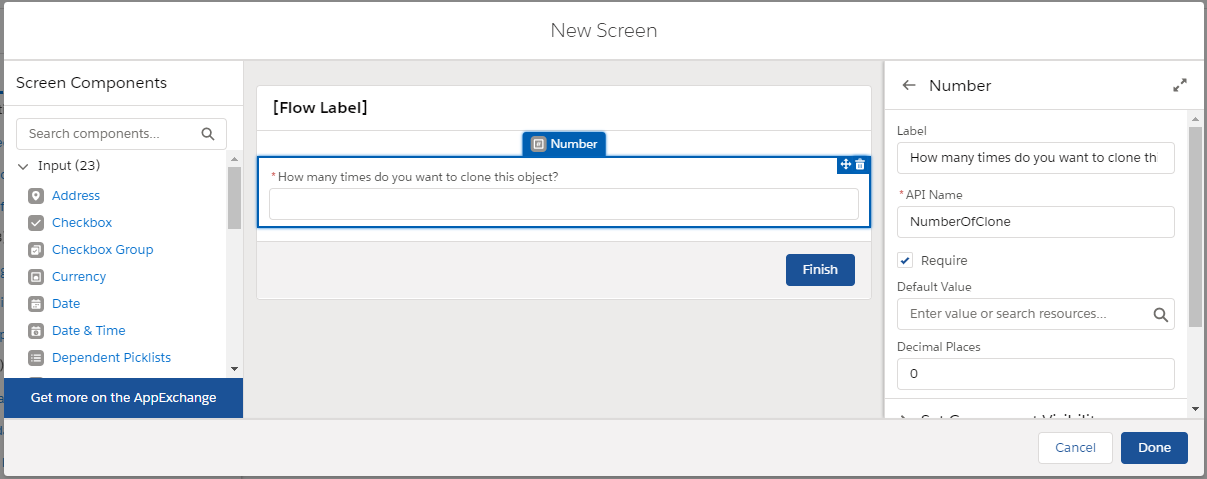
Figure 3: Screen element to take user input for NumberOfClone - Next, take a screen element to set the name of Account records(s). And connect the preceding element with this element.
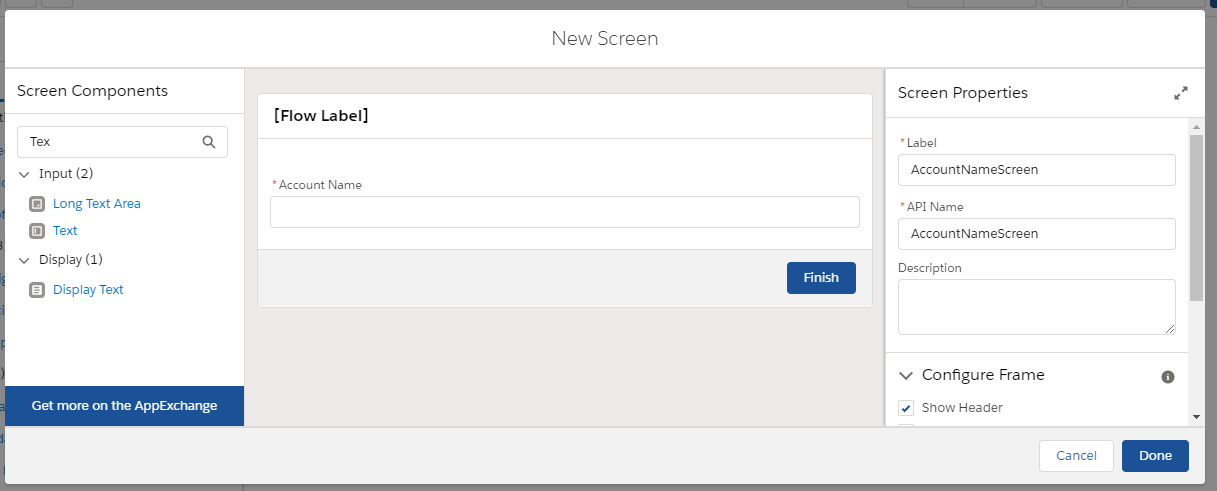
Figure 4: Screen element to take input for name of account clone record(s). - Next, create a resource variable “varNumberOfClone” and assign it to zero using the assignment element. And connect the preceding element with this element.
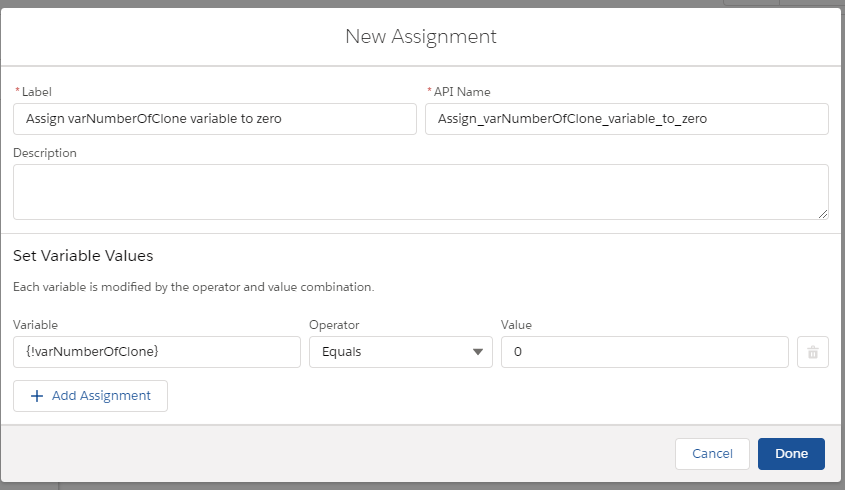
Figure 5: Assignment element to assign varNumberOfClone to zero. - Now, take an assignment element on canvas to increment the “varNumberOfClone” after each iteration and create a resource variable “varAccountCountName” to assign the account name with number count. And connect the preceding element with this element.
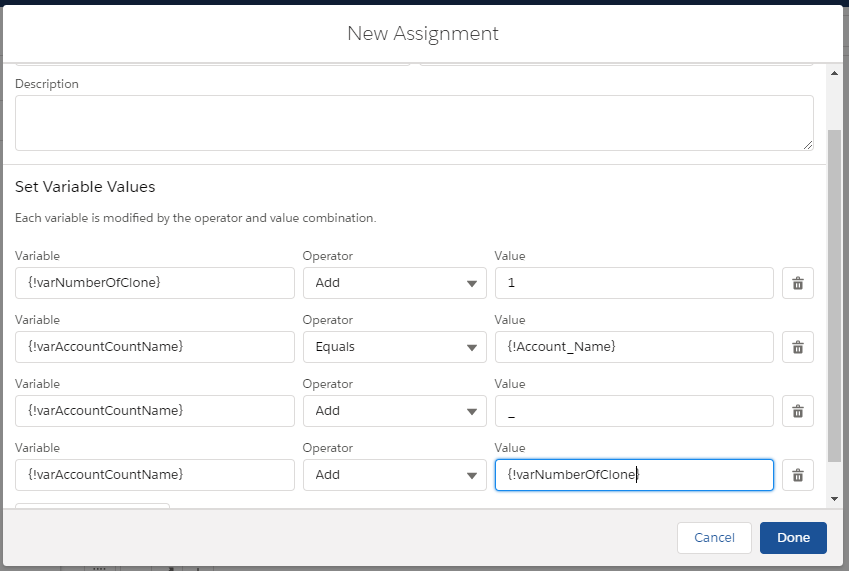
Figure 6: Assignment element to assign varAccountCountName & increment varNumberOfClone. - Now, drag the Create Record element on canvas to create an account clone record & assign values to its fields. Create a resource variable “varNewAccount” to store the Id of the newly created clone record. And connect the preceding element with this element.
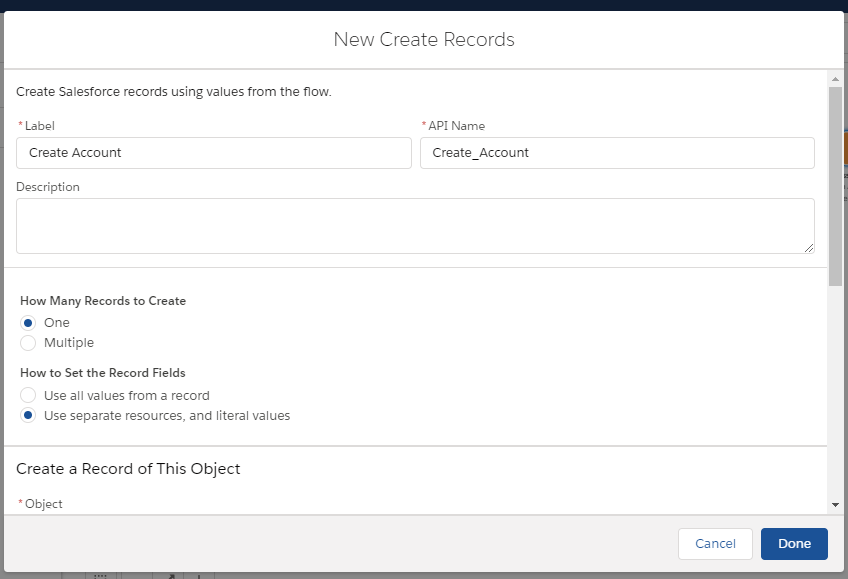
Figure 7: Create Account element to create clones of the account record.
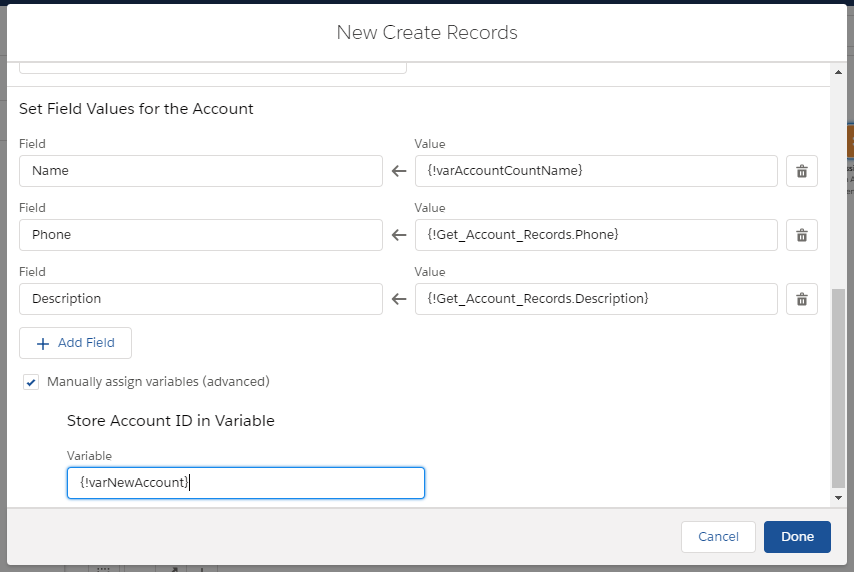
Figure 8:Assign account fields & storing Id in a variable in Create Account element. - Our Account cloning part is completed. Now we are working on its related list – Contact. To do this, first of all query all the Contacts records related to the account using condition “AccountId” equal “recordId”, drag the Get Record element on the canvas and connect the preceding element with this element.
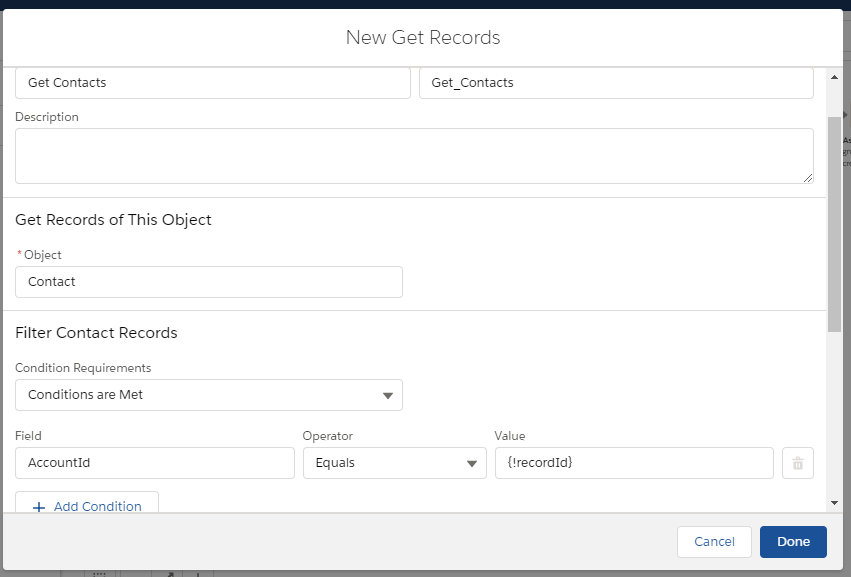
Figure 9: Get Contacts element for query all the related contacts. - After this, drag the Loop element on screen to iterate the “Get Contacts” list and connect the preceding element with this element.
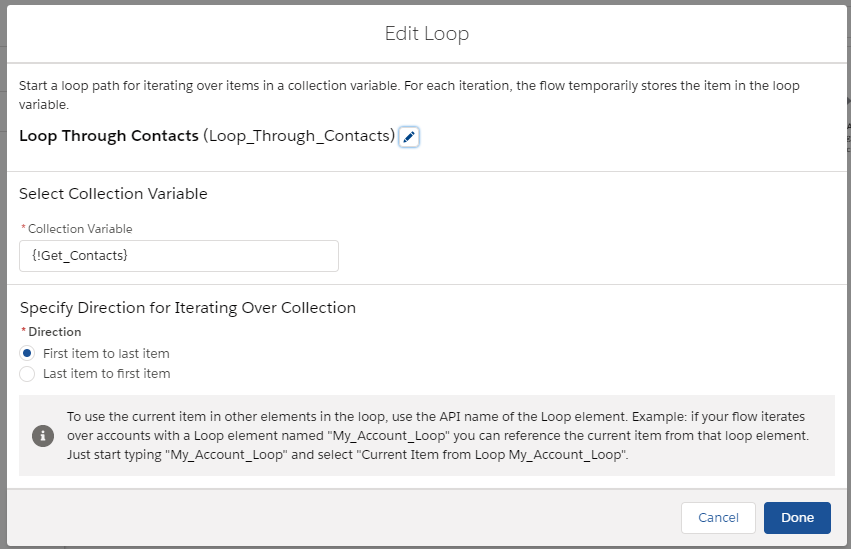
Figure 10:Loop Through Contacts element to iterate Get Contacts collection. - Now, drag the Assignment element on the canvas to assign the Contact fields from the Loop variable. To do that, create a resource variable record type of contact “varConNew” to store the values. Assign its AccountId field with the value of “varNewAccount” to associate the contacts with newly created account clones and connect the preceding element with this element.
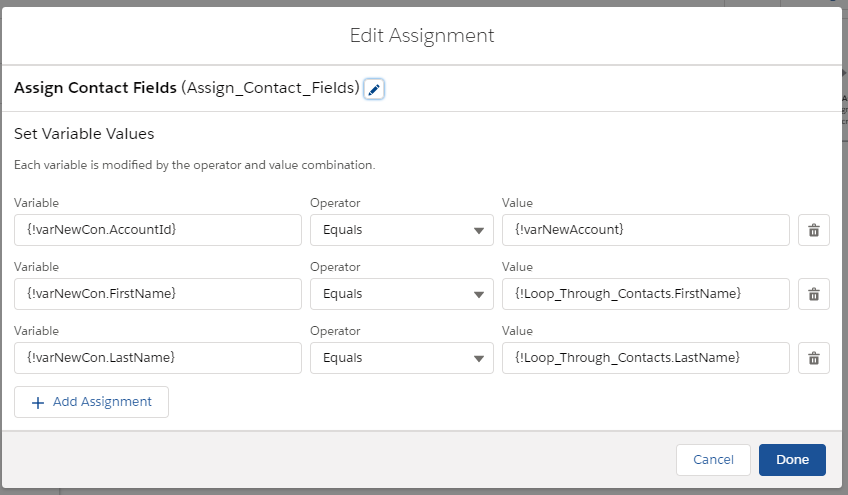
Figure 11:Assign Contact Fields element to assign the contact fields. - Now, drag an Assignment element to canvas to assign the contacts to the contacts record collection. To do that, create a resource variable record type contact “varNewConColl” and allow multiple values and connect the preceding element with this element.
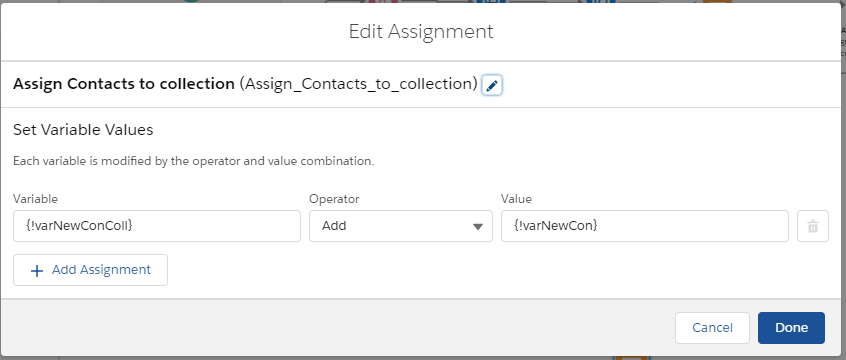
Figure 12:Assign Contacts to collection element to add contact to a collection. - Now, connect the Loop with assignment of contacts to collection. Then, drag the Create Record element on the screen to create multiple contact records and connect the loop after the last item with this create record element.
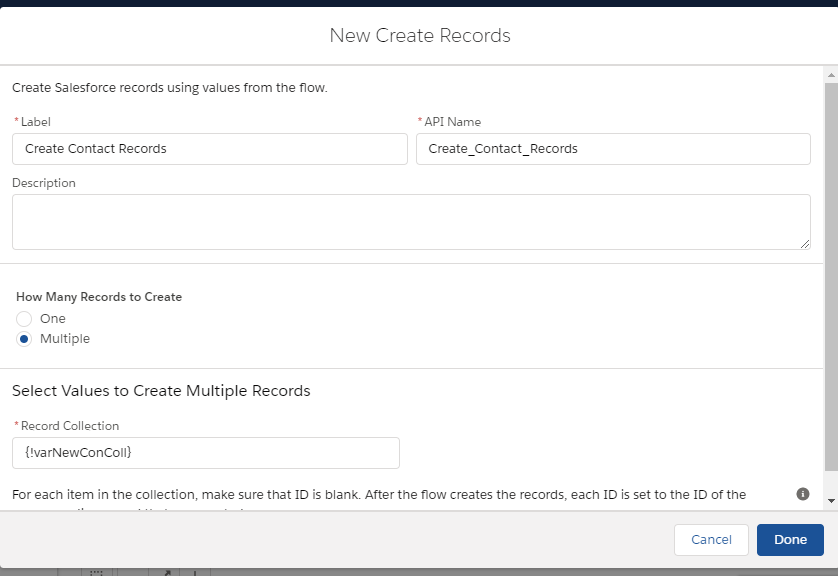
Figure 13:Create Contact Records element to create contact record(s). - After this, drag an assignment element to screen to Empty the Contact collection and connect the preceding element with this element.
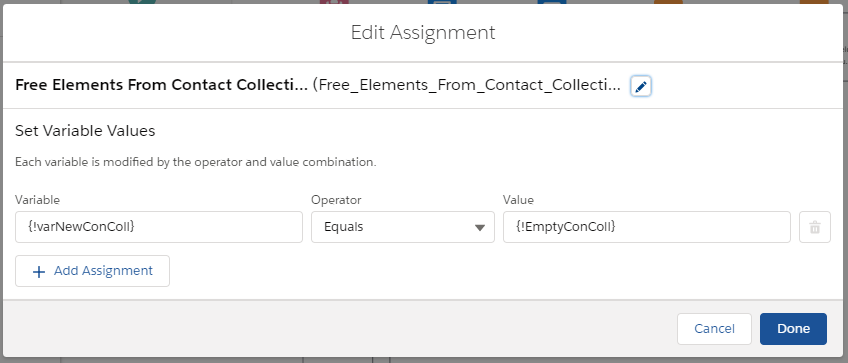
Figure 14:Free Elements From Contact Collection to empty the contact collection. - Then, drag the Decision element to screen to check the number of clones condition.
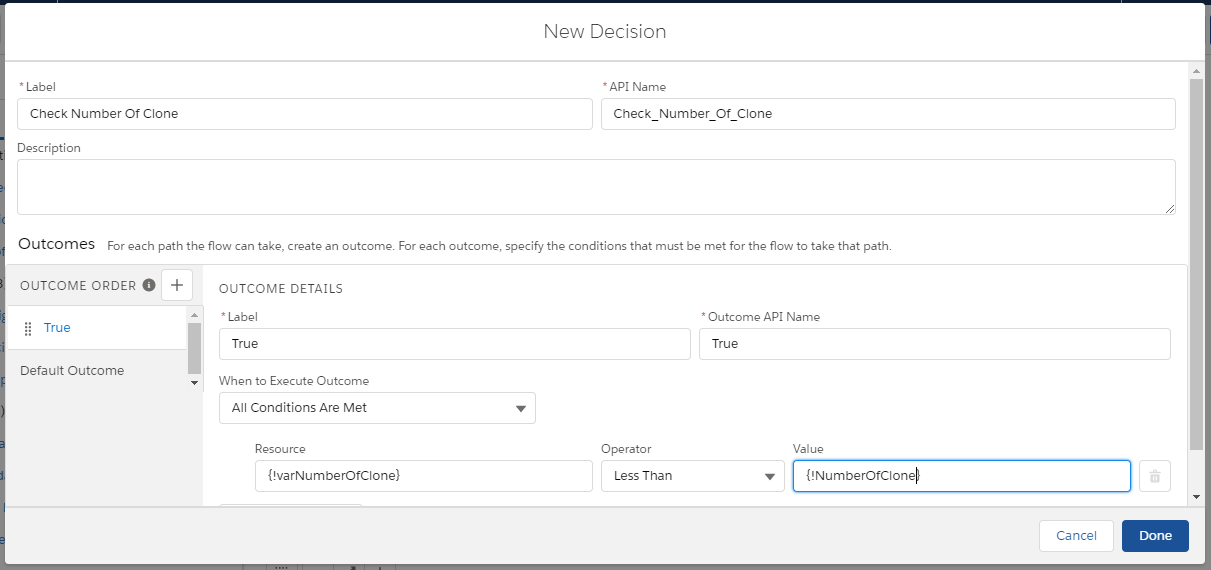
Figure 15:Decision element to Check Number Of Clone condition. - Now connect the Decision element with Assignment element – “Assign Account Field & Increment varNumberOfClone” with True Condition.Then Drag an element Screen as Success Screen and Connect the decision element with it.
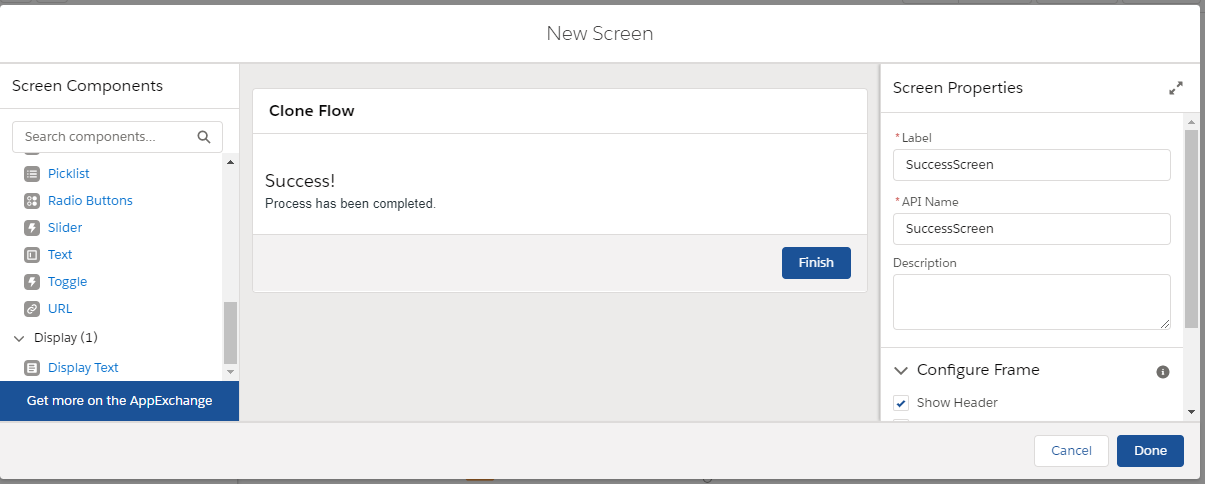
Figure 16:SuccessScreen element to show success message. - Finally the created flow that we created looks like this –

Figure 17:Overall picture of the flow. - Click on the Save button to save the flow.
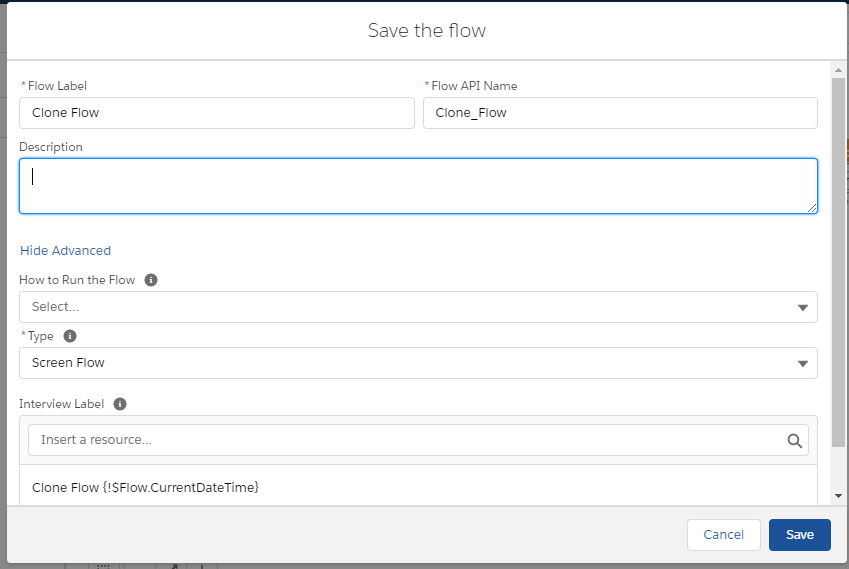
Figure 18:Saving screen of flow. - The flow is ready. Activate the Flow. Create a quick Action “Astrea Clone” on Account record page and call this flow on this quick action.
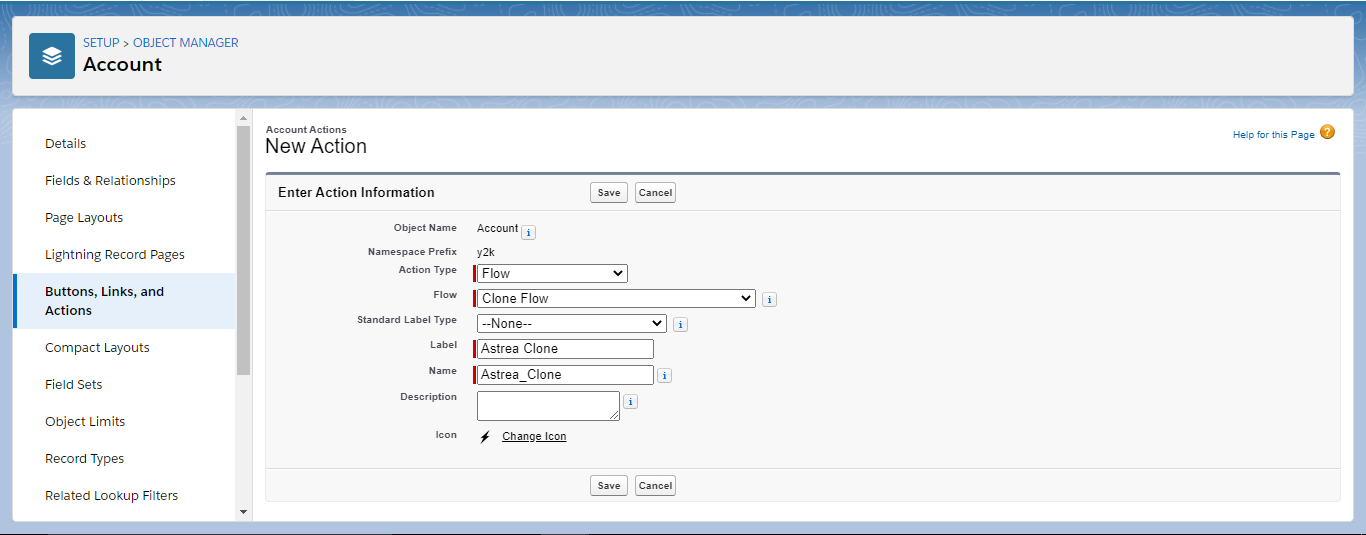
Figure 19:Creating Quick action on Account. - Add the “Astrea Clone” quick action in Account Page Layout.
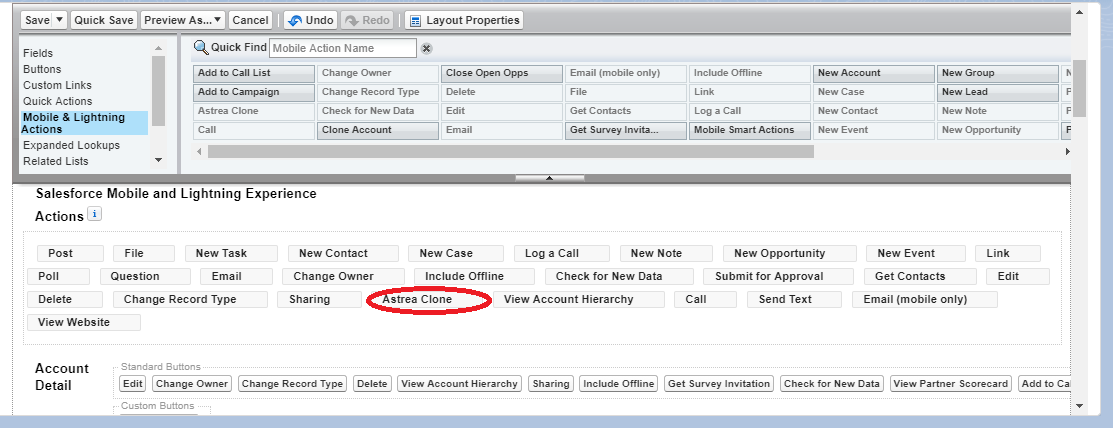
Figure 20:Adding Astrea Clone on account page layout. - Go to the Account record page and call this flow for any record and enter the clones and name and clone it.
- Click on “Astrea Clone” on Account record page.
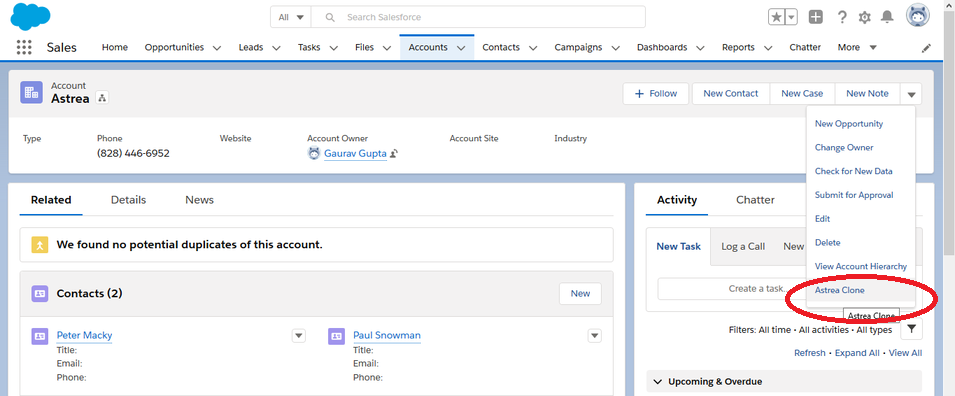
Figure 21:Account record page. - Flow starts, a screen appears and asked user for enter the number of clones.
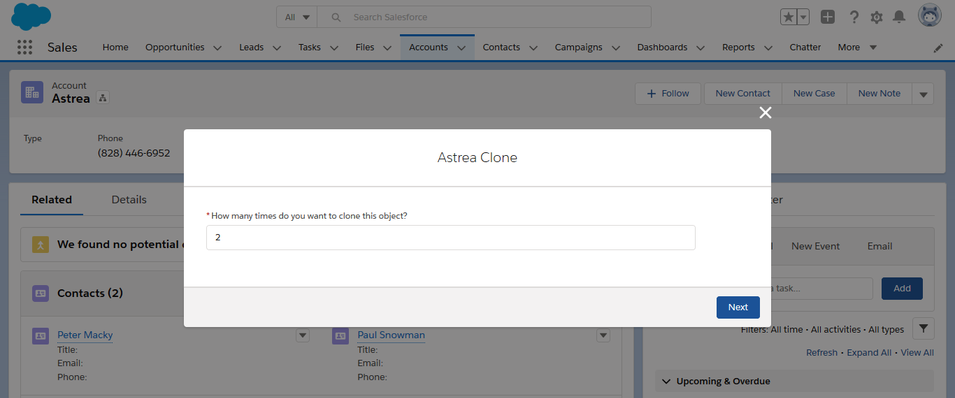
Figure 22:NumberOfClone screen of the flow. - After click on next button a screen appears with default account name, user is asked to set the Account record Name.
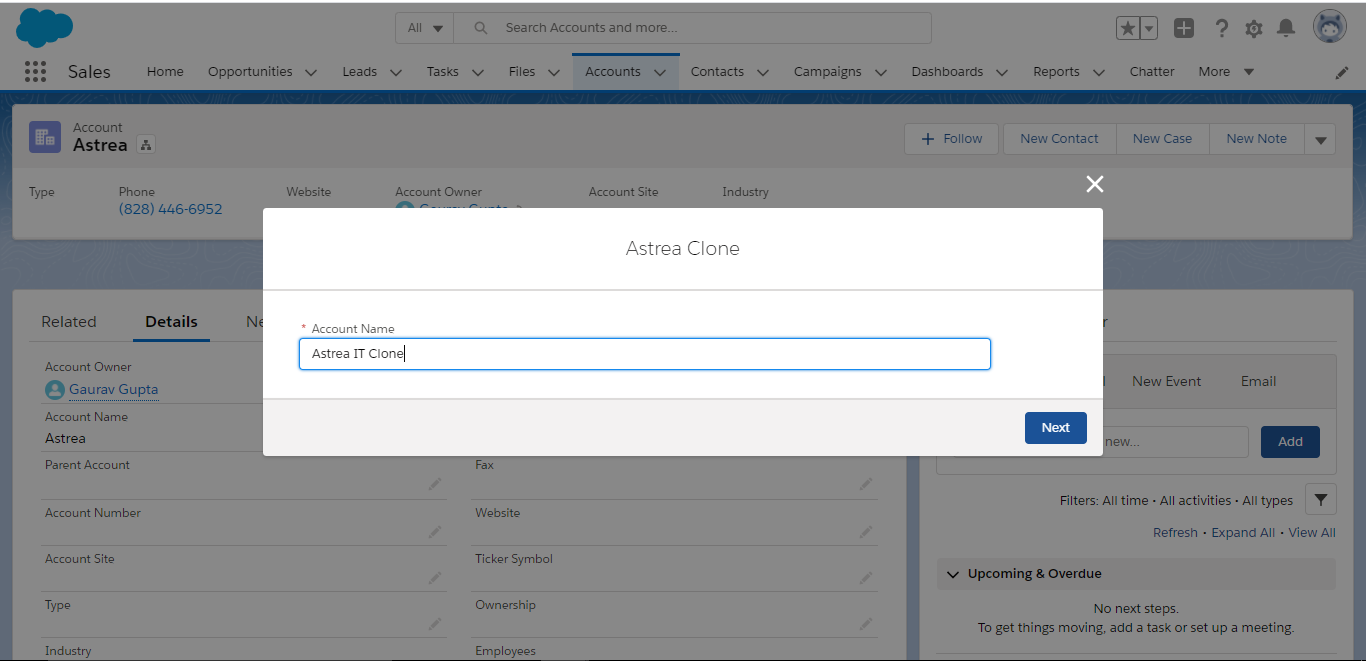
Figure 23:AccountNameScreen of flow. - Finally, the success screen appeared & clones are created.
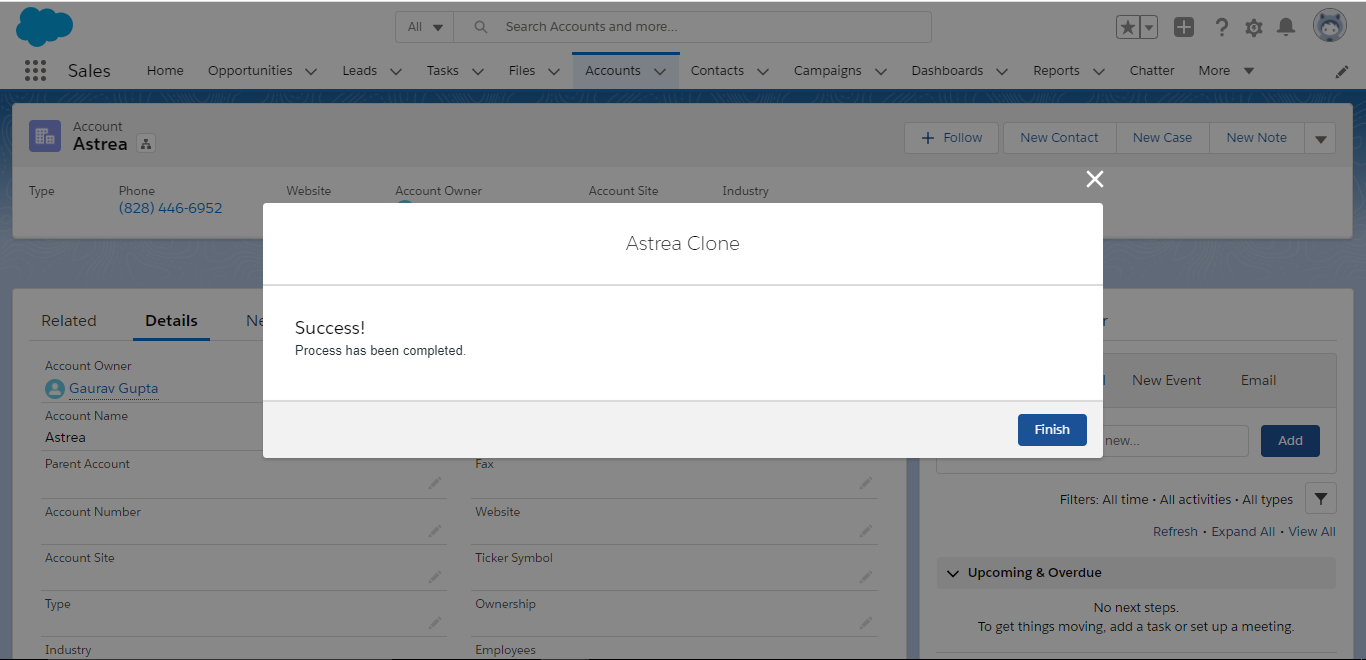
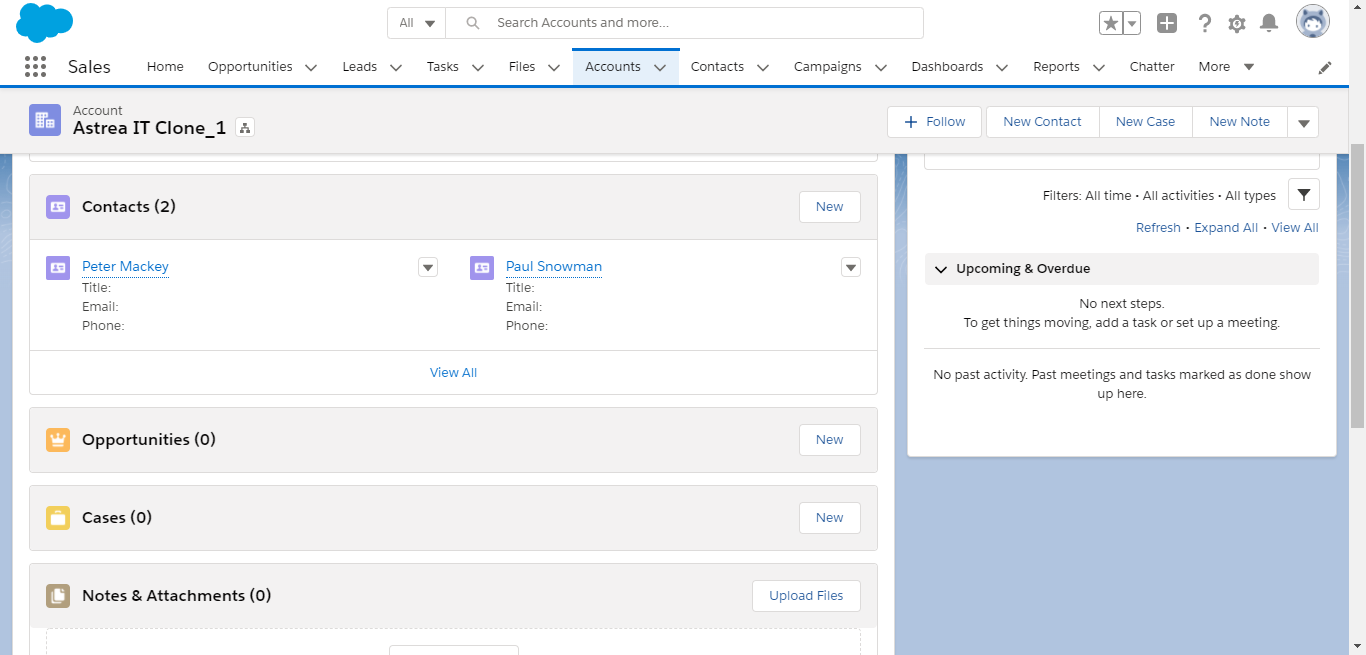
Figure 24:Success Screen of the flow. - The following accounts created with contact related list.
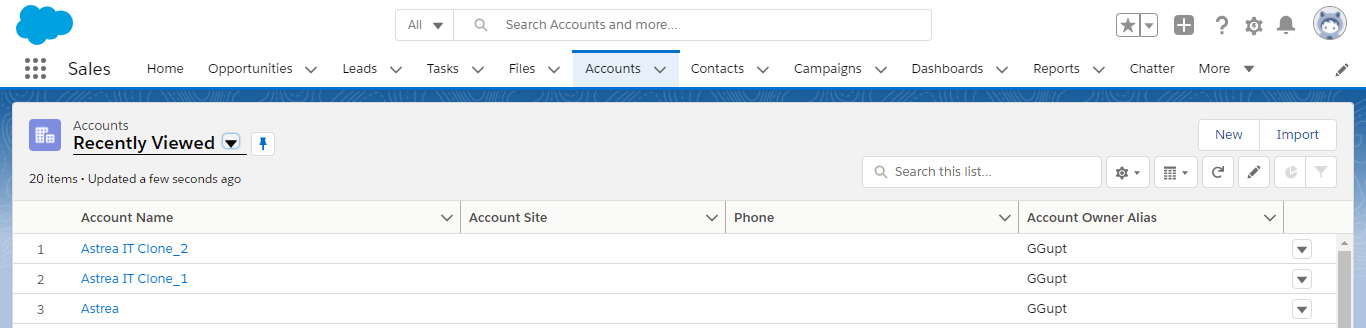
Figure 25:Account List view. br/>
Beyond functional automation, Lightning Flows also play a critical role in optimizing execution time and system performance. When implementing complex solutions, it becomes important to manage flow execution efficiently to avoid performance bottlenecks. Proper use of limits, loop controls, and bulk-safe patterns ensures scalable automation.
CONCLUSION
We just saw how we can solve complex business problems using lightning flows. We can do much more than just cloning and deep cloning.
Astrea offers an app called Ambea that performs Deep Clone, built using Flows. The app deep clones Accounts along with its Contacts and Opportunities. It can be modified and extended to meet your business requirements. Go ahead and check out the app on AppExchange - Ambea
Deep cloning of Accounts, Contacts, and Opportunities is a common requirement in Sales Cloud implementations, especially for sales operations, account replication, and testing scenarios. Salesforce Flow enables these Sales Cloud automations without custom code, empowering admins and consultants to build scalable solutions efficiently. To explore more Sales Cloud capabilities, best practices, and automation strategies, visit the Sales Cloud page.
-
References:
- Lightning Flow
- Flows
For any query on Deep Cloning, contact support@astreait.com