If you’ve ever wanted to turn your Airtable data into a beautiful website or app without coding, you’re in the right place! Softr is a no-code platform that pairs perfectly with Airtable, letting you create everything from blogs to client portals in minutes. In this guide, I’ll walk you through how to integrate Airtable with Softr.
Why Use Airtable with Softr?
Airtable is like a spreadsheet on steroids. It's flexible, easy to use, and great for organizing data. Softr takes that data and turns it into a sleek, functional web app. Together, they’re like a dream team for anyone who wants to build something awesome without needing to be a tech wizard.
Here’s how to connect them step-by-step.
Step 1: Set Up Your Airtable Base
First things first, you need an Airtable account and a "base" (that’s what Airtable calls a project or database). If you don’t have one yet, head to airtable.com, sign up, and create a new base. Add some data like a list of blog posts, customers, or tasks. For example, you could have columns like "Title," "Description," and "Image."
Once your base is ready, you’re good to move on.
Step 2: Sign Up for Softr
Next, go to softr.io and create an account if you haven’t already. It’s free to start, and the interface is super user-friendly. Once you’re in, you’ll see options to start a new app, either from a template or from scratch. For this guide, let’s start with a blank app so you can see the full process.
Step 3: Connect Airtable to Softr
Here’s where the magic happens:
- Open Your Softr Dashboard: After logging in, look for the "Data Sources" section (on the left sidebar).
- Add Airtable: Click "Connect Data Source," then choose "Airtable."
- Authorize Access: Softr will ask for permission to access your Airtable account. Log in to Airtable when redirected, and select which bases you want Softr to use. For simplicity, pick "All current and future bases" so you won’t need to reconnect later.
-
Confirm: Hit "Authorize" and now your Airtable data is now linked to Softr!
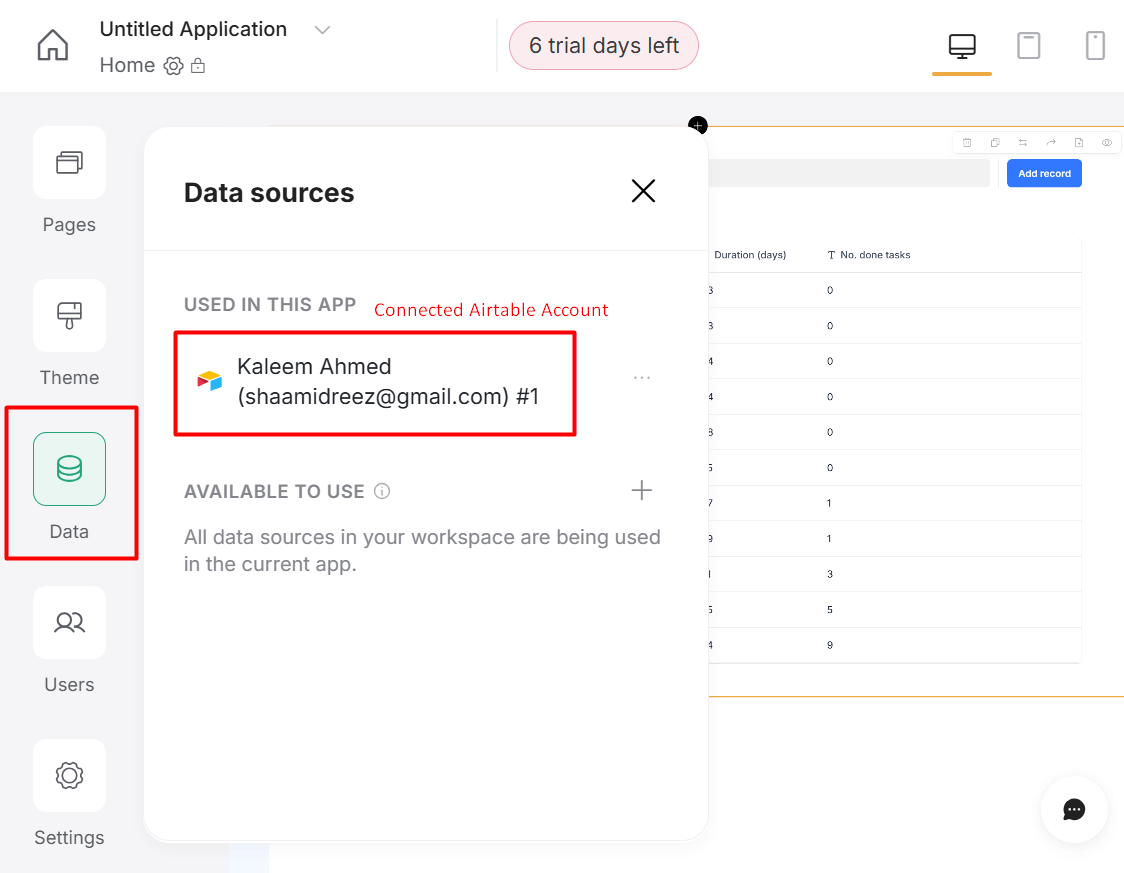
It should look something like this if yes move to next step
Step 4: Build Your App
Now that Airtable is connected, let’s display your data:
-
Add a Block: In your Softr app, click the "+" button to add a new block (think of blocks as building pieces like lists or forms).

- Choose a Layout: Pick something like a "List" block to show your Airtable data in a clean, organized way.
-
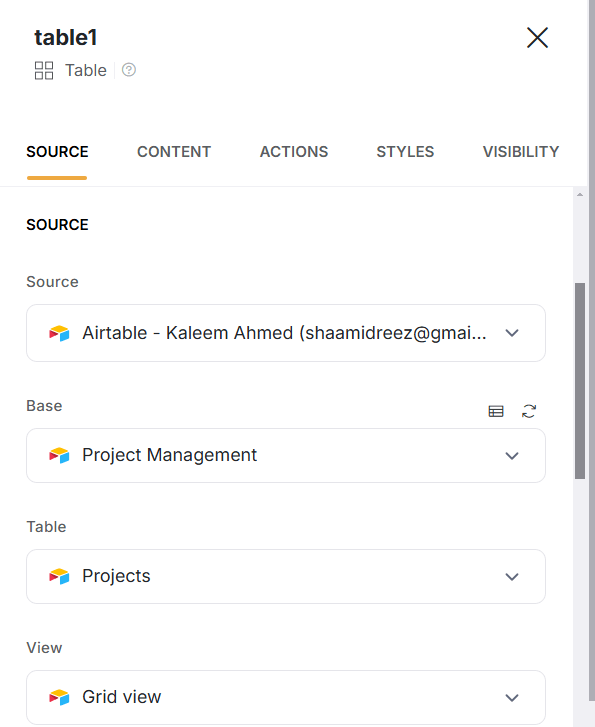
Link Your Data: In the block settings, go to "Data Source," select your Airtable base, and choose the table you want to display (e.g., "Blog Posts").
-
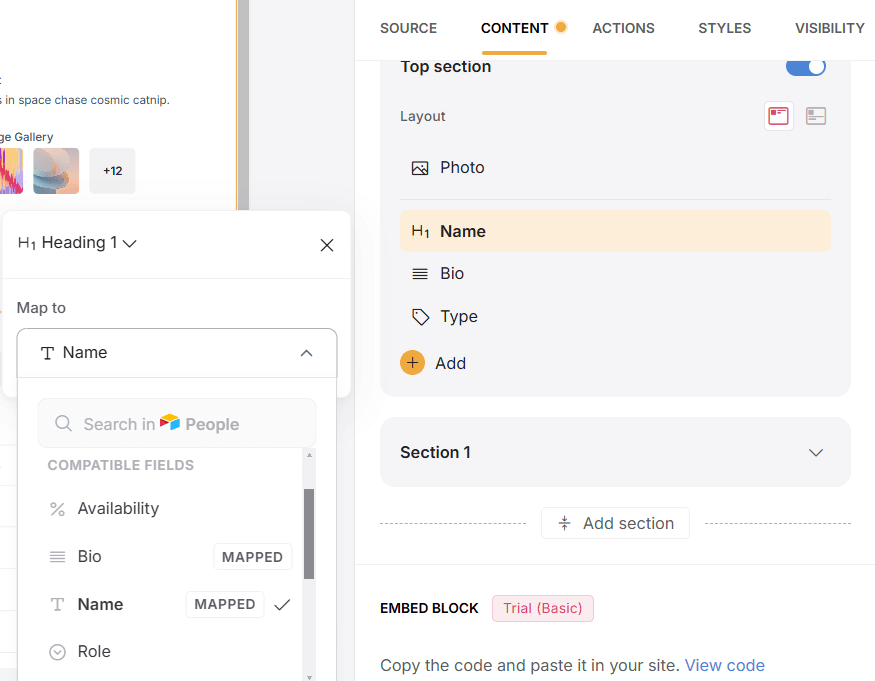
Map Fields: Match your Airtable columns (like "Title" or "Image") to fields in Softr. For example, link an "Image" column to an image field so pictures show up nicely.
You’ll see your data pop up in the app instantly, no coding required!
Step 5: Customize and Publish
Softr lets you tweak your app to make it your own:
- Change colors, fonts, or layouts in the "Style" settings.
- Add more blocks like a "List Details" block to show full blog posts when someone clicks an item.
- When you’re happy, hit "Publish" to get a live URL. Share it with others.
Some Tips for Success
- Use Views: In Airtable, create a "View" with filters (e.g., "Published Posts Only") and connect it to Softr to show just the data you want.
- Rich Text: For blog content, turn on "Rich Text Formatting" in Airtable’s long text fields to add bold, italics, or bullet points.
- Test It Out: Preview your app as you go to see how it looks on desktop and mobile.
Wrap-Up
Integrating Airtable with Softr is like giving your data superpowers. In just a few steps, you can go from a spreadsheet to a fully functional web app with no tech skills needed. So grab your Airtable base, hop into Softr, and start building something amazing today. Have any questions?
For additional questions on Experience please reach out to support@astreait.com