Introduction:
In today's interconnected world, businesses are expanding their reach to international markets like never before. To cater to a diverse global audience, it is crucial for companies to adopt an internationalization strategy for their Salesforce applications. Internationalization, often abbreviated as i18n, is the process of designing and developing software in a way that enables easy adaptation to different languages, regions, and cultures. Salesforce provides various tools to support internationalization, and one of the key components is Custom Labels. In this blog post, we'll explore how to use Custom Labels to achieve internationalization in your Salesforce org and effectively communicate with a global audience.
Understanding Custom Labels:
Custom Labels in Salesforce are custom text values that can be translated into multiple languages. They act as placeholders for static text or messages in your Salesforce application, such as field labels, error messages, help text, and more. By utilizing Custom Labels, you can separate text from the code, making it easier to manage and translate your application into various languages without the need for any code changes.
Step-by-Step Guide to Internationalization using Custom Labels:
Step 1: Enable Translation Workbench:
The first step is to enable the Translation Workbench in your Salesforce org. To do this, navigate to Setup > Translation Workbench > Translation Settings and enable the feature. You'll also need to select the languages you want to support in your application.
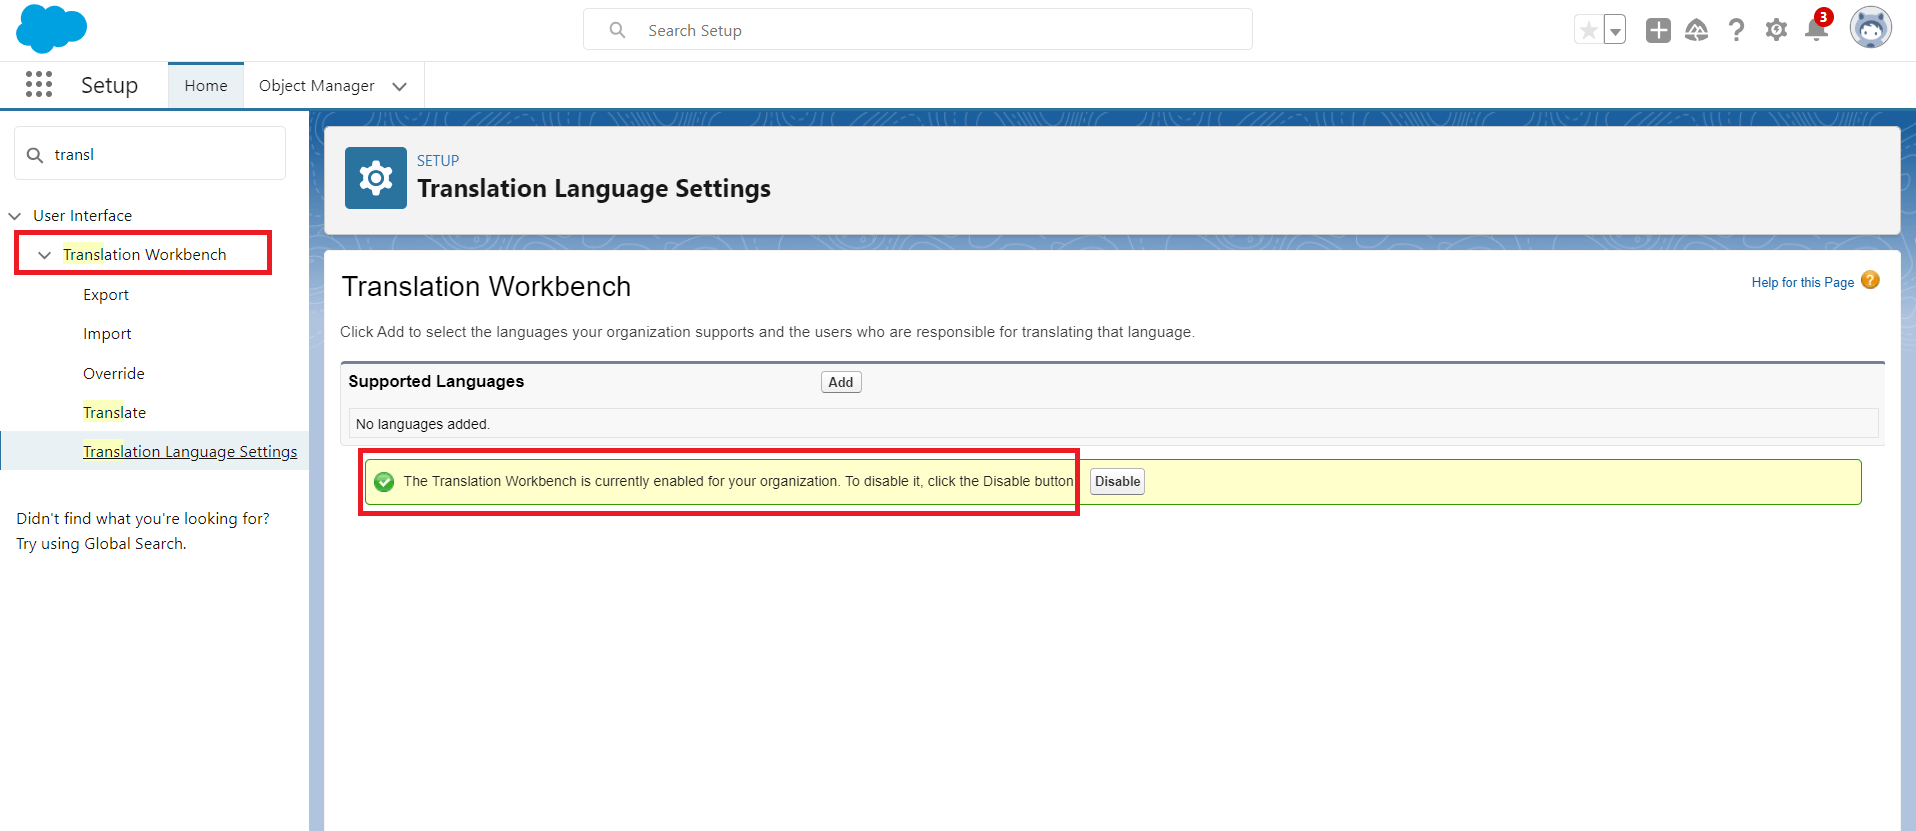
Figure 1: Enable Translation Workbench
Step 2: Create Custom Labels:
Now that the Translation Workbench is enabled, it's time to create Custom Labels. To create a Custom Label, go to Setup > Custom Labels > New Custom Label. Give your label a name and provide the default text in the source language (usually English). This default text will be used when a translation for a specific language is not available.
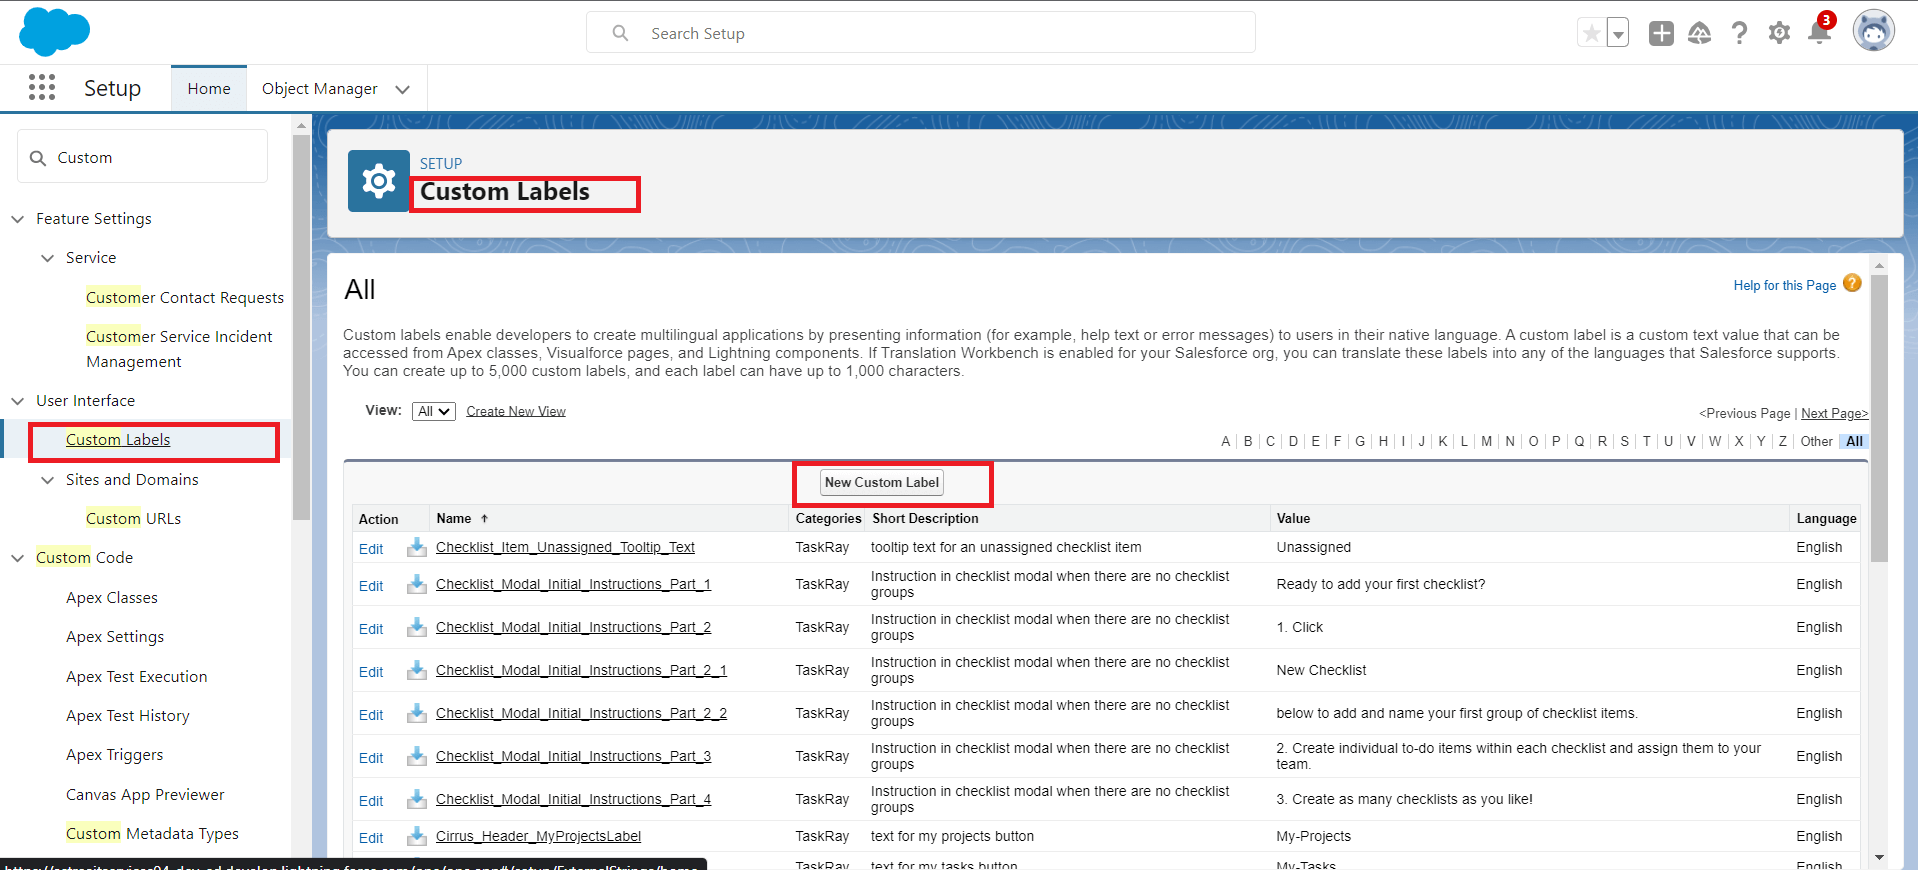
Figure 2: Create Custom Labels as per requirements.
Step 3: Add Translations:
After creating the Custom Label, you can start adding translations for different languages. To do this, go to Setup > Translation Workbench > Translate, and select the language you want to translate into. Then, search for your Custom Label and provide the translated text for that language. Salesforce will automatically associate the translation with the corresponding Custom Label, based on the label's name.
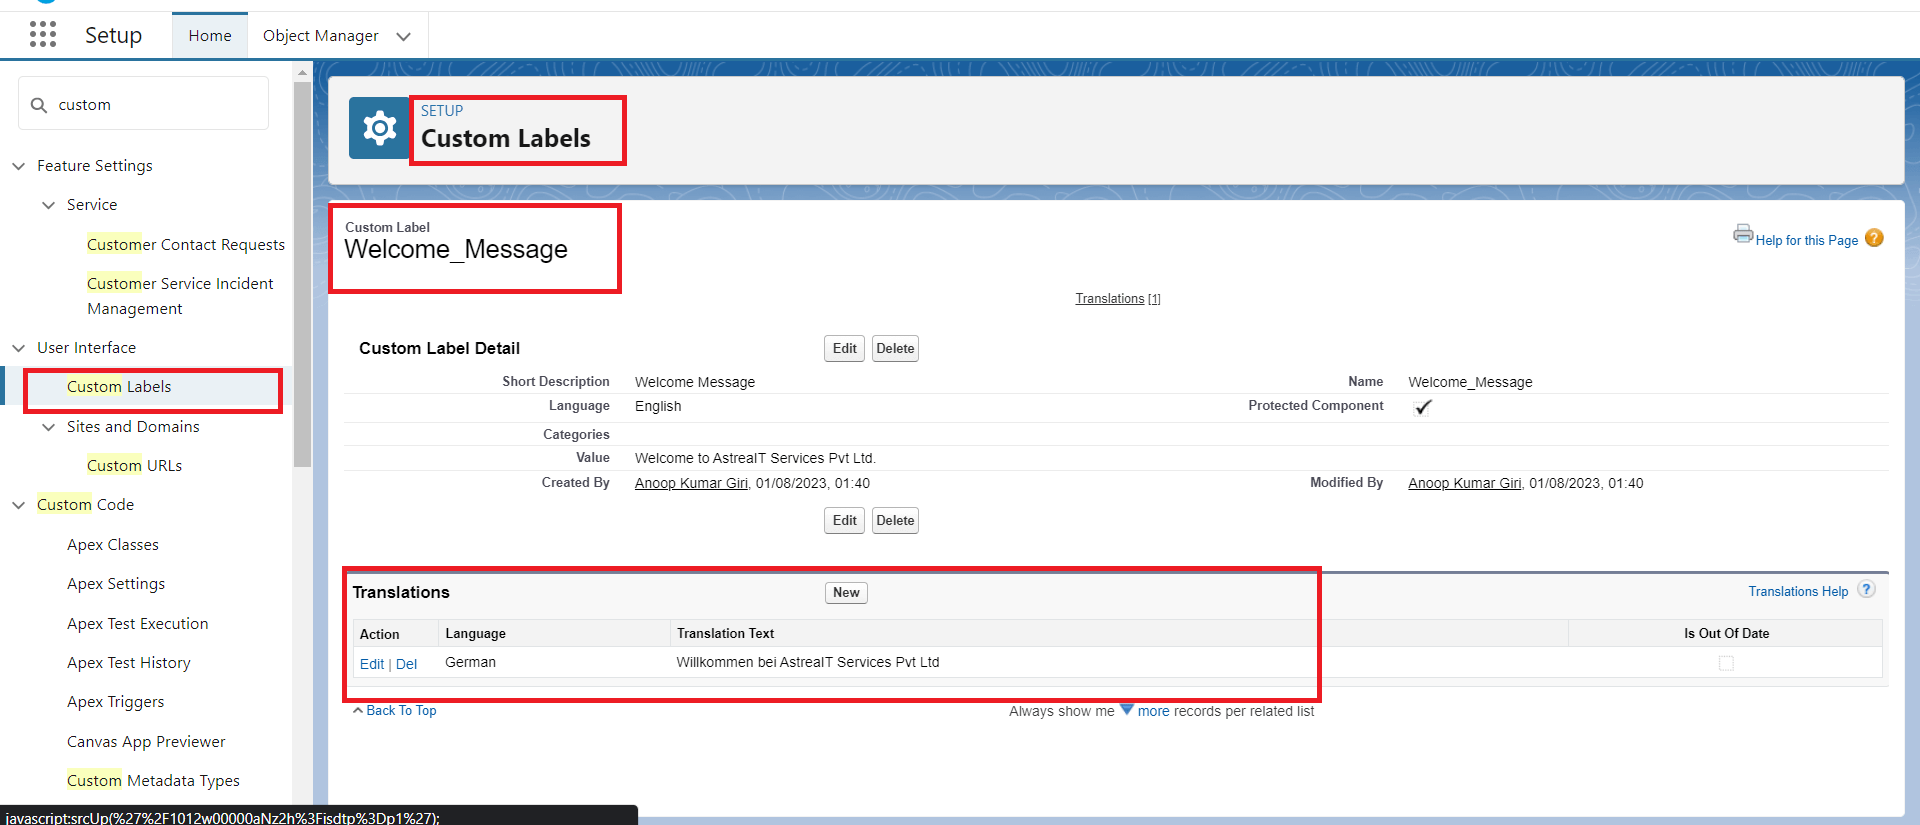
Figure 3: Adding Translation to the Custom Labels and select Language as per required translation
Step 4: Implement Custom Labels in Your Code:
Now that you have created and translated your Custom Labels, it's time to implement them in your Salesforce code. Instead of hardcoding text values directly into your Apex classes, Visualforce pages, or Lightning components, you'll reference the Custom Labels using their unique names.
For example, suppose you have a Visualforce page that displays Account List View and has Account Name as column. Instead of writing the label directly in the Visualforce page like this:
```html

This change allows Salesforce to automatically fetch the appropriate translation for the user's language based on their locale settings.
Step 5: Test Your Application:
After implementing Custom Labels, it's essential to thoroughly test your application in different languages and locales to ensure that the translations are accurate and appropriately displayed. Testing will help you identify any issues and make any necessary adjustments.
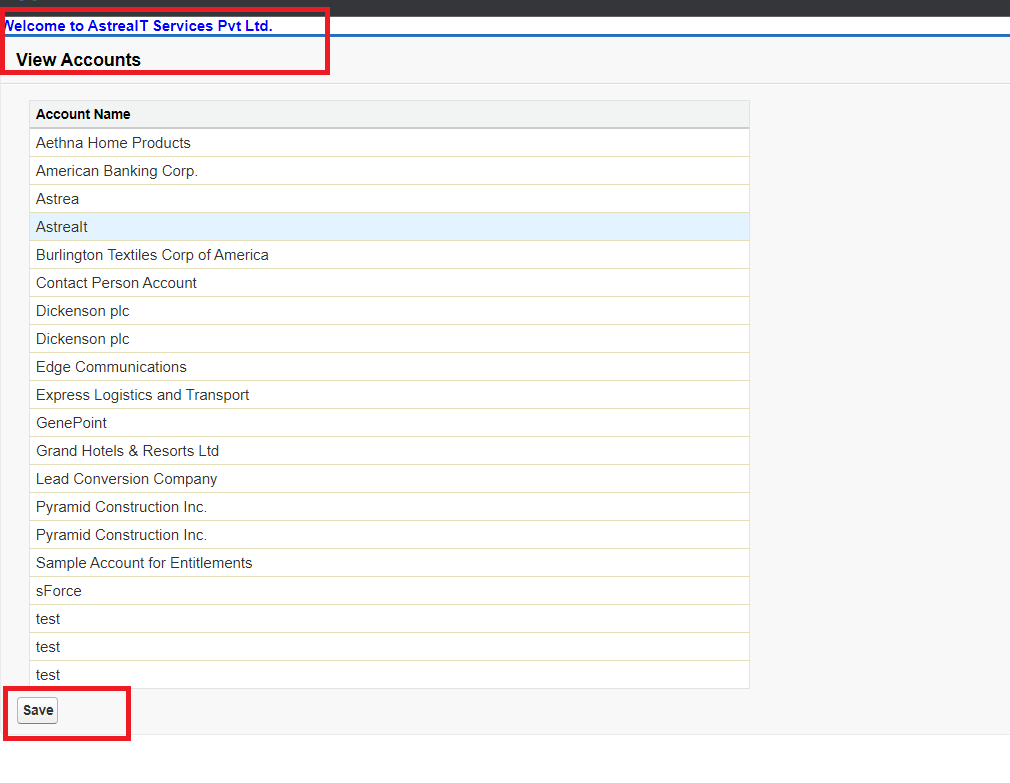
Figure 4: VisualForce Page Display Account List View In English when language is selected in English.
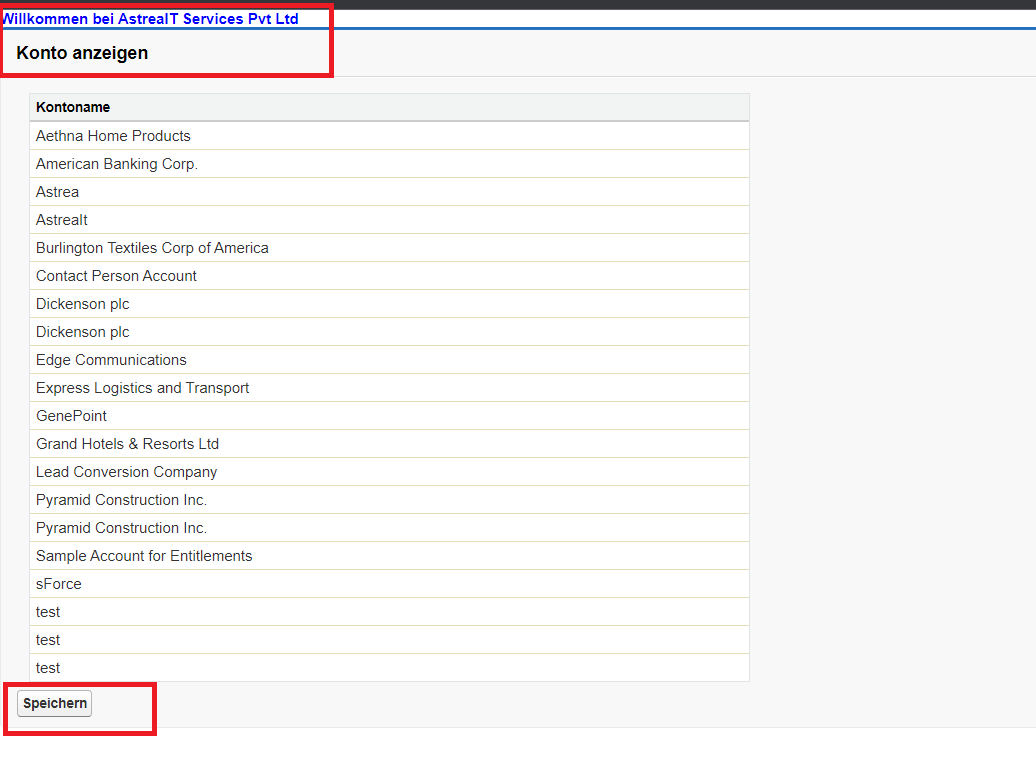
Figure 5: VisualForce Page Display Account List View In German when language is selected in German.
Benefits of Internationalization using Custom Labels:
1. Efficiency: Custom Labels enable easy management and maintenance of translations, reducing the need for code changes and making updates more efficient.
2. Consistency: By centralizing your text in Custom Labels, you ensure consistency across your application and reduce the risk of errors due to inconsistent translations.
3. Scalability: Custom Labels allow your application to scale easily to support new languages as your business expands to new markets.
4. User Experience: Providing a localized user experience builds trust with international customers, as it demonstrates your commitment to their language and cultural preferences.
5. Compliance: In some regions, there may be legal requirements to provide applications in the local language. Custom Labels help you meet these compliance requirements.
Conclusion:
In conclusion, Internationalization using Custom Labels is a powerful tool in Salesforce that allows businesses to tailor their applications for global audiences without the need for extensive code changes. By following the steps outlined in this guide, you can make your Salesforce application accessible and appealing to users around the world, fostering a positive user experience and supporting your international growth endeavors.
For any queries on this functionality, please reach out to support@astreait.com.