Business Need:
In the realm of community engagement, effective communication is paramount. For organizations leveraging Salesforce Communities, keeping community users informed and engaged is a key business requirement. Imagine a scenario where a community manager wants to notify users about important updates, personalized messages, or relevant information. This is where the need for sending custom notifications to community users arises.
Whether it's announcing new features, sharing exclusive content, or simply providing personalized updates, custom notifications play a crucial role in enhancing user experience and fostering a sense of belonging within the community.
Implementation:
To address this business need, Salesforce provides a powerful combination of Flow Builder, empowering administrators and developers to automate the process of sending custom notifications to community users.
Step 1: Creating a Custom Notification Type.
- In Salesforce, go to Setup.
- Enter "Flow" in the Quick Find box and select "Custom Notification Type."
-Create new Custom Notification Type.
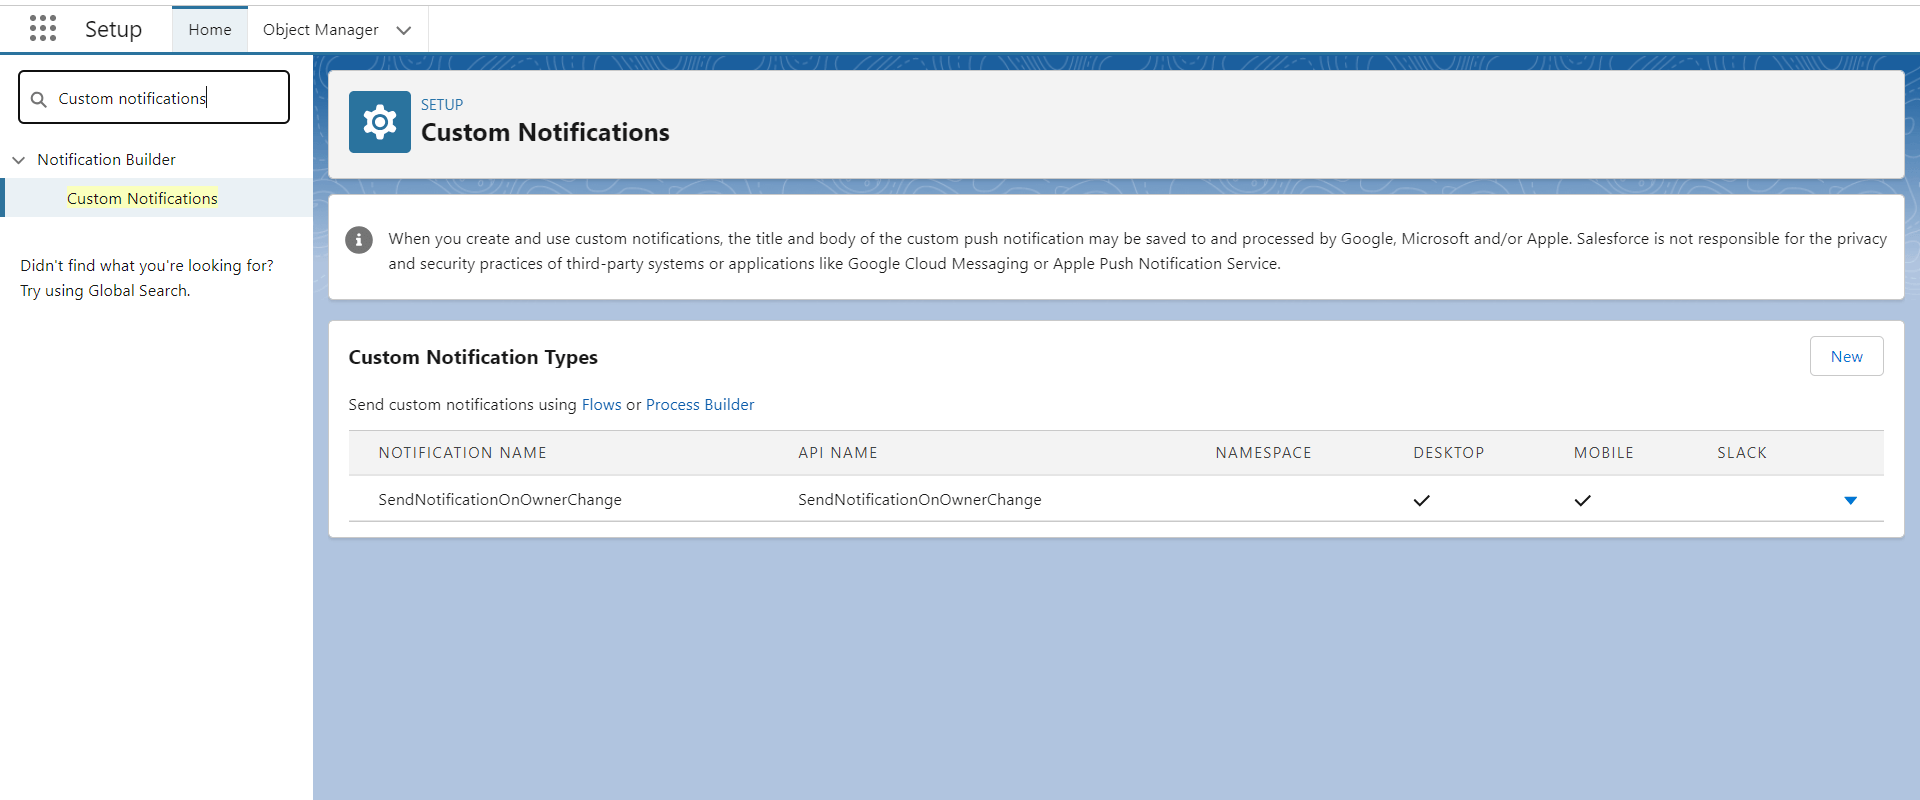
Figure 1: Creating Custom Notification Type to send Notification.
Step 2: Creating a Flow
1. Navigate to Flow Builder:
- In Salesforce, go to Setup.
- Enter "Flow" in the Quick Find box and select "Flow Builder."
2. Create a New Flow:
- Click on the "New Flow" button.
- Choose the appropriate flow type based on your use case.
3.Select Triggering Conditions and Objects.
-Select the Object and set the entry Condition to trigger the flow.
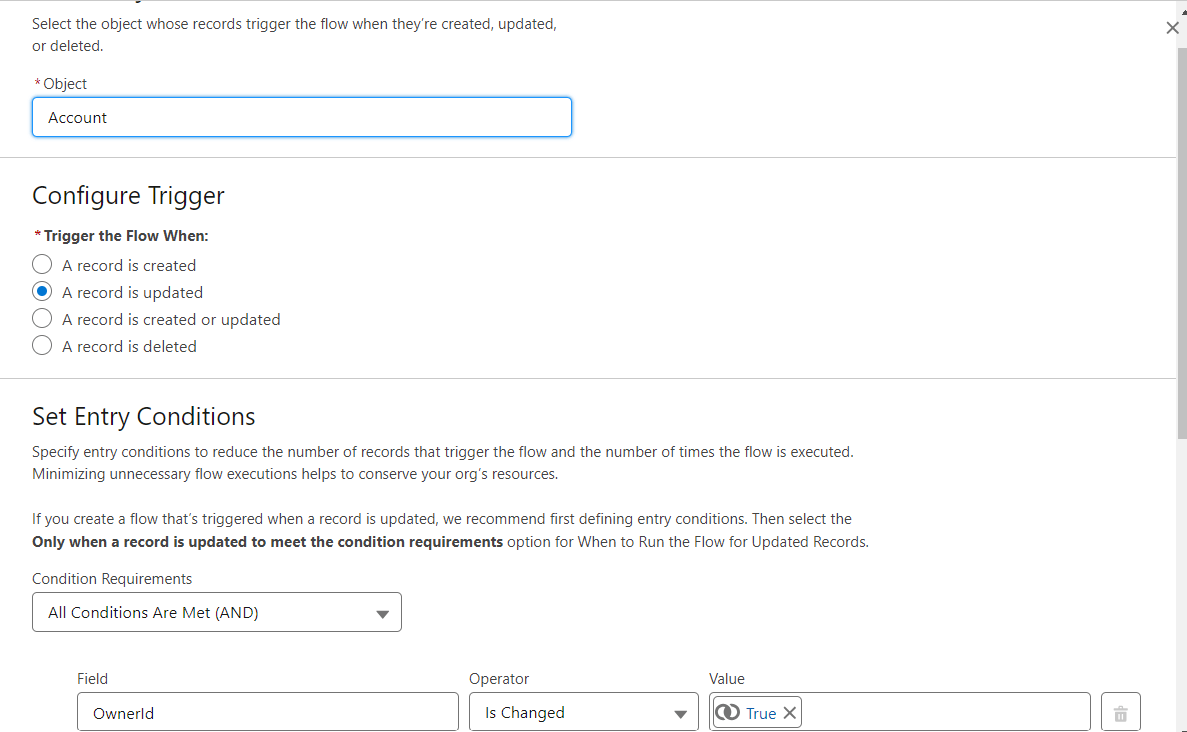
Figure 2: Select Object and Entry Condition to trigger the Flow.
4.Get Notification Type.
-Select the Get record Element to get the record of the user to send notification.
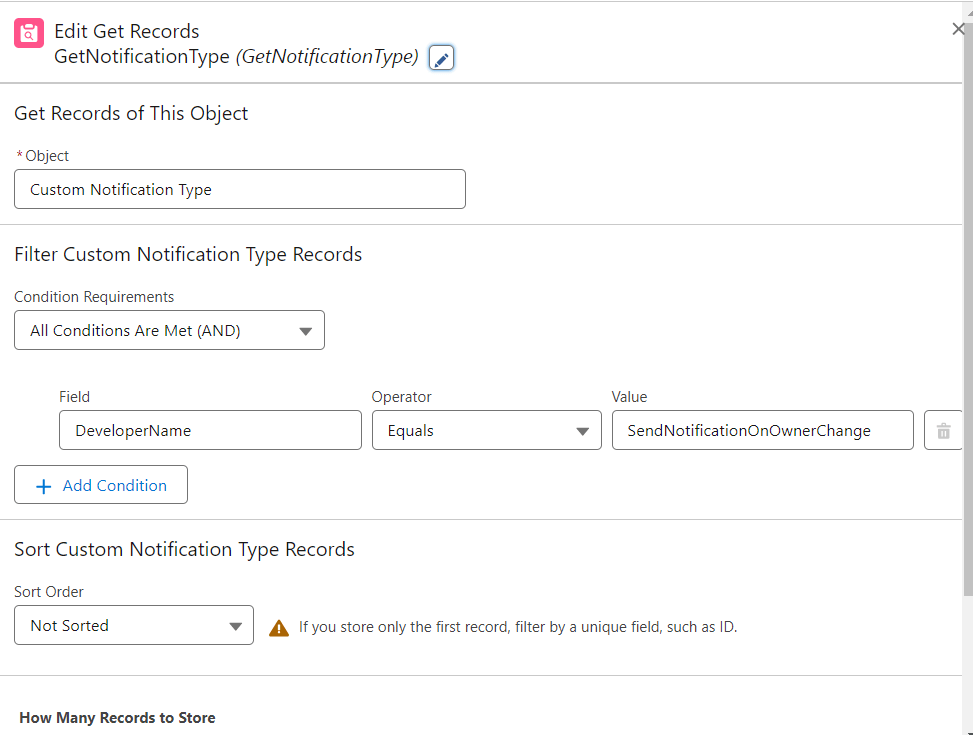
Figure 3: Use Get record elements to find users to send notifications.
5. Add CollectRecipientsIds
Collect recipients Id and Add to Custom Notification Type Variable.
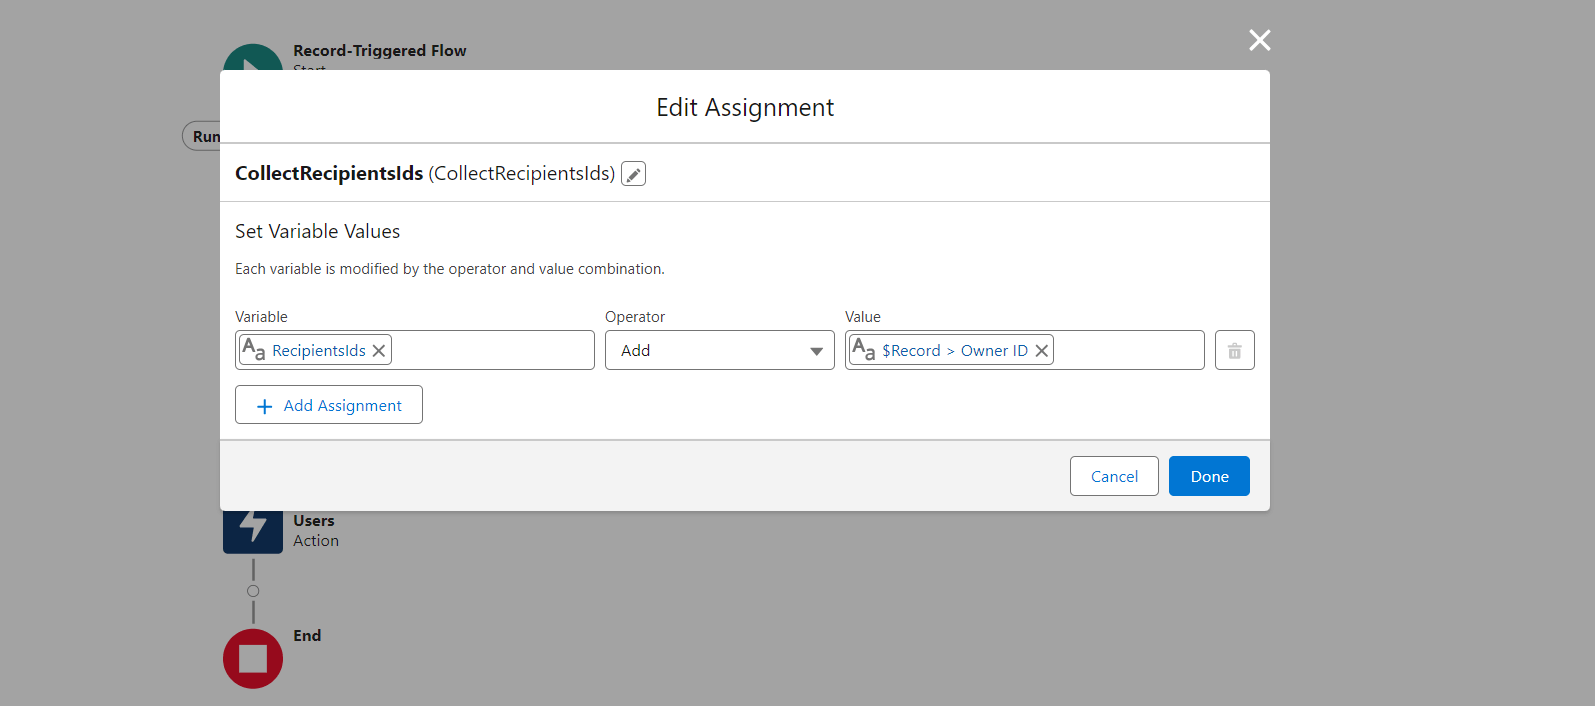
Figure 4: Add id of user on Custom notification type record to send notification.
6. Send Notification action
Select Action Element and and use Send custom Notification Element.
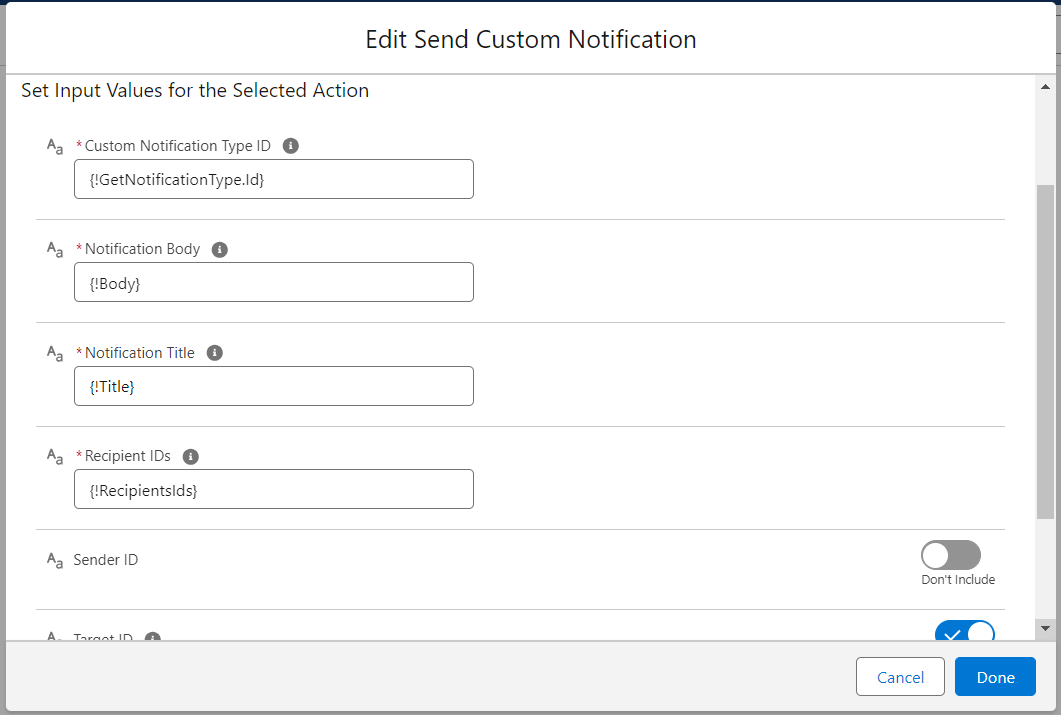
Figure 5: Select Action Element and use Send custom Notification Element to send notification to the community user.
7. Final flow
Final flow looks like this.
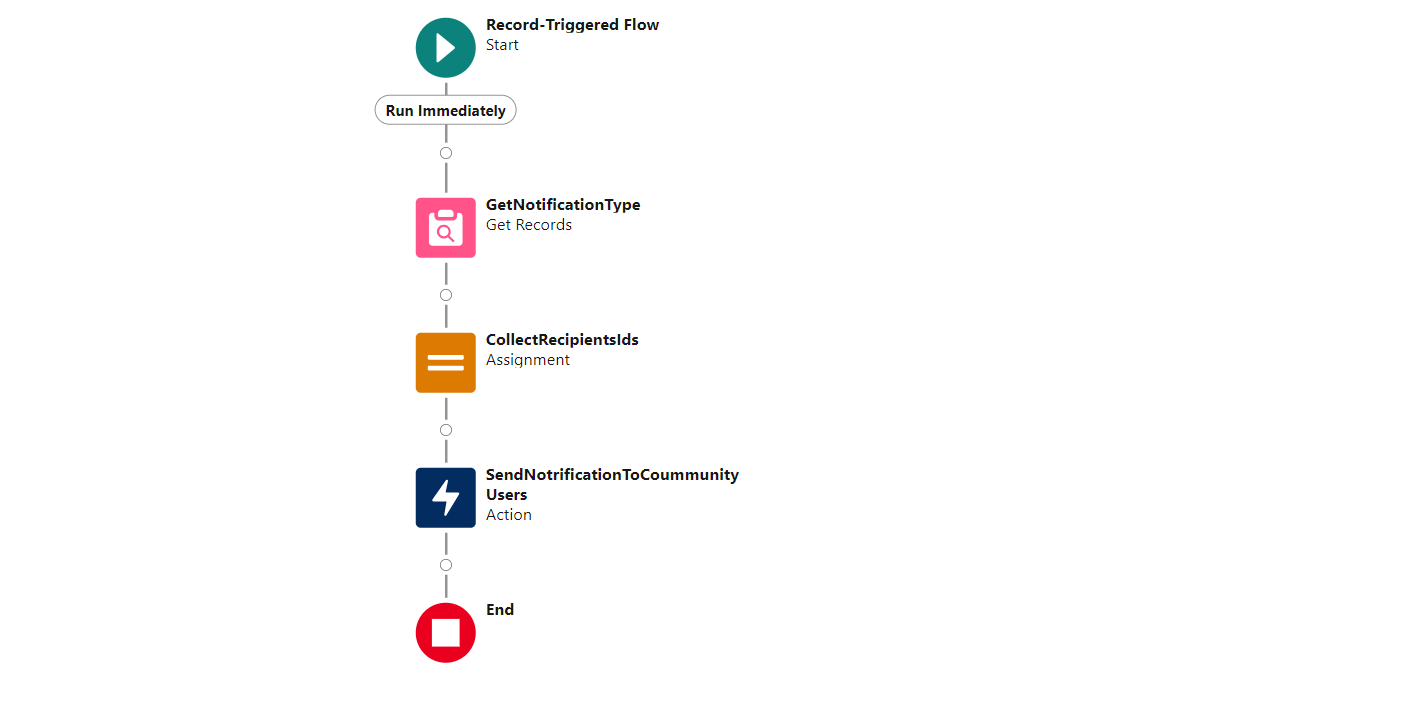
Figure 6: Final flow
Step 3: Community User Access
1. Ensure Community User Permissions:
- Verify that community users have the necessary permissions to execute flows and receive custom notifications.
Step 4: Testing
1. Test the Flow:
- Create test scenarios or records to trigger the criteria defined in the Flow.
- Verify that the custom notifications are sent successfully to community users.
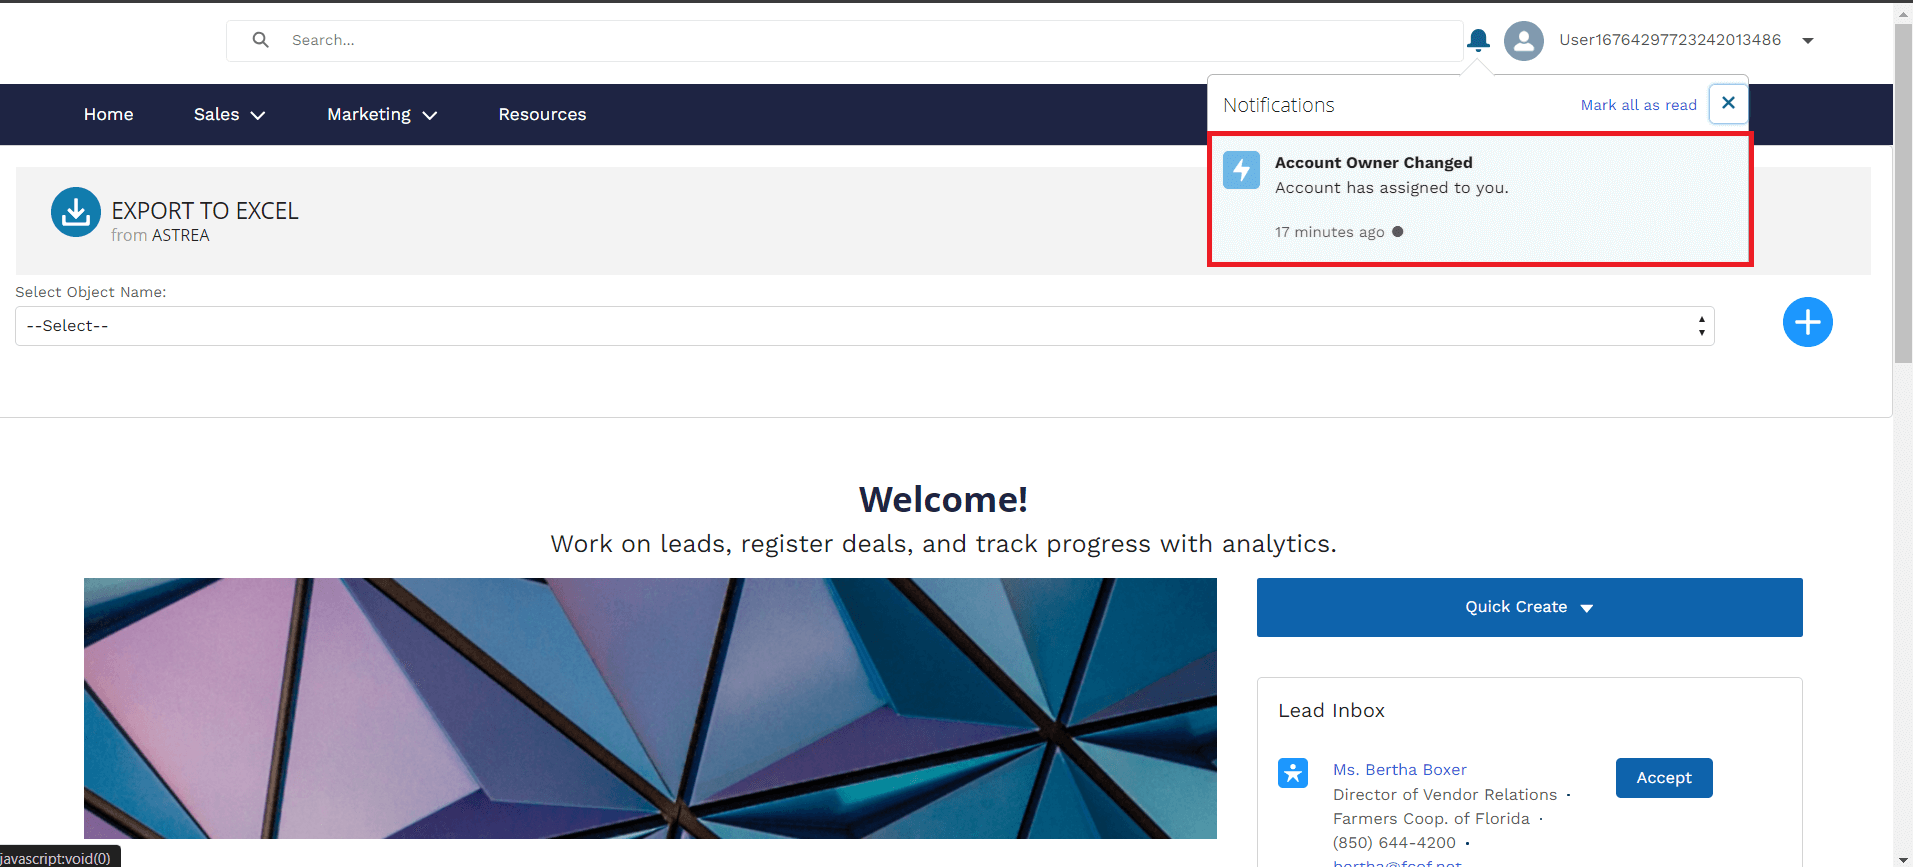
Figure 7: Community users receive the notification when flow is triggered on a given condition.
Conclusion:
Implementing custom notifications using Flow and Process Builder in Salesforce Communities empowers organizations to enhance community engagement and communication. This dynamic combination allows for the automation of personalized messaging, ensuring that community users stay informed, engaged, and connected.
As businesses continue to leverage the capabilities of Salesforce, incorporating this functionality becomes a strategic move to foster a thriving and interactive community environment. By keeping users informed and engaged through custom notifications, organizations can elevate the overall community experience and build lasting connections with their audience.
For any queries please reach out to support@astreait.com