Introduction:
Efficient workforce management is crucial for organizations to deliver exceptional customer service. Salesforce Service Cloud offers a robust Shifts feature that allows businesses to optimize scheduling, improve agent productivity, and ensure proper coverage during customer service hours. In this article, we will explore how shifts work in Salesforce Service Cloud and provide step-by-step instructions on setting up shifts within the platform.
Understanding Shifts in Salesforce Service Cloud:
Shifts in Salesforce Service Cloud represent predefined time periods during which agents are available to handle customer inquiries, cases, or tasks. They help organizations manage agent schedules effectively, align resources, and meet customer demands. Here's a breakdown of how shifts work:
Shifts become even more powerful when combined with Omni-Channel routing. While shifts define when agents are available, Omni-Channel ensures that work items such as cases, chats, or messages are automatically routed to available agents based on capacity and presence status. Together, these features create a balanced and efficient service operation.
1. Shift Types:
Salesforce Service Cloud allows you to create different types of shifts based on your business needs. Common shift types include Regular, Overtime, Break, or On-Call. These types can be customized to accommodate unique scheduling requirements.
2. Shift Start and End Times:
Each shift is associated with specific start and end times, allowing organizations to align agent availability with customer service hours. Shifts can be configured for different days of the week or specific date ranges.
3. Shift Templates:
Shift templates serve as predefined schedules that can be applied to multiple agents or teams. They streamline the process of assigning shifts and ensure consistency across the workforce. Templates can be customized to match your organization's working patterns.
Setting Up Shifts in Salesforce Service Cloud:
Now, let's walk through the steps to set up shifts within Salesforce Service Cloud:
Step 1: Assign Service Resources to Service Territories
1. Click App launcher to open the App Launcher, and then select Salesforce Scheduler Setup.
2. Open the Service Resources tab.
3. Open Team member service resource record.
4. In the Related tab, click Assign Service Territories.
5. Select Headquarters and then click Next.
6. Select the start date.
7. Click Save.
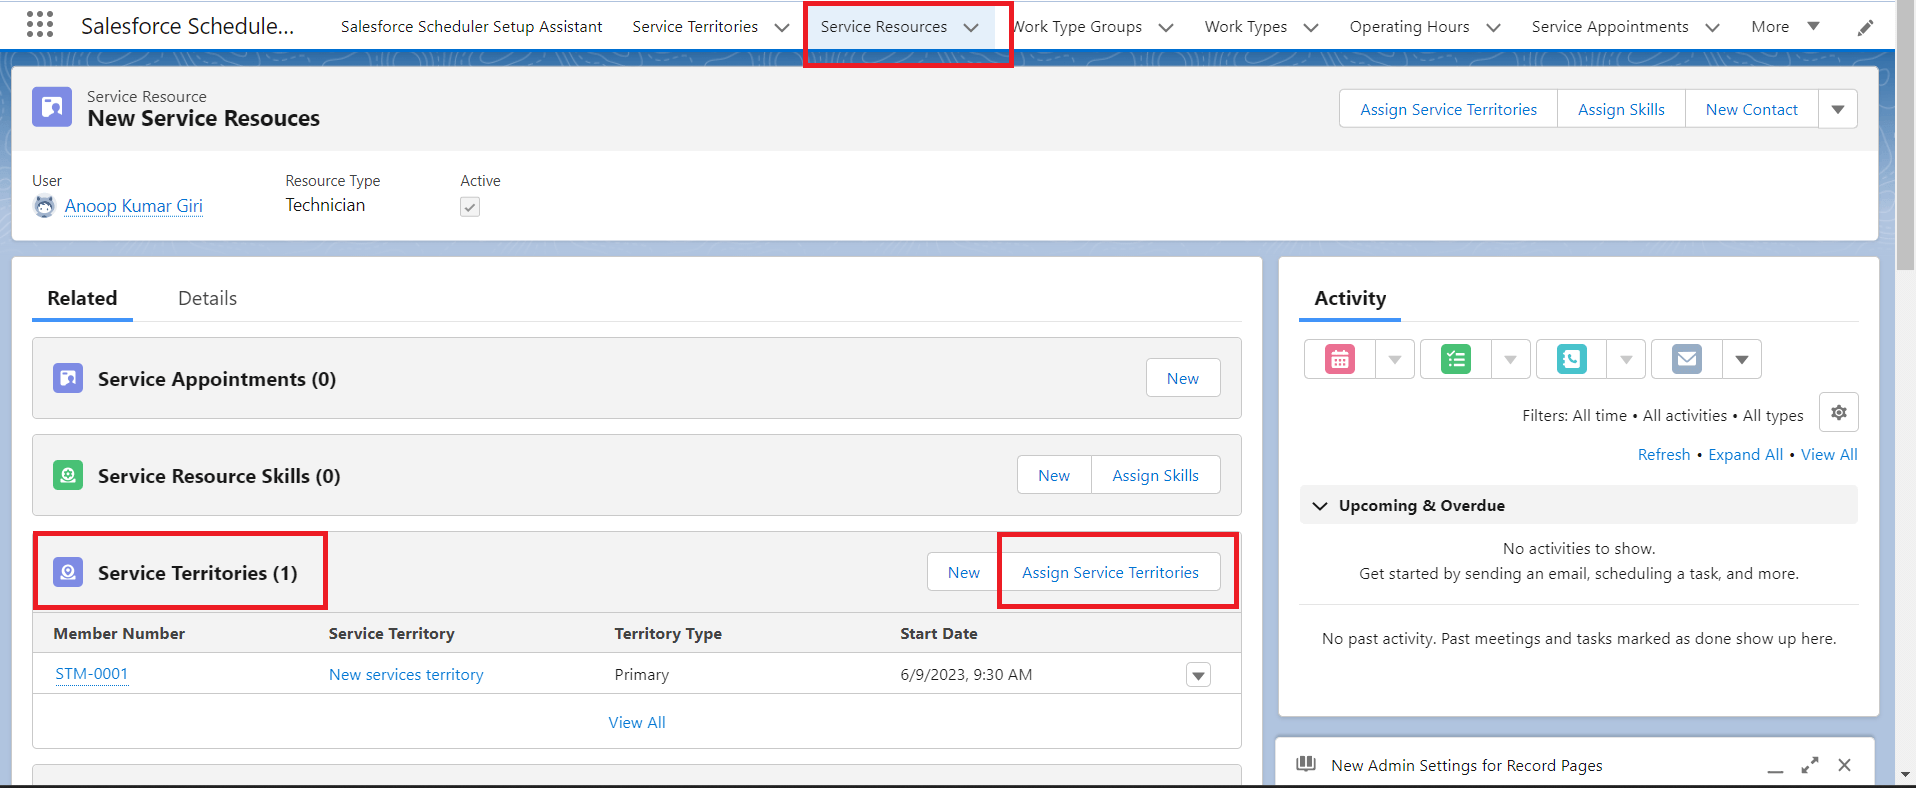
Figure 1: Assign Service Resources to Service Territories
Step 2: Create Shifts
1. Click App launcher to open the App Launcher.
2. Select Shifts.
3. Click New.
4. Provide the following details. As per your requirement.
- Start Time:
- End Time:
- Status:
- Work Type Group:
- Service Territory:
- Service Resource:
- Time Slot Type:
5.Click Save.
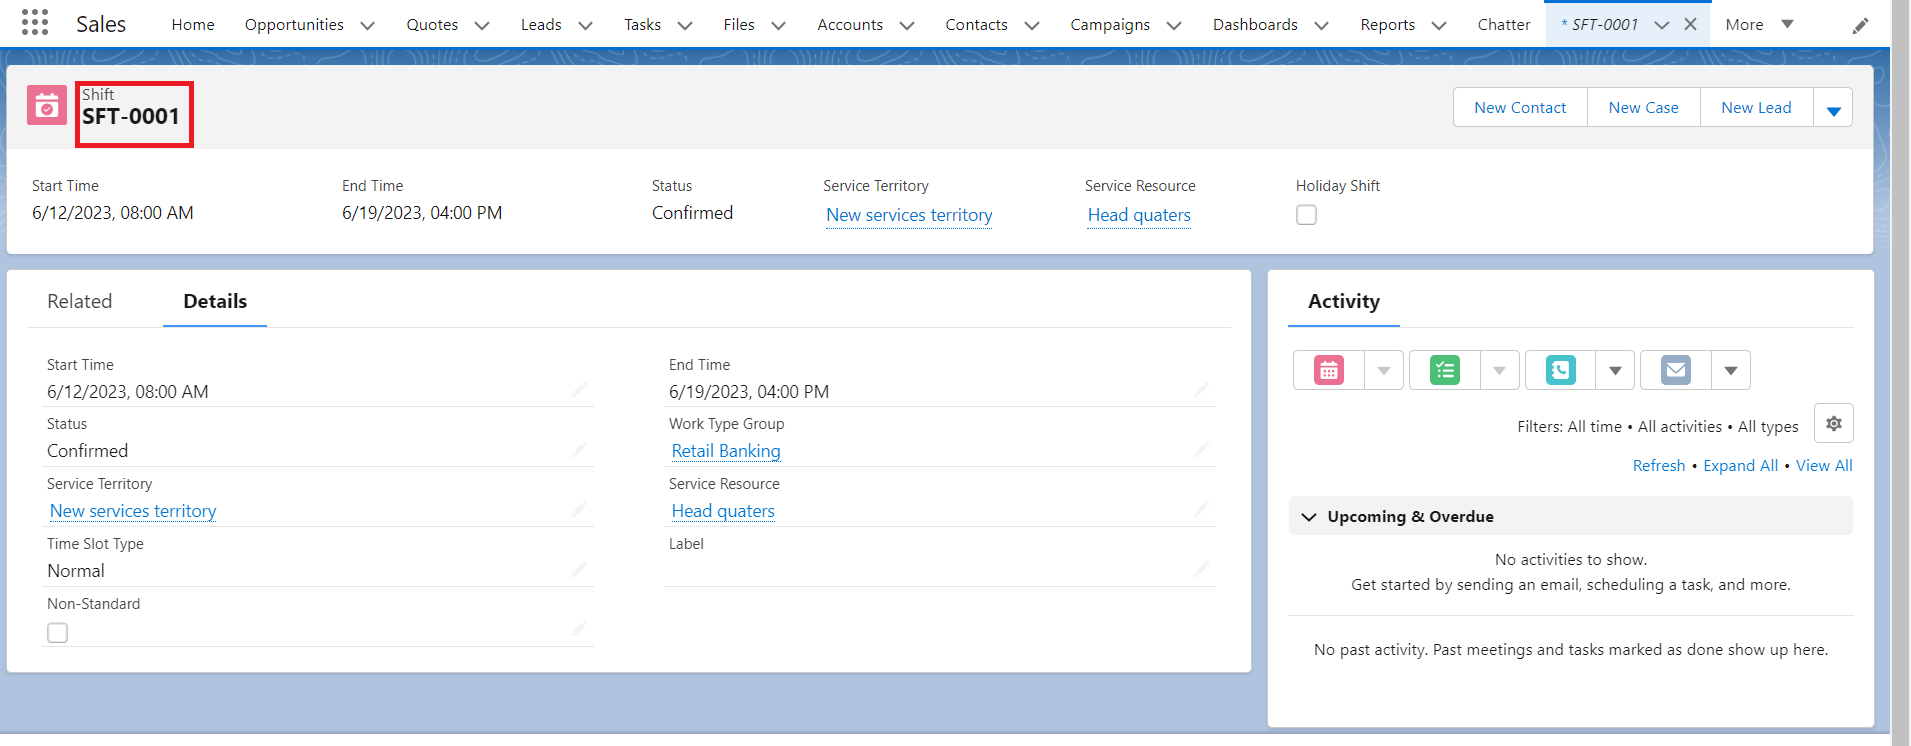
Figure 2: Create Shifts in Salesforce Service cloud
Step 3: Enable Shifts
1. Click Setup, and then click Setup.
2. In the Quick Find box, enter Scheduling Policies, and click Scheduling Policies.
3. Click Edit next to the Policy you have made for shifts.
4. To enable shifts, select the Use service territory member’s shift.
5. To ensure that Salesforce Scheduler considers the intersection of shifts and service territory operating hours when determining the availability, select Use service territory’s operating hours with shifts.
6. To ensure that Salesforce Scheduler prevents users from scheduling appointments outside account visiting hours, select Enforce Account’s Visiting Hours.
7. Click Save.

Figure 3: Enable shifts in Salesforce Service cloud
Step 4: Schedule an Appointment
1. Click App launcher to open the App Launcher, find and select Accounts.
2. Open a record.
3. Click the Schedule Appointment quick action.
4. Select By work type group, appointment type, or service territory.
5. Select Retail Banking.
6. Select the location at which appointments are scheduled.
7. Select users.
8. Select a time slot.
9. Review the appointment details, and then click Next.
10. Click Finish.
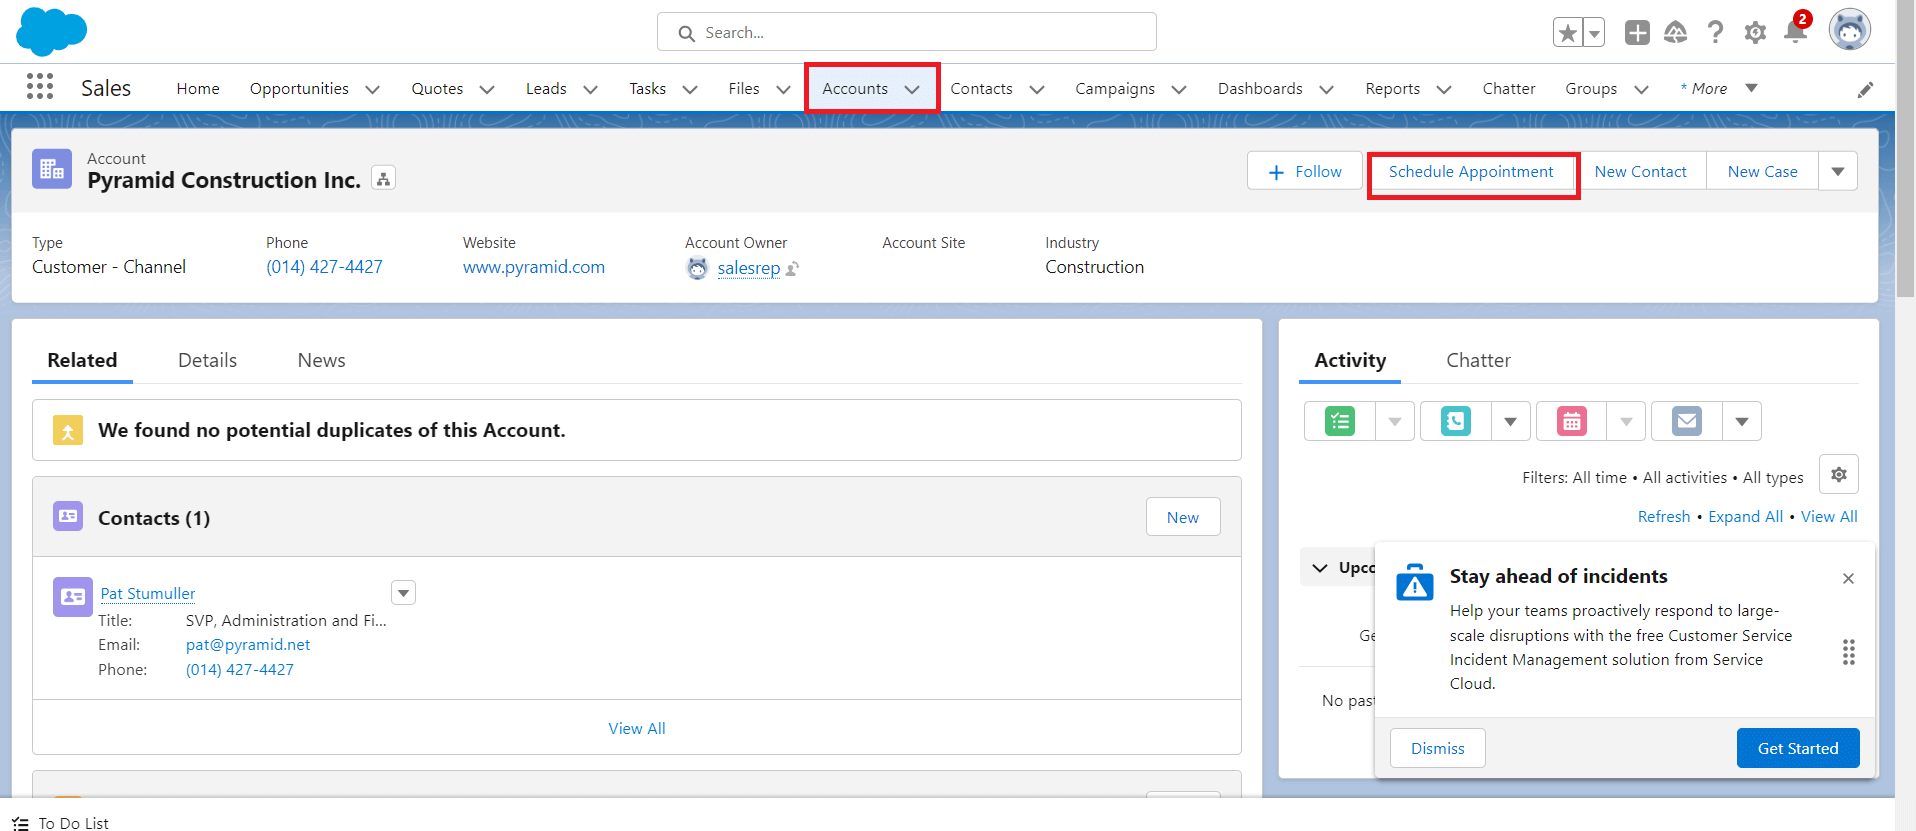
Figure 4: Schedule Appointments for the staff to test how shifts work.
Benefits and Best Practices:
In addition to scheduling agents based on availability, organizations should also consider aligning shifts with agent expertise. For example, agents with specialized skills can be scheduled during peak hours for specific service categories, ensuring faster resolution and higher customer satisfaction. This approach works seamlessly with skill-based routing strategies in Omni-Channel.
Implementing shifts in Salesforce Service Cloud offers several benefits and opportunities for efficient workforce management. Here are some best practices to maximize the effectiveness of shifts:
1. Define shifts based on your organization's specific customer service needs and agent availability.
2. Leverage shift templates to simplify the assignment process and ensure consistency across the workforce.
3. Regularly review and adjust shifts based on customer demand and performance analytics.
4. Integrate Salesforce Service Cloud with workforce management tools or time tracking systems to automate shift assignment and track agent adherence to schedules.
Conclusion:
Shifts in Salesforce Service Cloud provide a powerful solution for optimizing workforce management and ensuring proper coverage during customer service hours. By setting up shifts, organizations can streamline scheduling processes, improve agent productivity, and enhance service level management. Follow the step-by-step instructions outlined in this article to configure shifts in Salesforce Service Cloud and leverage the benefits of efficient workforce management. With the ability to define shift types, create templates, and assign shifts, Salesforce Service Cloud empowers businesses to deliver exceptional customer experiences.
Workforce scheduling, intelligent routing, case management, and console productivity are all essential components of a modern support organization. Salesforce Service Cloud provides a unified ecosystem to manage these capabilities efficiently. To explore more features, configuration guides, and best practices, visit our Service Cloud page.
For any queries on this functionality, please reach out to support@astreait.com.