Introduction:
In today's highly competitive business landscape, providing exceptional customer service is crucial for long-term success. Salesforce Service Cloud, a robust customer service platform, offers a multitude of features to streamline and enhance customer interactions. One such powerful feature is Omni-Channel. In this blog post, we will delve into the benefits of the Omni-Channel feature in Salesforce Service Cloud and provide a step-by-step guide for setting it up.
Understanding Omni-Channel:
Omni-Channel is a comprehensive service routing and management solution that enables organizations to seamlessly integrate multiple communication channels into a unified platform. It empowers businesses to efficiently distribute incoming service requests across available agents, ensuring a consistent and personalized customer experience.
Benefits of Omni-Channel in Salesforce Service Cloud:
- Enhanced Agent Productivity: Omni-Channel intelligently distributes work items, such as cases, chats, emails, and social media inquiries, to the most suitable agents based on their availability, skills, and workload. This eliminates manual work allocation and maximizes agent productivity, leading to faster response times and improved customer satisfaction.
- Improved Customer Experience: By consolidating customer interactions from various channels into a single view, agents gain a holistic understanding of customer history and preferences. This enables them to provide personalized and context-rich support, resulting in higher customer engagement and loyalty.
- Real-time Work Distribution: Omni-Channel uses sophisticated routing algorithms to distribute work items in real-time. It ensures that the most urgent or high-priority tasks are promptly assigned to agents with the relevant expertise, minimizing response times and meeting service level agreements (SLAs).
- Channel Flexibility: With Omni-Channel, businesses can effortlessly add or remove communication channels based on their evolving customer needs. Whether it's voice calls, web chats, emails, social media platforms, or even IoT devices, the feature seamlessly adapts to changing communication landscapes.
- Operational Insights: Omni-Channel provides comprehensive analytics and reporting capabilities that offer valuable insights into agent performance, channel utilization, and customer trends. These insights empower businesses to make data-driven decisions, optimize resource allocation, and refine their customer service strategies.
Setting up Omni-Channel in Salesforce Service Cloud:
Now, let's walk through the step-by-step process of setting up Omni-Channel in Salesforce Service Cloud:
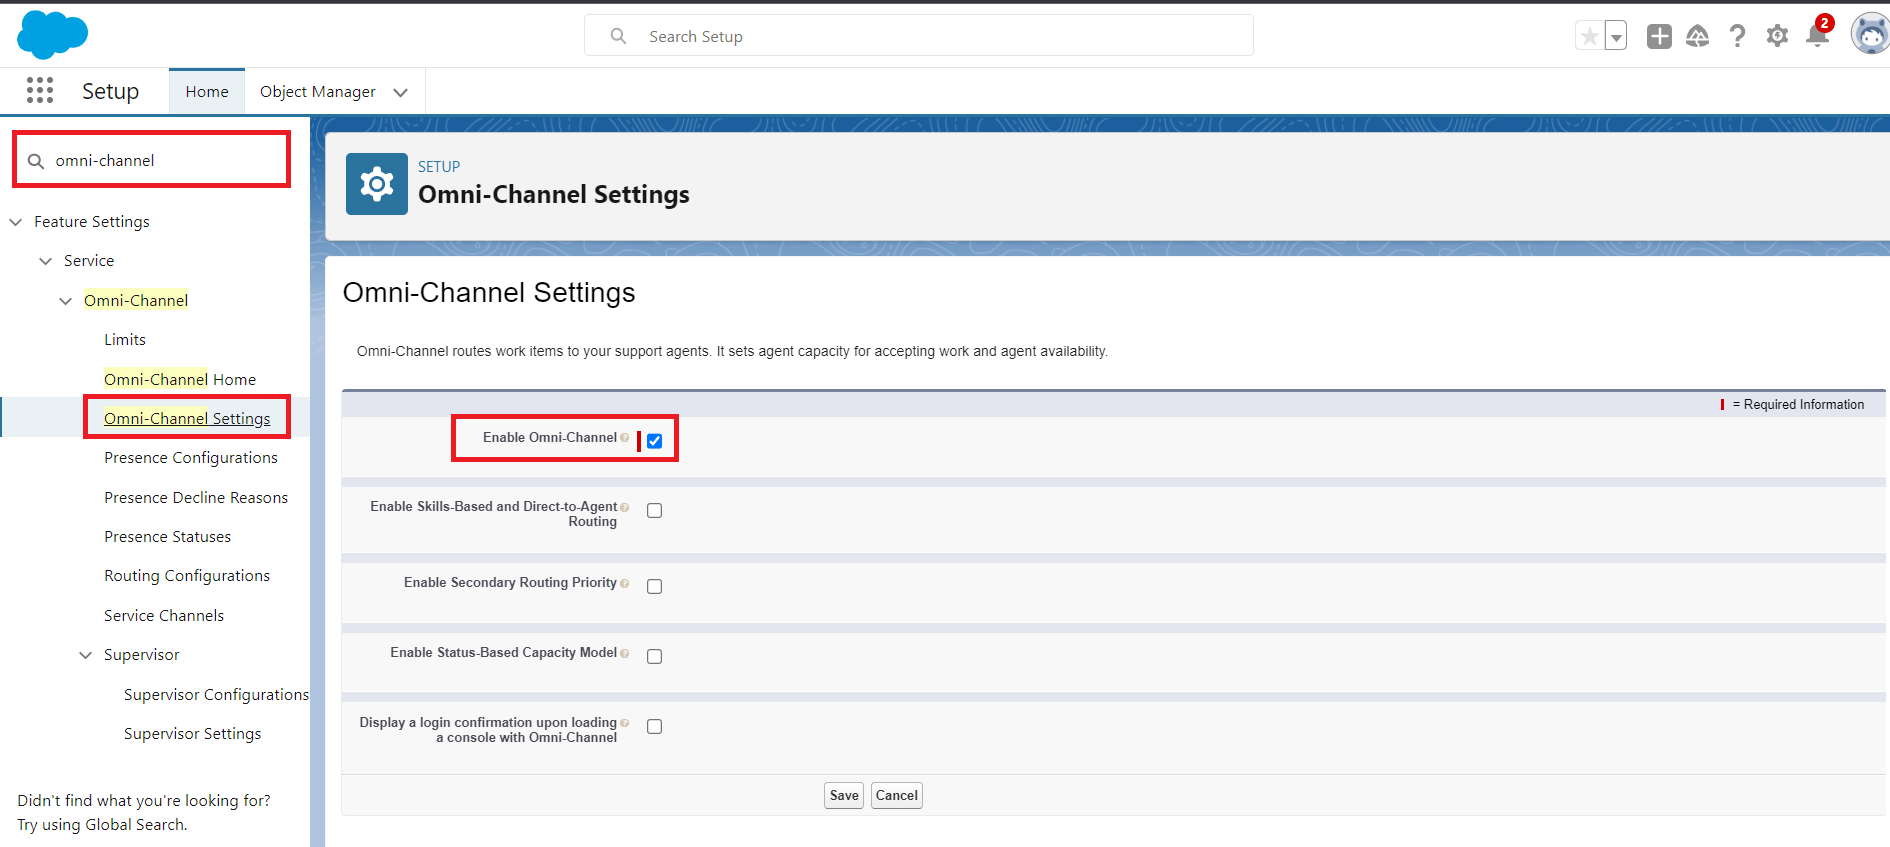
Step 1: Enable Omni-Channel:
a. In Salesforce Setup, navigate to the Quick Find box and search for "Omni-Channel Settings."
Click on "Omni-Channel Settings" and enable the feature.
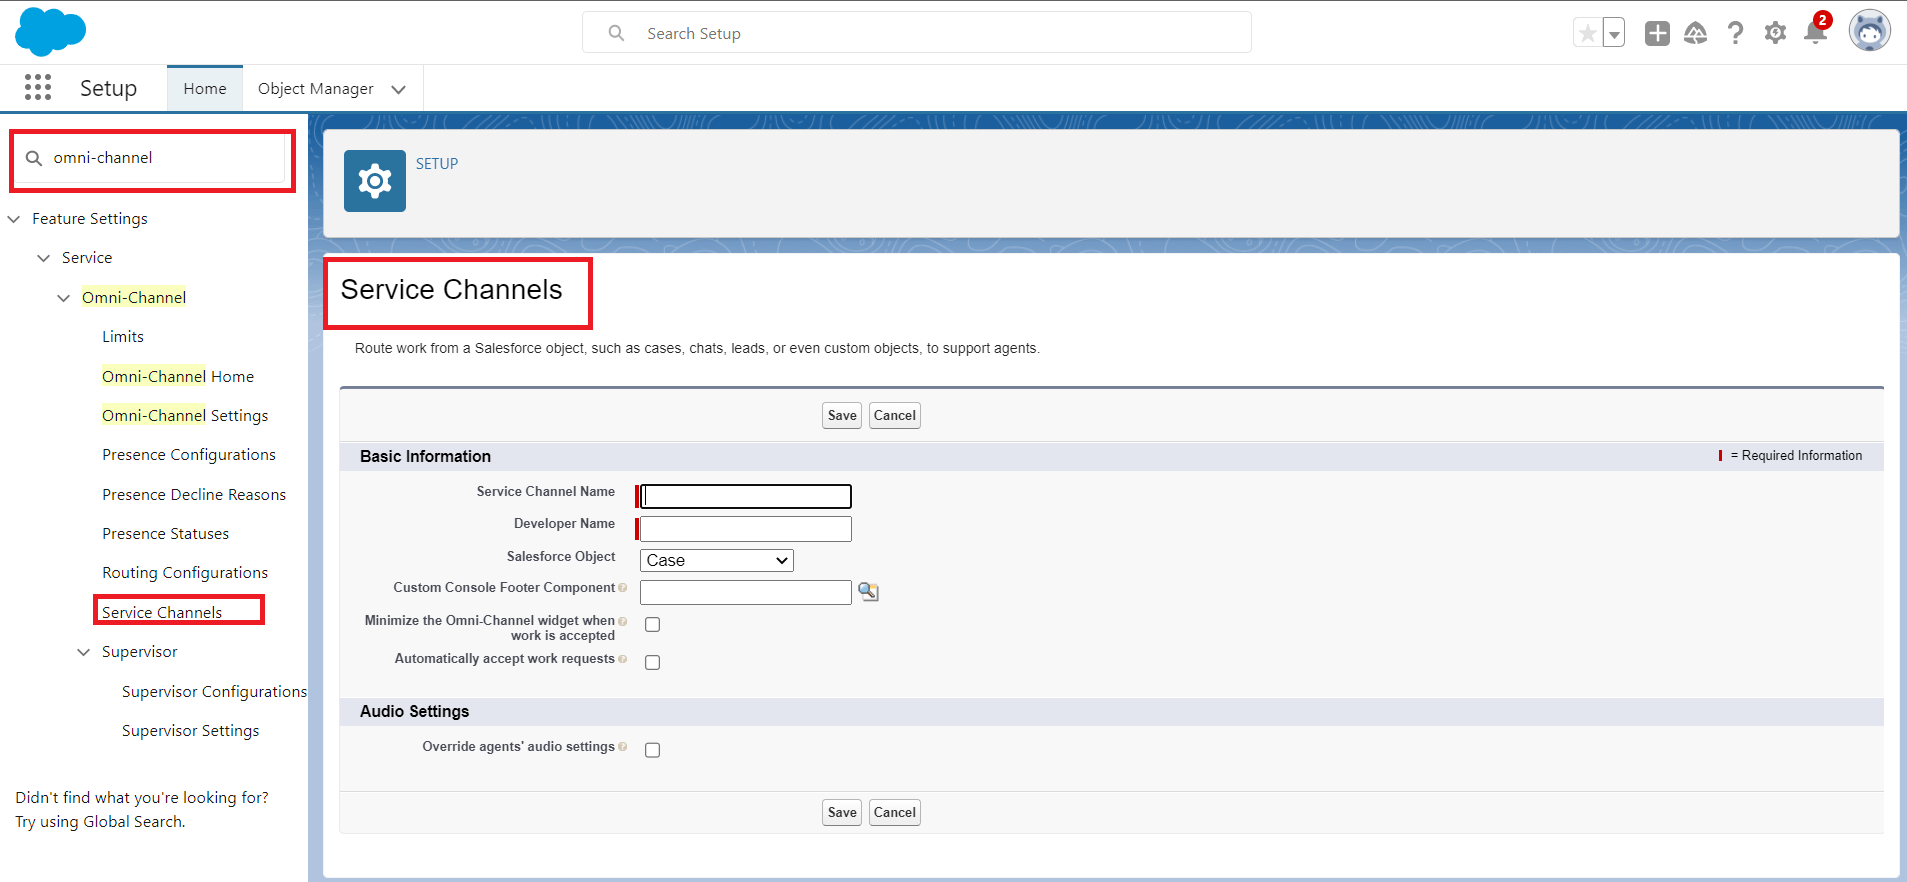
Step 2:Create Service Channels
a. In Salesforce Setup, navigate to the Quick Find box and search for "Omni-Channel Settings."
b. Click on "omni-channel" and Click on New to create new Service channels.
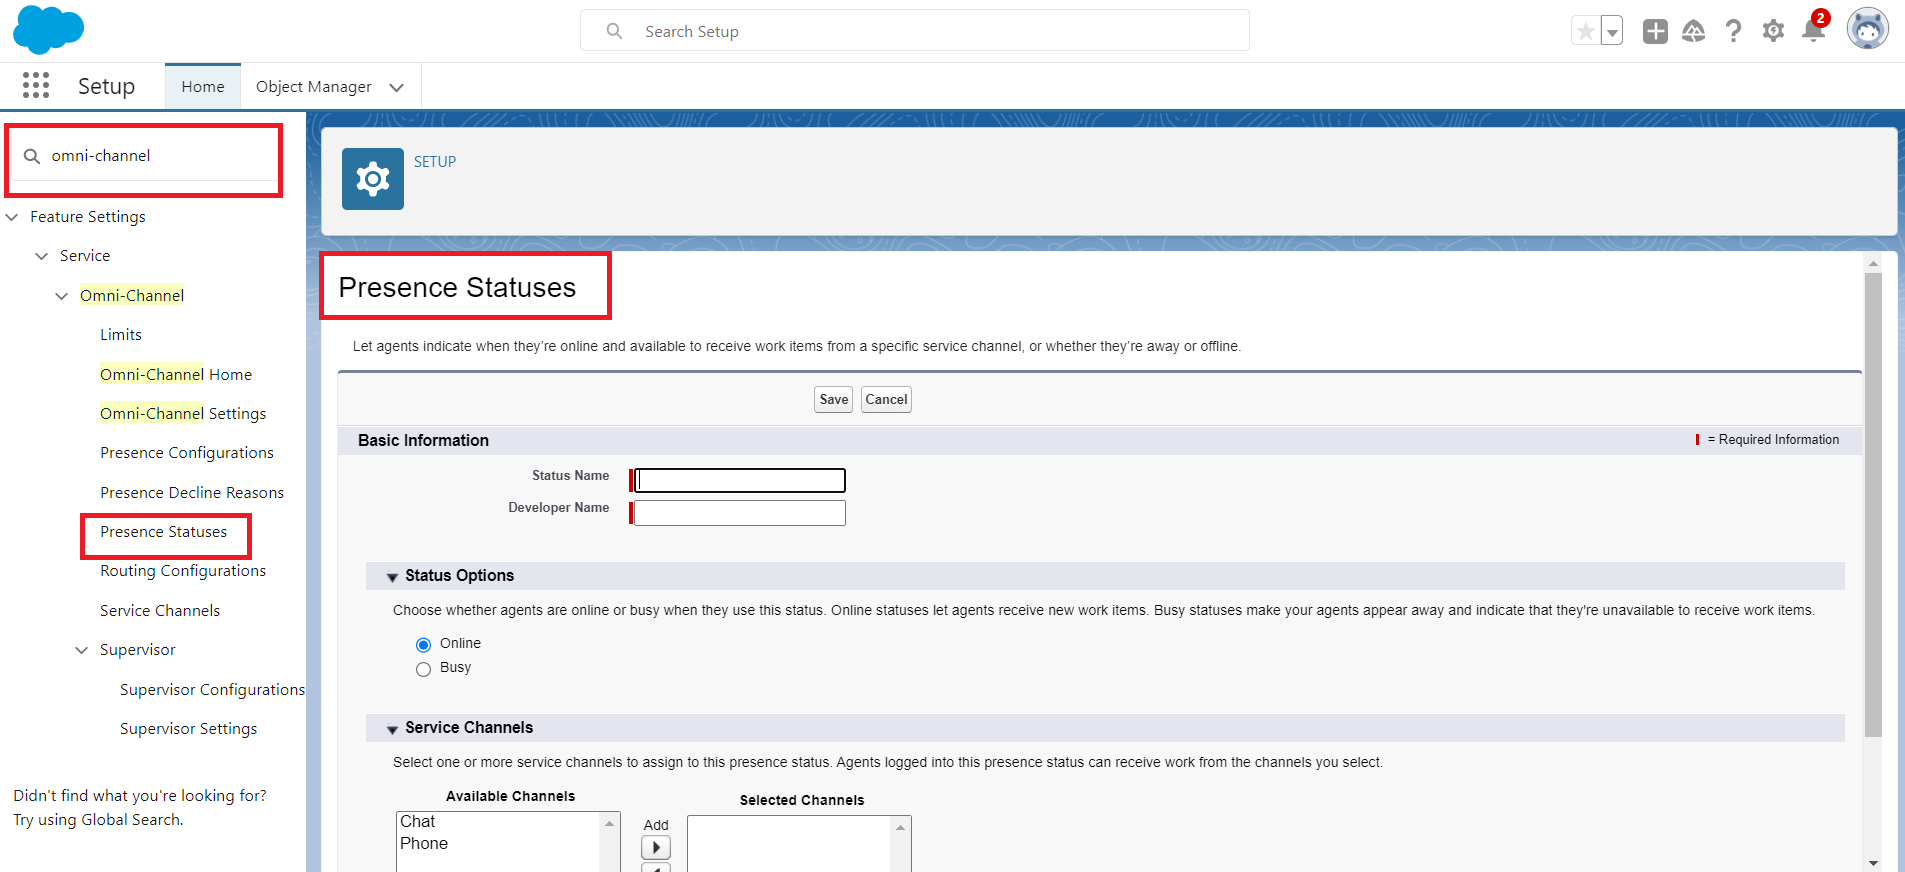
Step 3: Create Presence Status
a. In Setup, search for "Omni-Channel Settings" and click on "Presence Status"
b.To create a new Presence Status click the New button.
Step 4: Configure Routing Configurations:
a. In Setup, search for "Omni-Channel Settings" and click on "Routing Configurations."
b. Define the routing configuration rules based on your organization's requirements, such as skills-based routing, workload limits, and priority settings.

Step 5: Create Presence Configurations:
a. In Setup, search for "Omni-Channel Presence" and click on "Presence Configurations."
b. Create presence statuses for agents, such as "Available," "Away," or "On Break," and define their behavior and associated work item assignments.

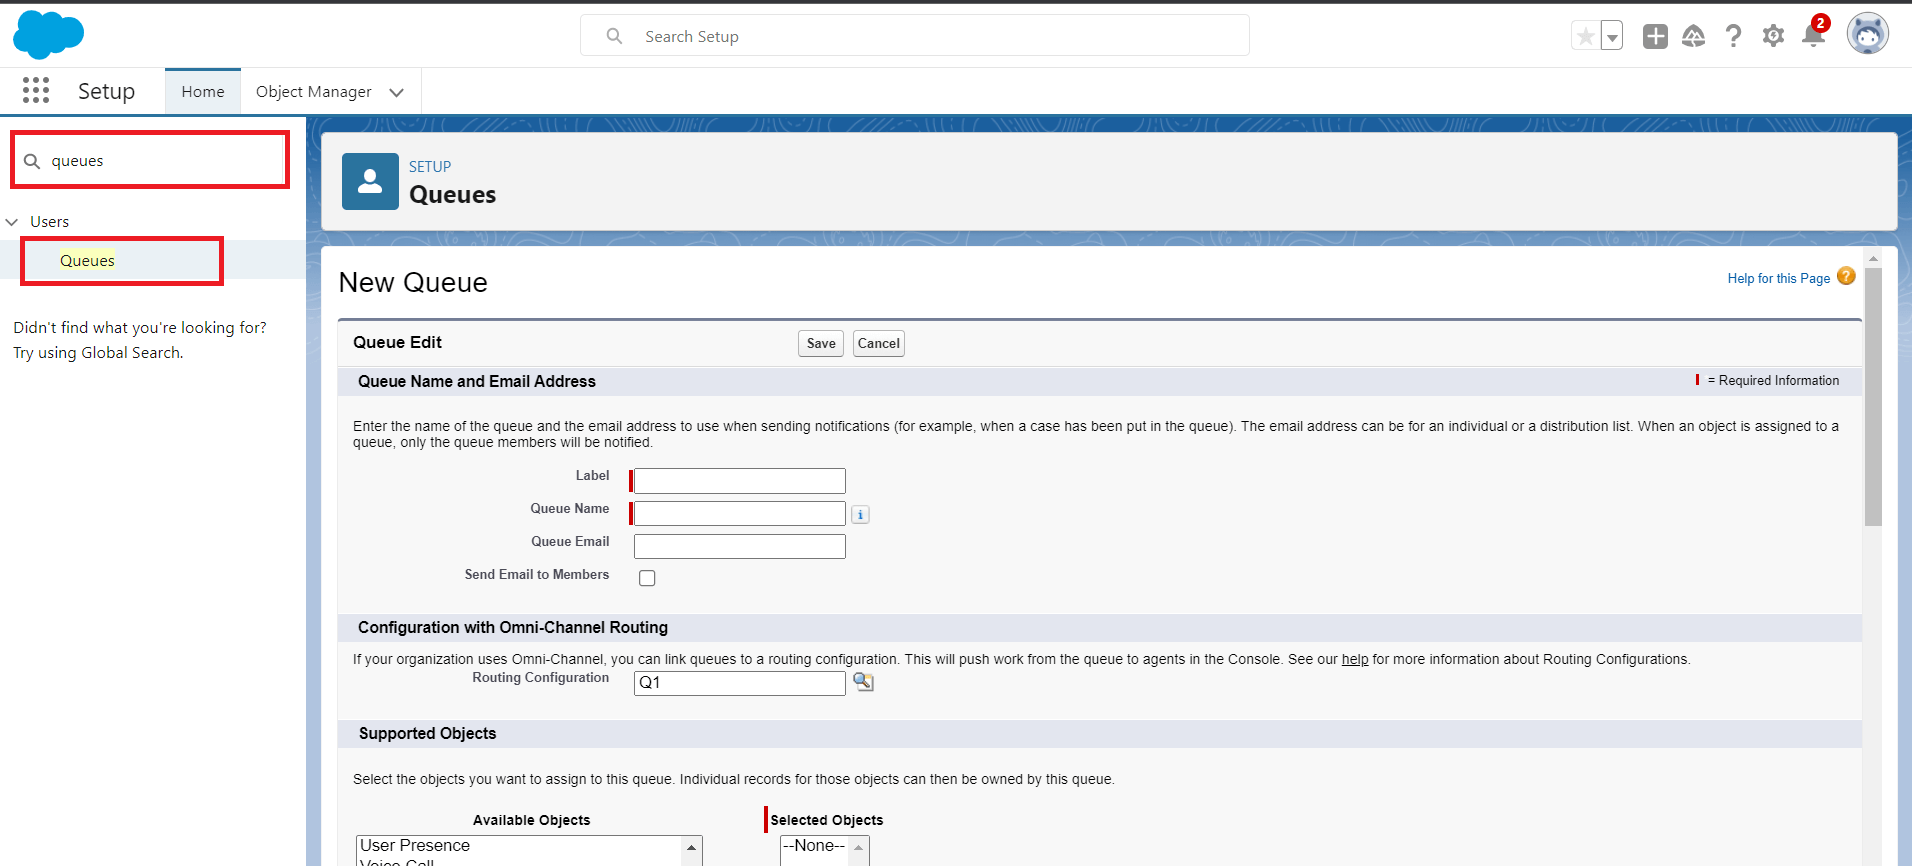
Step 6: Create Queues and assign them routing configurations
a. In Setup, search for "Queue" and select queue
b.Click New, Name your queue, and assign a Routing Configuration.
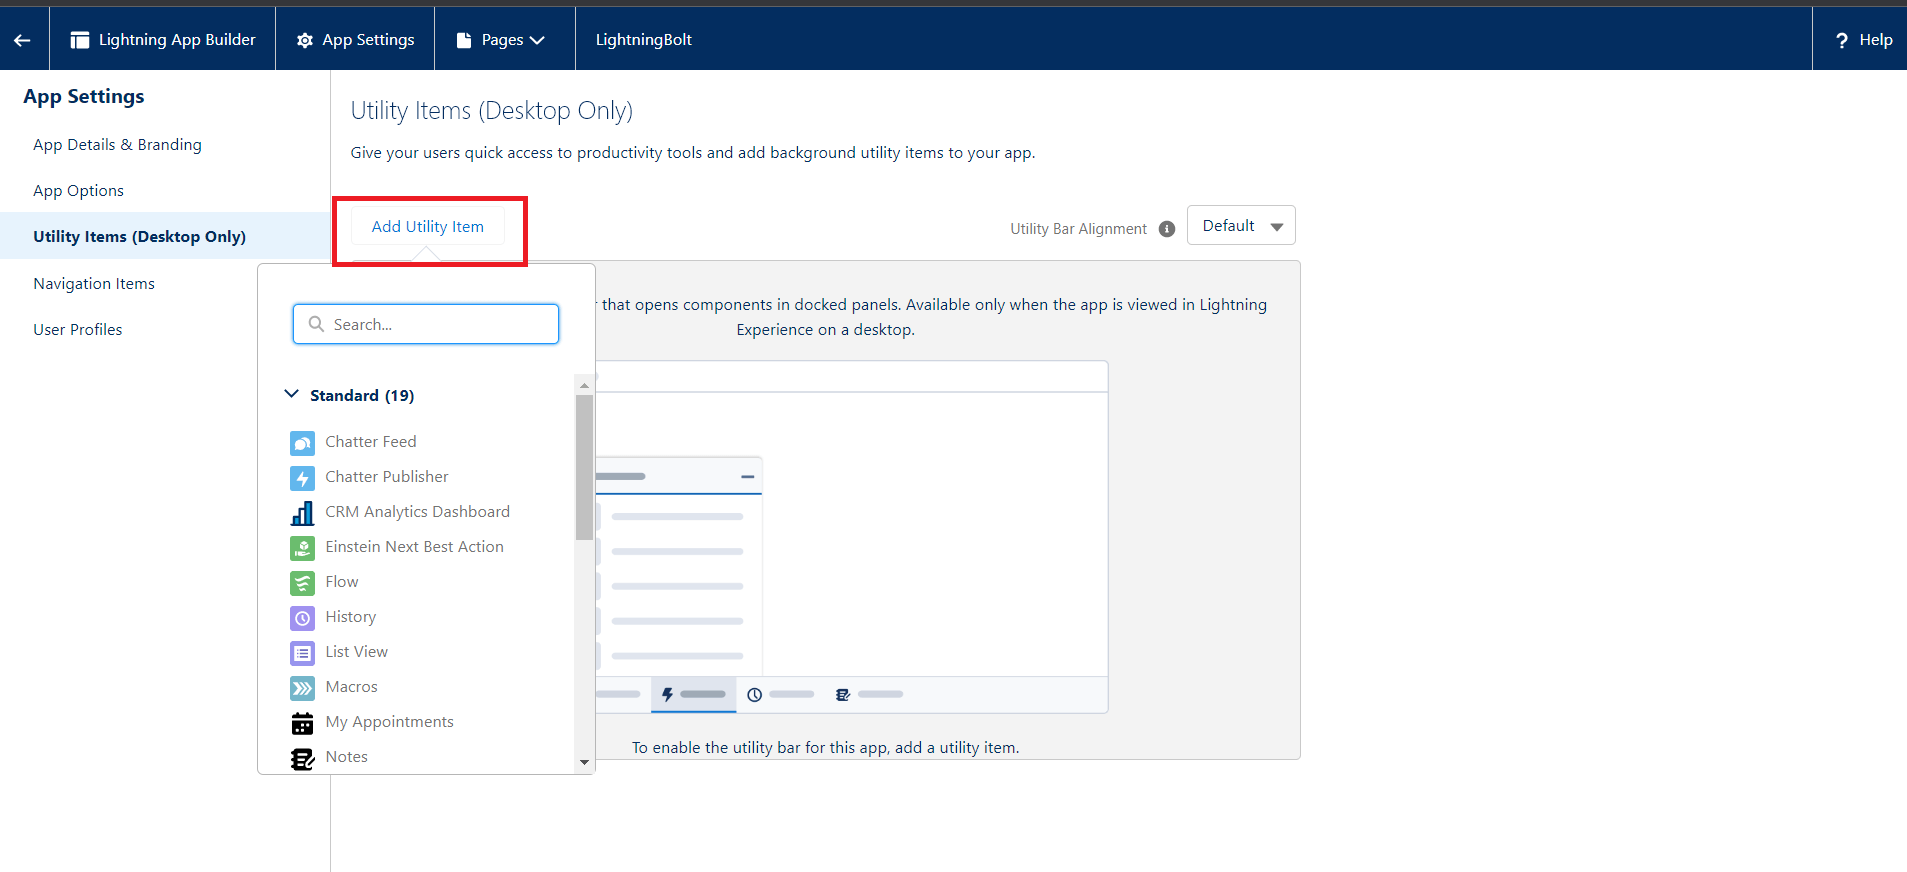
Step 7: Add omni-channel to utility bar.
a.From Setup in Lightning Experience, enter App in the Quick Find box, then select App Manager.
b.Click the dropdown next to the console app that you want to add Omni-Channel to, then click Edit.
c.Under Utility Bar, click Add.
d.Click Omni-Channel.
e.Click Save.
f.Click Done.
Conclusion:
Salesforce Service Cloud's Omni-Channel feature revolutionizes customer service by unifying and optimizing communication channels. With enhanced agent productivity, improved customer experiences, real-time work distribution, channel flexibility, and actionable insights, businesses can deliver exceptional service and gain a competitive edge. By following the step-by-step instructions provided, organizations can seamlessly set up and configure Omni-Channel within Salesforce Service Cloud, unlocking its full potential and transforming customer service operations.