As a Salesforce partner we often build flows that have utilities across different businesses. With minor changes the same template of flow can be used in different scenarios. In such cases it is helpful to take the flow and copy it to another org, and then make the necessary changes to the flow in the new org. In this blog we explain how Flows can be copied from one Salesforce org to another.
Automation or the practice of having software and machines perform routine tasks, is taking over and is here to stay in almost every industry around us. Salesforce Flows are precisely that. It is an automation tool that provides declarative process automation for the Salesforce app, experience, and portal. Salesforce gives us the functionality through Flow Builder to fully automate a guided visual experience. It has very high functionality as it can be implemented in almost all processes to bring some form of automation. There are several ways to clone Flows and transfer them from one org to another. Nowadays, on the Salesforce AppExchange, you can find more than a few applications offering this functionality. But those come with the drawback of either being a paid service or having some issues in functionality. Here we will be able to provide you with a single process with which Salesforce Flows can be copied in different Orgs. This will be implemented with the thing we need to clone and copy into different orgs, a Salesforce Flow! This is a particular advantage of using your own Import/Export process as most applications either have a fee for bulk transfers or have a subscription payment system. It is also helpful from a Data Security point of view as, throughout the entire process, the data being transferred is not available to any third party. The flow used to Import, and Export other flows is available on Github. This article will provide you with the prerequisites required for the flow to be downloaded, step-by-step instructions to download and implement the flow, and some common errors which are encountered as well.
Implementation Details
This flow uses components from unofficialrsf.com which are required in your org to properly install and run the Import/Export flow.
The components required are:
1. Flow Base Packs (Version 2.12) or higher which is linked here
https://unofficialsf.com/flow-action-and-screen-component-basepacks
2. low List Picker (Version 1.4) or higher which is linked here
https://unofficialsf.com/flow-action-and-screen-component-basepacks
3. Flow Screen Component Base Pack (Version 2.7.6) which is linked here (same link as above)
These are the three main components required to download the Import/Export flow from Github which is linked here. https://github.com/ericrsmith35/Import-Export-Flows
So after downloading the required components, we select the Deploy to Salesforce option on the bottom of the page and follow the on-screen instructions which will allow us to download the Flow in our Org. The main thing to be noted here is that all the prerequisites and the flow itself need to be downloaded in both of the orgs, the Source org from where the flow is to be cloned ,and the Receiving org where the flow is to be copied.
We will select the Export option in the Org from where the Flow will be taken and the Import option in the Org where the flow will be implemented.
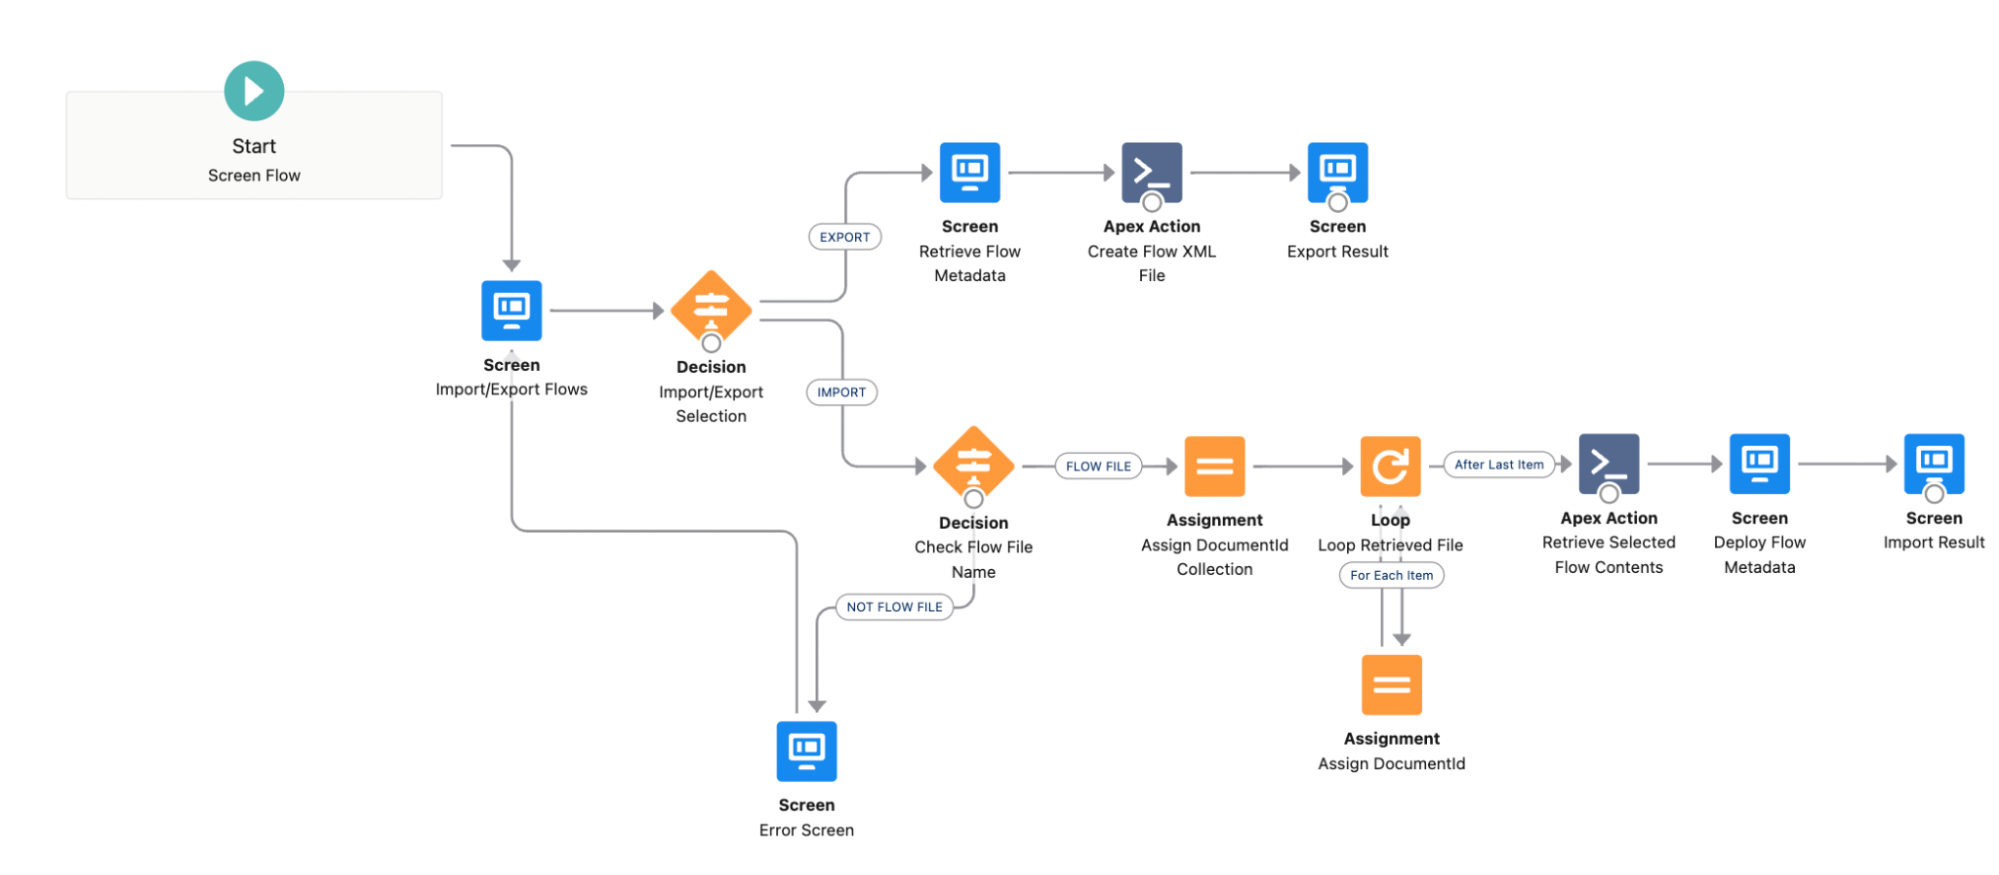
This Import/Export flow essentially works in 2 parts.
- The Export part takes all the Metadata of the selected flow(flow to be copied) and downloads that onto your PC in the form of an XML file. This process can be implemented as many times as required for as many flows as required.
- The Import is implemented when we log into the required Org, select the Import option. It shows us the option to upload the file, where we can upload the metadata of the flow for it to be fully implemented.
Implementing the Export:
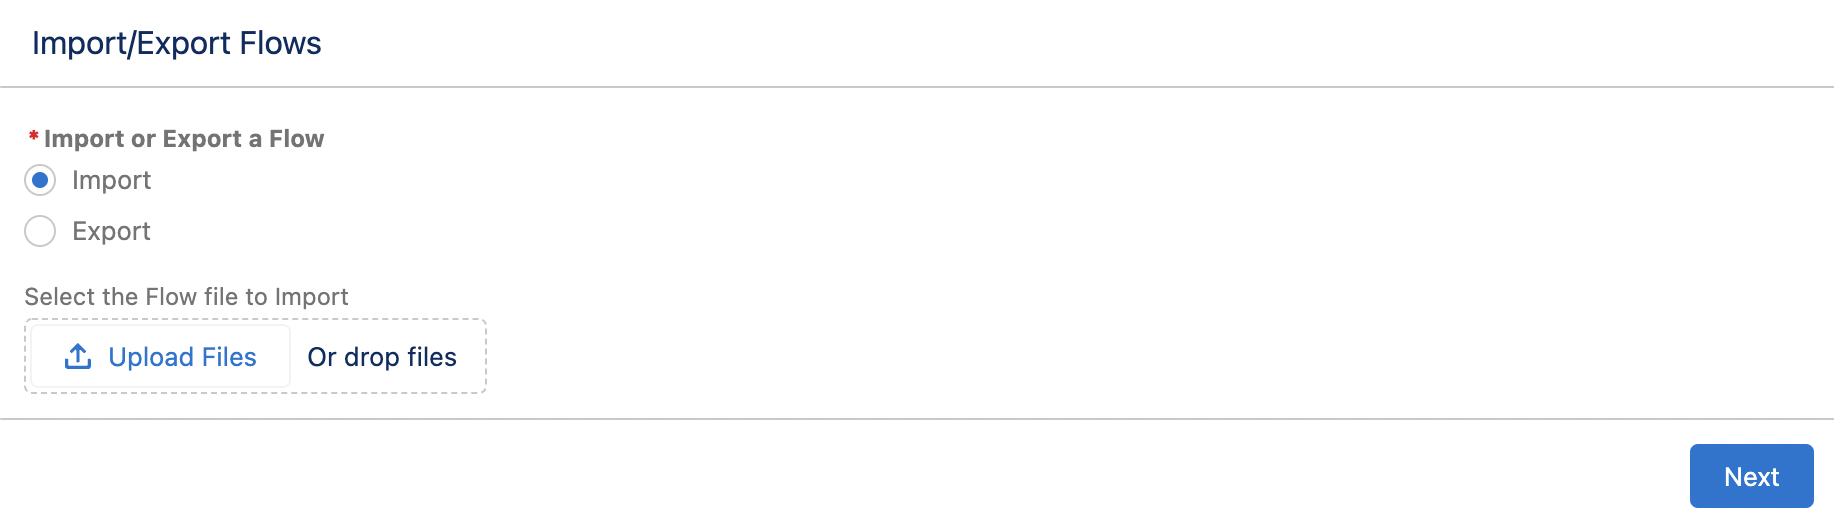
This is done by going to Setup -> Process Automation -> Flows, then selecting the Import/Export flow and running it.
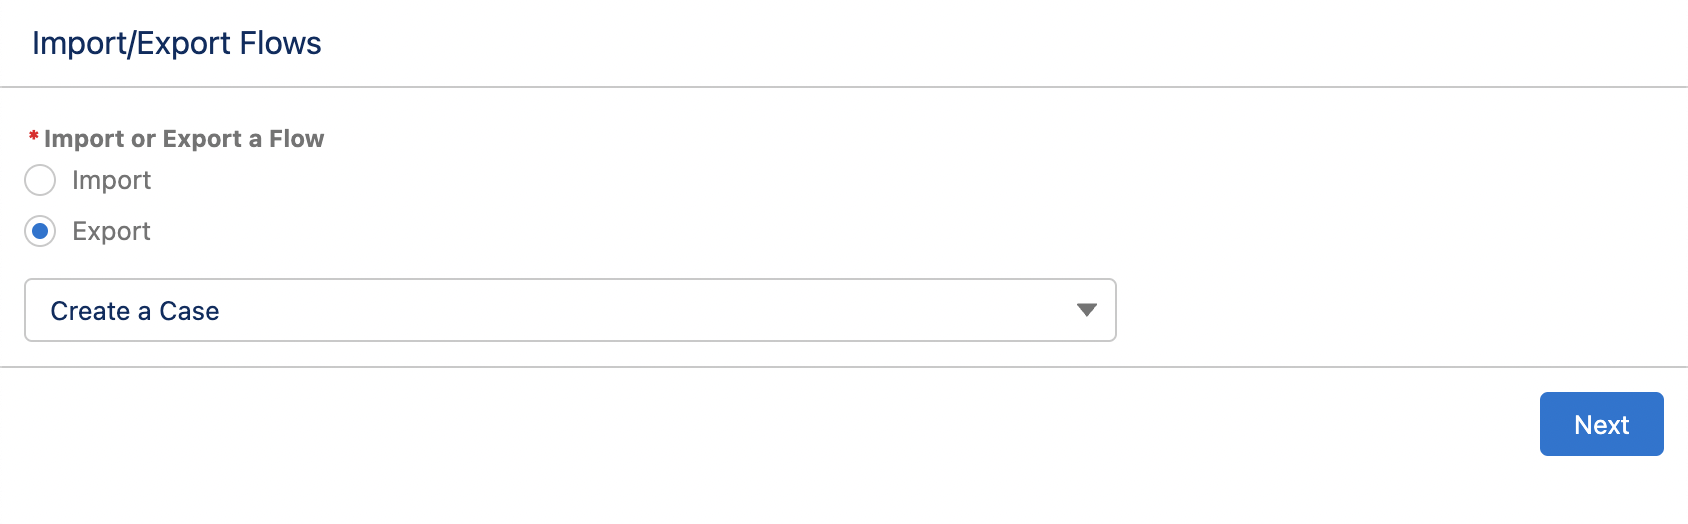
Here we need to select the flow to be Exported from the Dropdown menu and click Next.
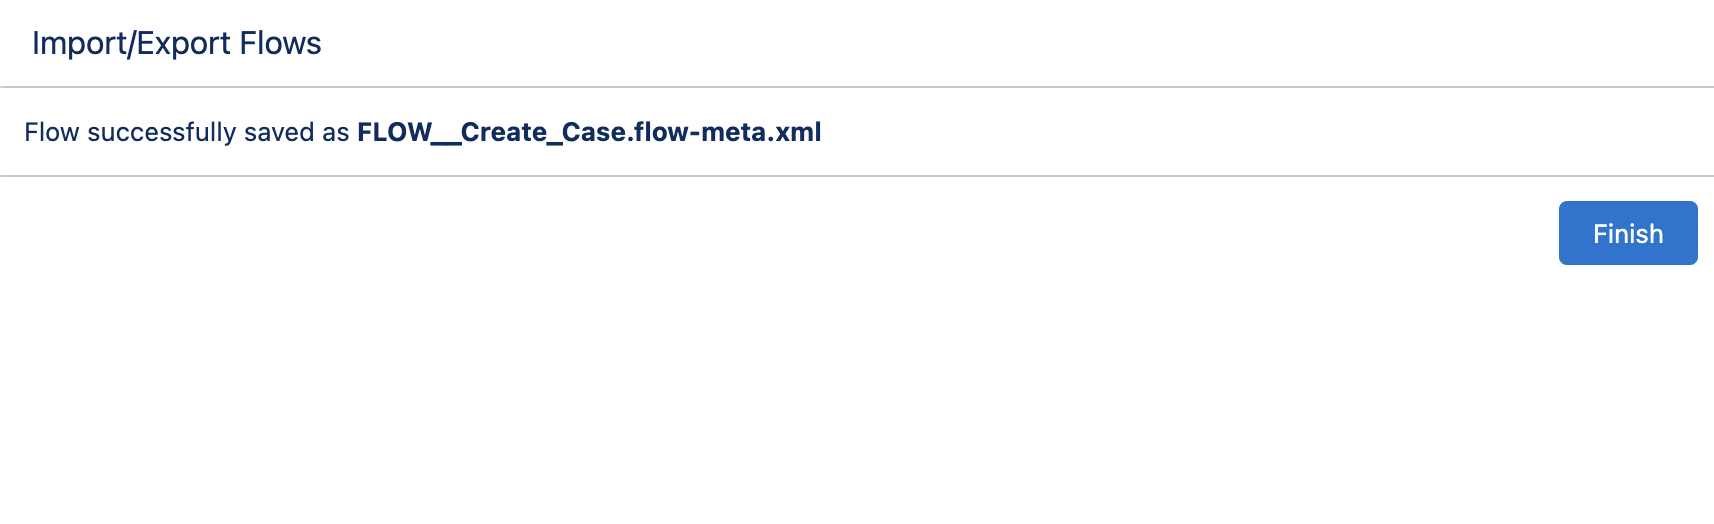
This would lead us to the next screen where the XML file of the flow will be saved in the Files section of Salesforce.
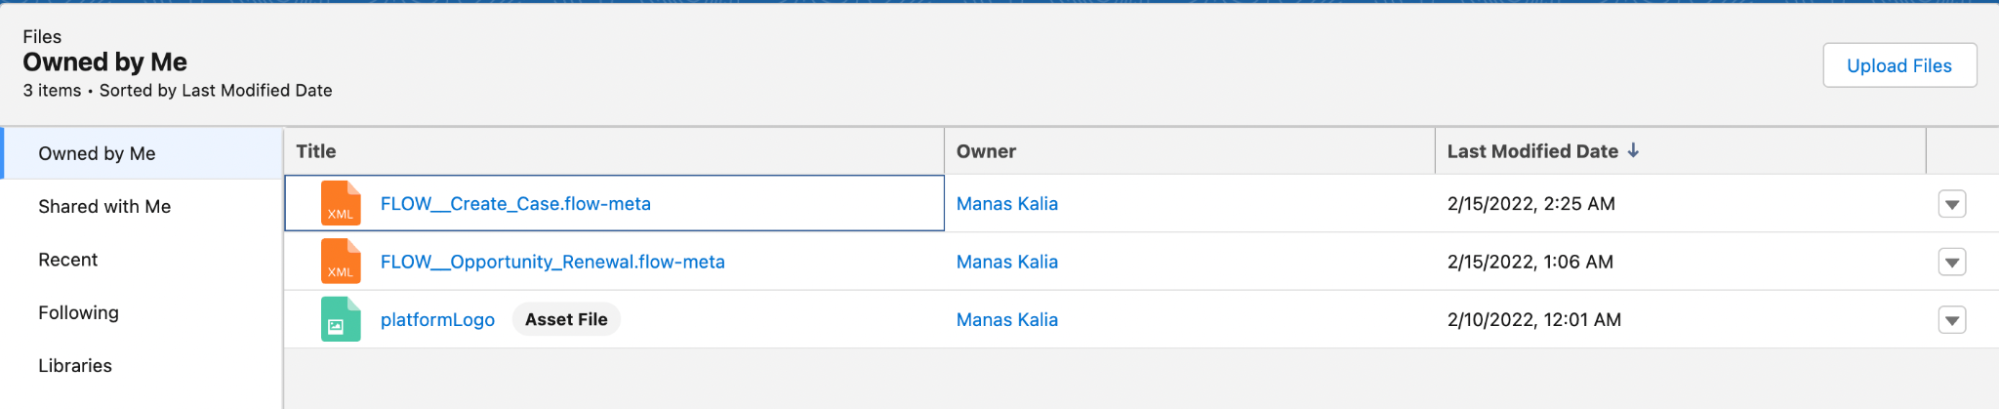
The flow files can be downloaded from here and saved on your desktop, and the export part is done.
Implementing the Import:
This is done by logging into the new Org where the flow is needed and going to Setup -> Process Automation -> Flows, then selecting the Import/Export flow and running it. Here we will select the Import option.
And upload the flow we downloaded.
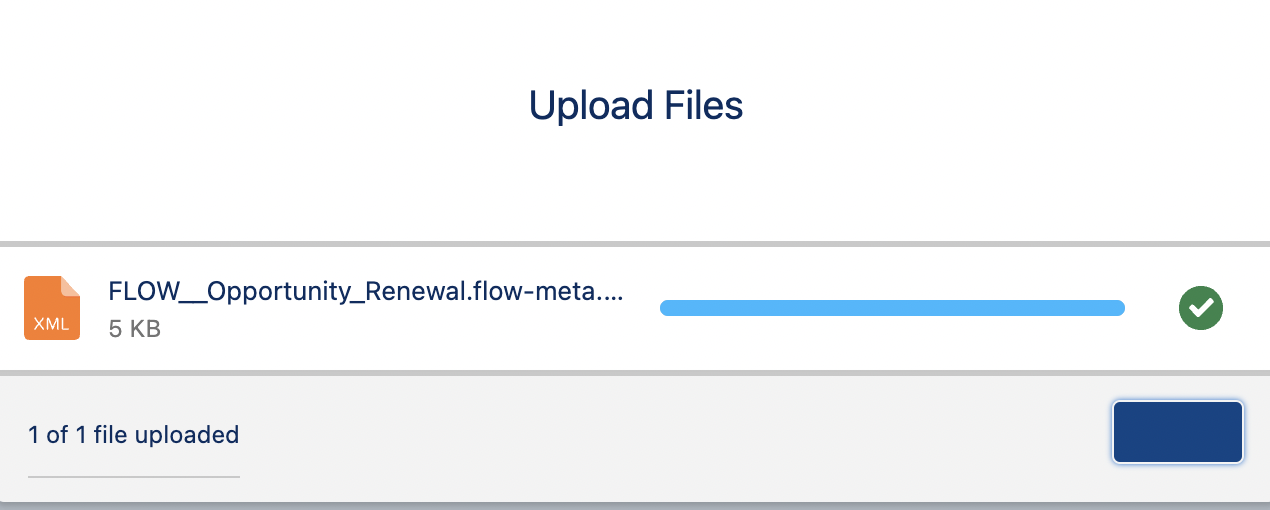
Once this is done a success message will be displayed.

Common Issues Encountered:
The first time the flow runs, it can have some issues which would cause the error message shown below to pop up.
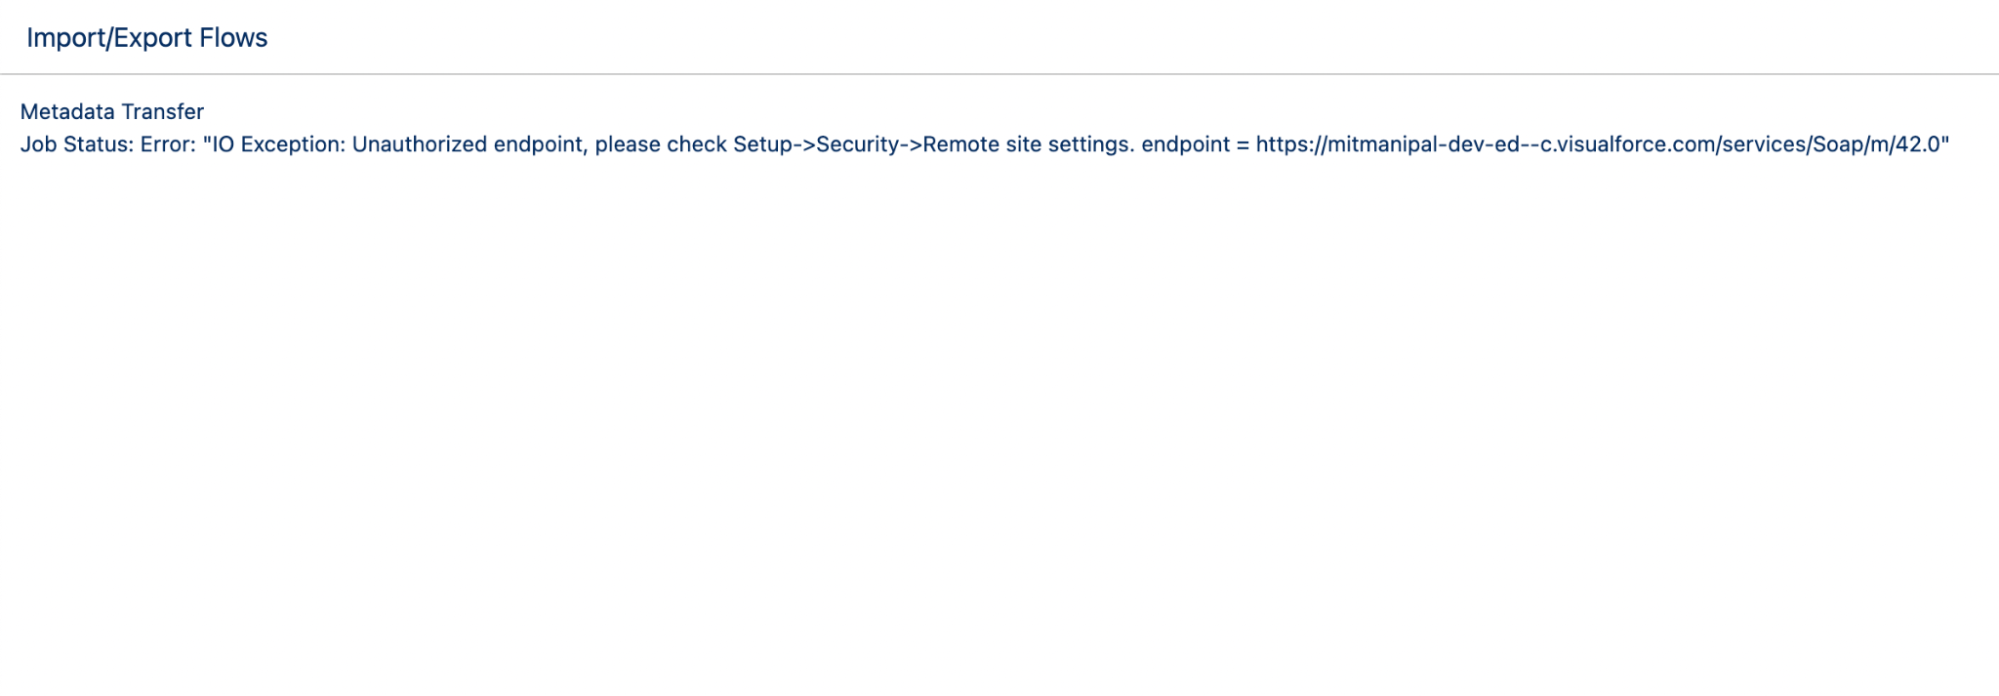
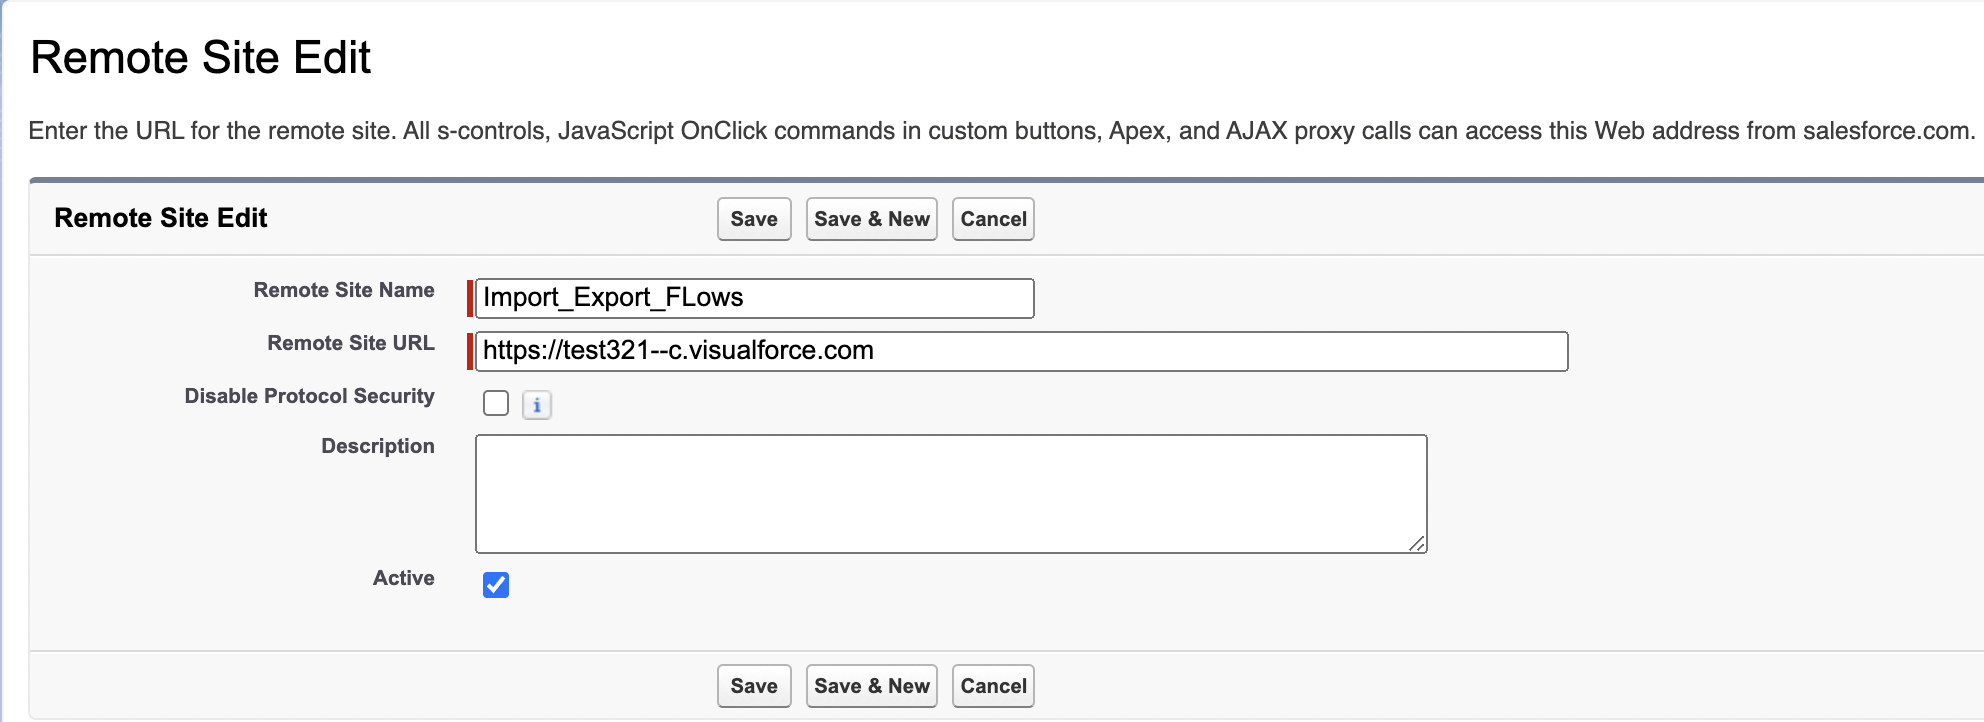
This is due to the user not having the correct Remote Site Settings. This is resolved by copying the Endpoint URL listed in the error message. Then in Setup, we go to Remote Site Settings and create a new Remote Site where the Remote site URL would be the Endpoint URL copied from the error message.
Another common issue encountered is that all the components, objects, and fields available in the Source org have to be present in the same format in the Receiver org for the flow to be implemented.