For any business to grow, every Organization makes sure that the data (customer information, billing details, project details, private information) are updated in the system with 100% accuracy and in the most secure way possible.
While manually importing data into Data Extensions is useful for one-time tasks, organizations often need to automate data imports on a scheduled basis. Automation Studio in Salesforce Marketing Cloud enables marketers to automate processes such as file imports, data transformations, segmentation, and campaign execution. By configuring automated workflows, businesses can ensure that customer data is consistently updated without manual intervention.
In Salesforce Marketing Cloud data is stored either in the form of a ‘List’ or a ‘Data Extension’ (can be termed as a table used to store data).
Let’s have a look into the data importing process into a Data Extension.
Here we have a test data extension named “Test_Journey” into which data will be imported.
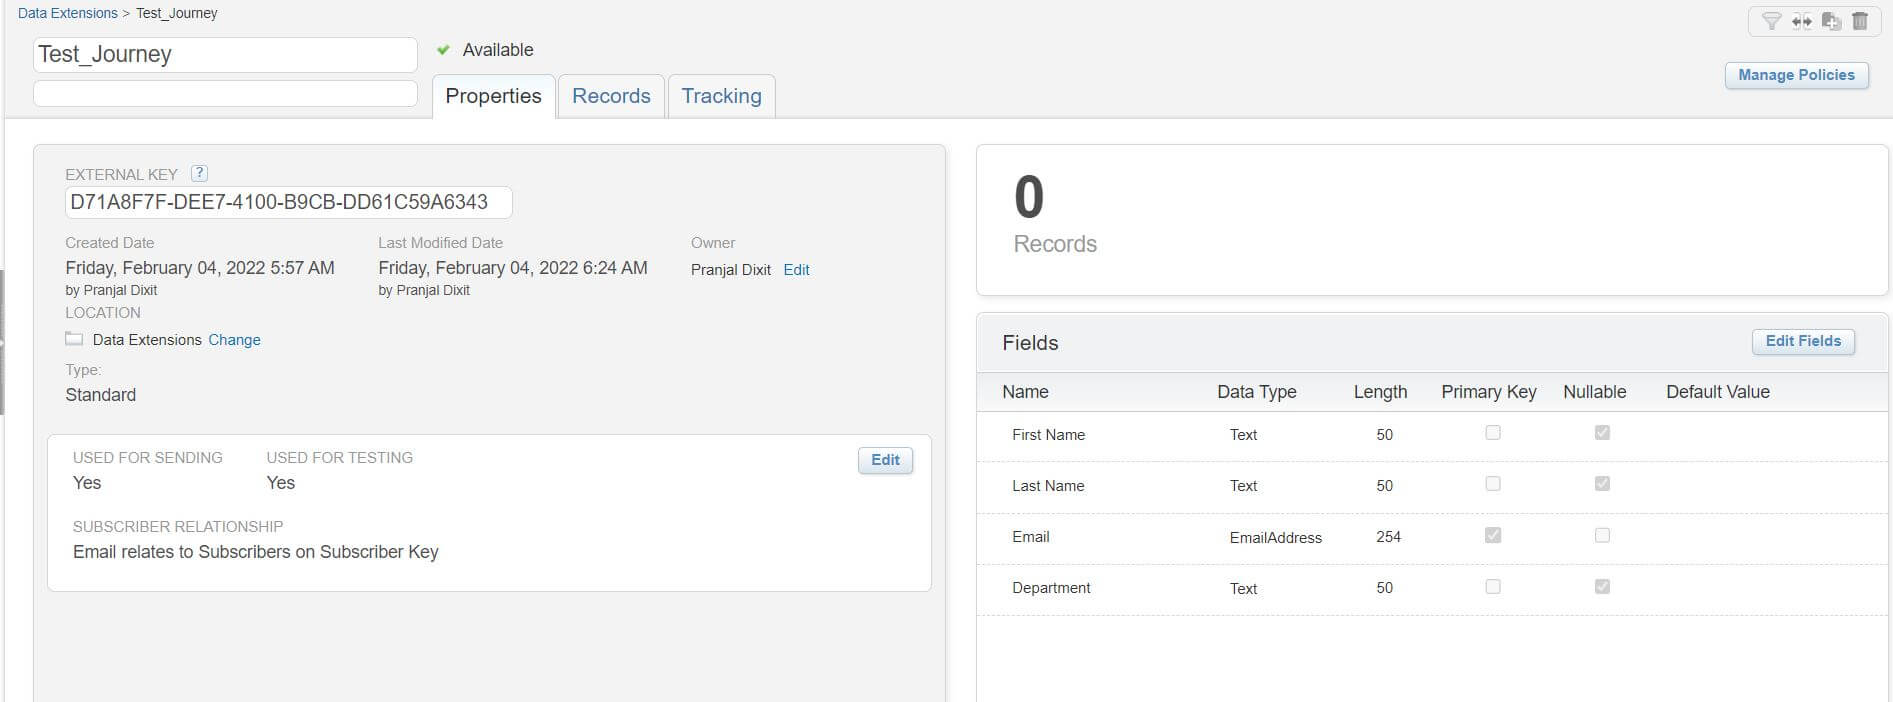
In the above image attached it can be clearly seen that there are 0 records as of now.
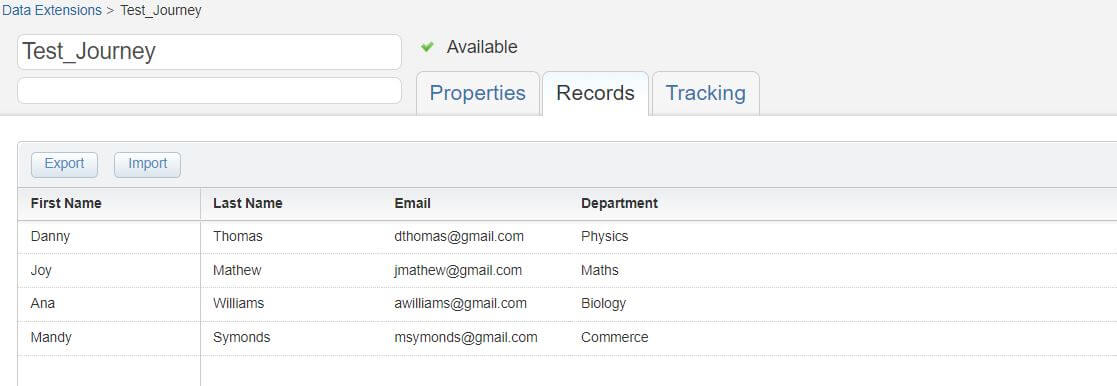
There are 3 tabs visible besides the name of the data extension ‘Properties’, ‘Records’ and ‘Tracking’.
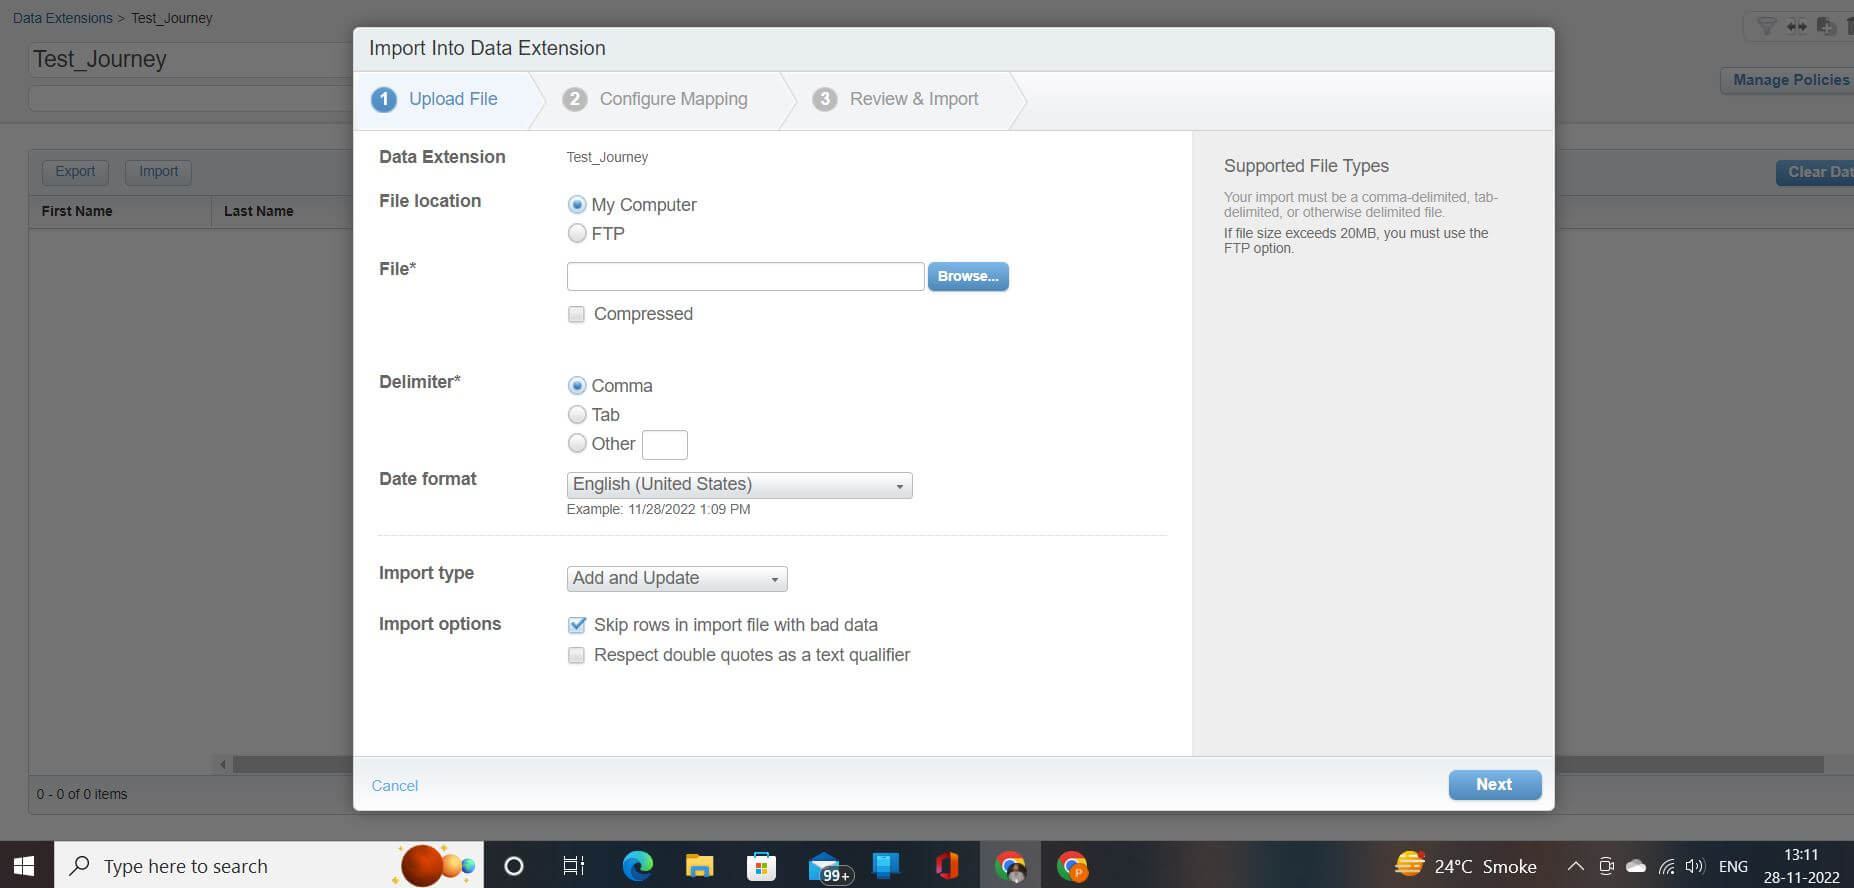
For performing import click on the ‘Records’ tab and a new page will appear shown in the below attached image.

There are 2 tabs available by the name ‘Export’ and ‘Import’.
‘Export’ tab is used when a user wants to perform exporting of the data from the data extension. Now, for performing importing of the data click on the ‘Import’ tab and a new screen as a pop-up will appear shown as below.
Once data is successfully imported into Data Extensions, it can be leveraged to create personalized marketing campaigns. In Salesforce Marketing Cloud, AMPscript
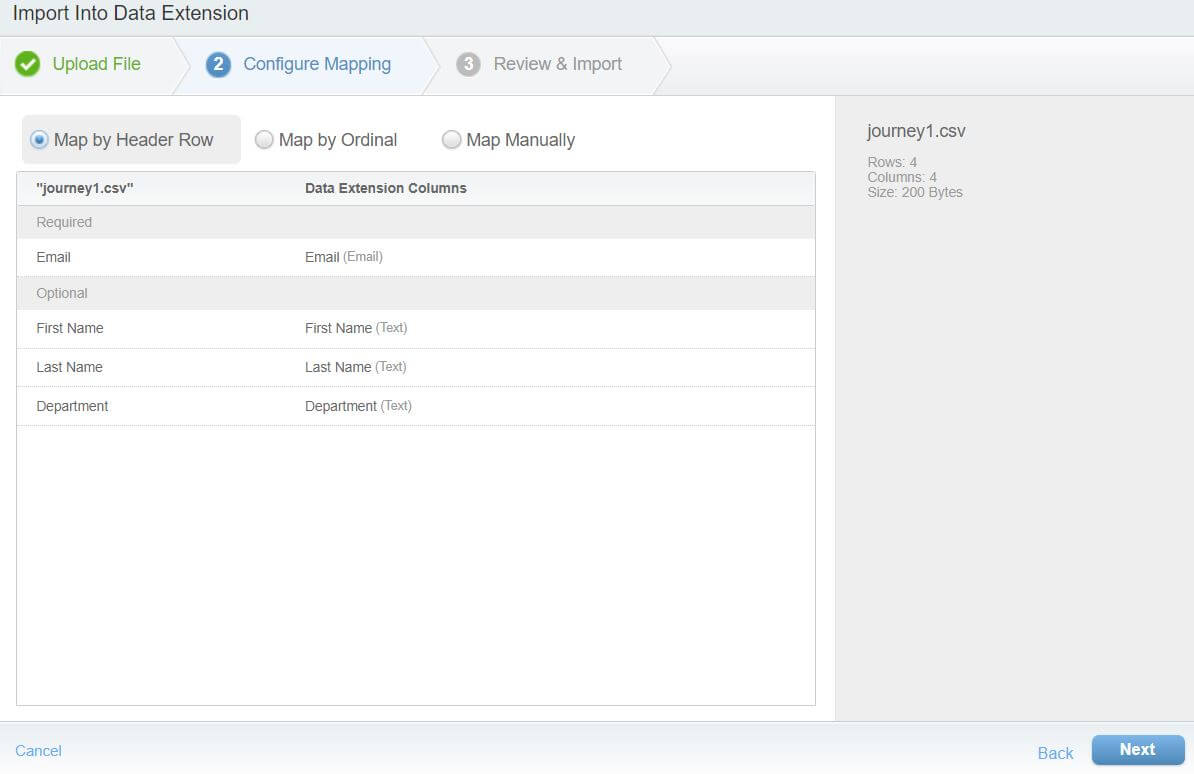
There are 3 tabs visible ‘Upload File’, ‘Configure Mapping’ and ‘Review & Import’.
1. Upload File: This option allows a user to upload a file where certain details need to be selected as per the requirement.
- Data Extension - It automatically shows the name of the data extension where the data needs to be added.
- File Location - This suggests and allows a user to select the location from where file would be picked for uploading purpose.
Two locations available are:
- My Computer: File is selected from any specified location from a user’s system.
- FTP: The file name needs to be entered which will be searched by the system.
- Delimiter - It suggests formatting (Comma, Tab, Other) of the file.
- Date Format - It allows a user to select date format as per the requirement.
- Import type - It suggests the method (Add and Update, Add Only, Update Only, Overwrite) of importing a file.
- Import options - Two options available under this point.
- Skip rows in import file with bad data
- Respect double quotes as a text qualifier (when “Respect double quotes” is selected as a text qualifier then, the system treats the data contained within double quotes as text and does not process any delimiter contained within those quotes.)
Respect double quotes as a text qualifier (when “Respect double quotes” is selected as a text qualifier then, the system treats the data contained within double quotes as text and does not process any delimiter contained within those quotes.)
NOTE: If file size exceeds 20MB, a user must use the FTP option.
In addition to manual file uploads and FTP-based imports, Salesforce Marketing Cloud also provides APIs that allow developers to programmatically import and manage data within Data Extensions. These APIs enable integration with external systems such as CRM platforms, data warehouses, and third-party applications, allowing organizations to synchronize customer data efficiently.
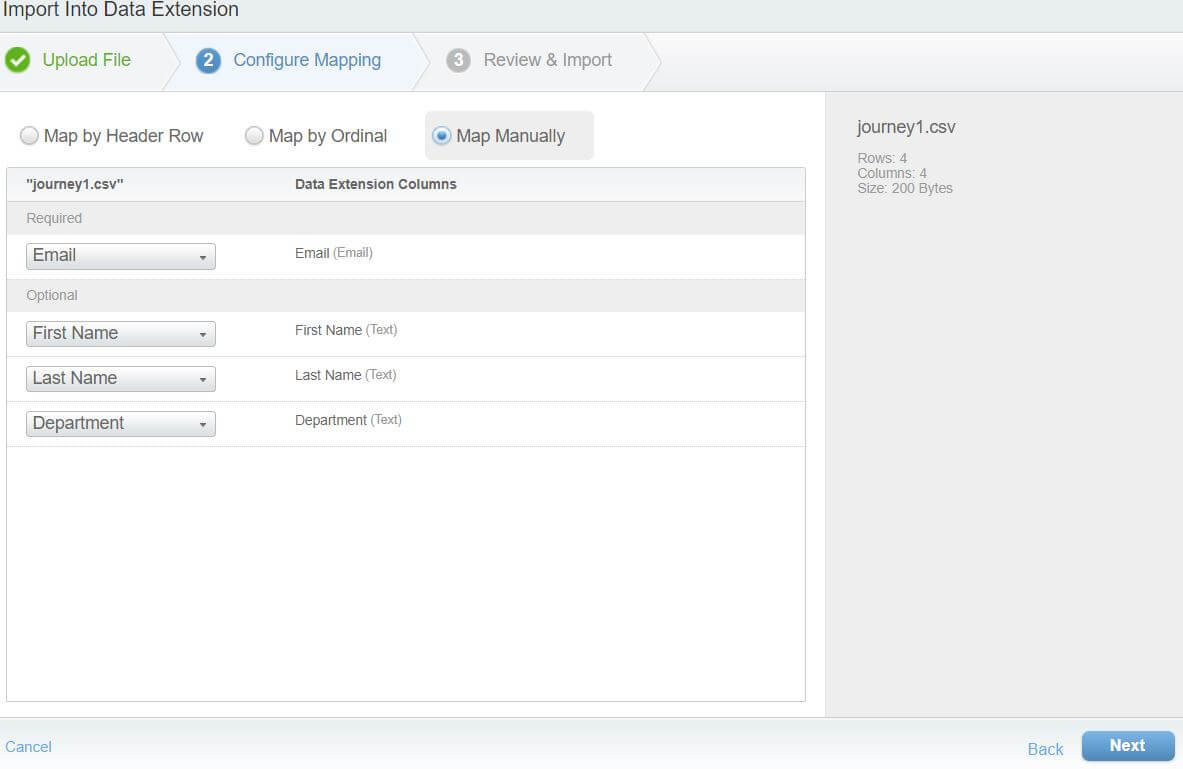
2) Configure Mapping: This option allows a user to select a mapping option of data from the csv file to the data extension.
Option selected will depend on the data type and size.
Map by Header Row: When this option is selected, import updates the columns in the data extension with the information in the import file by matching the column headings.
Map by Ordinal: When this option is selected, import updates the first column in the data extension with the first column in the import file, the second column with the second column and so on.
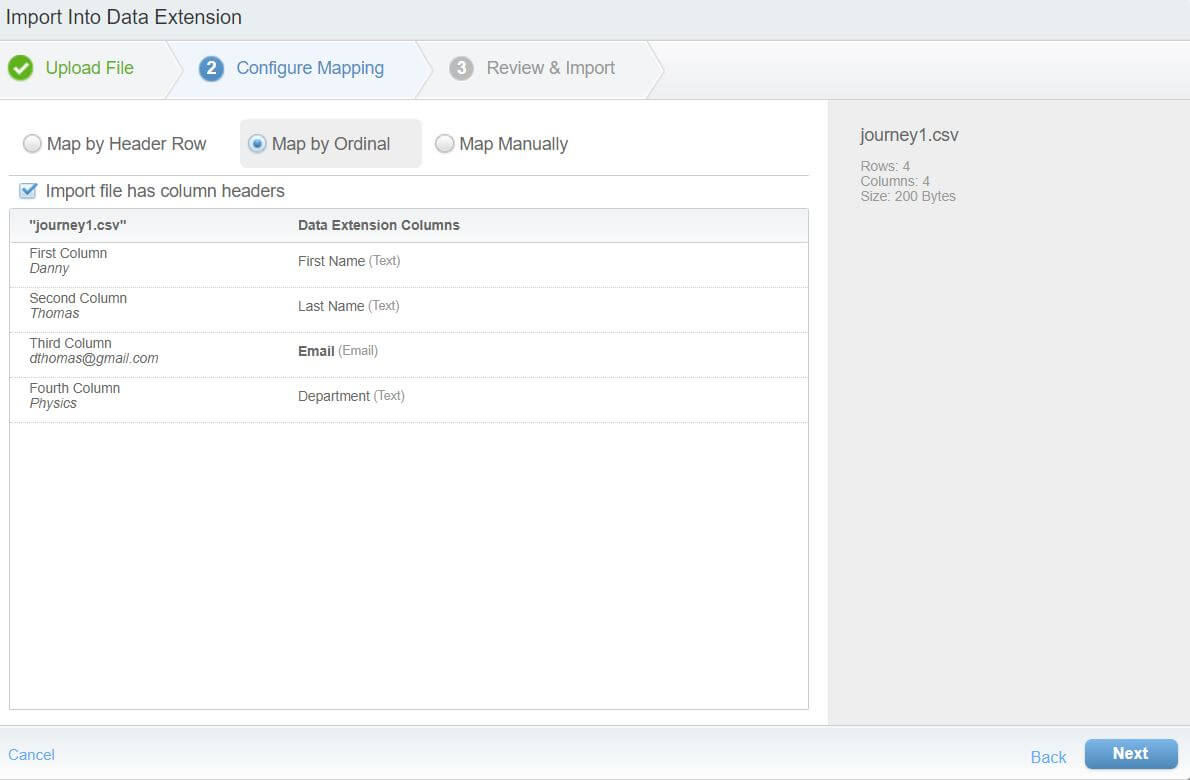
Map Manually: When this option is selected, the import file column that directly matches a data extension column maps automatically.
To manually map an import file column, select the column name in the drop-down next to the data extension column. An import file column can only be mapped to a single data extension column.
3) Review & Import: As the name suggests this is the final step where a user gives a final check by having a look at the summary of previous steps and options selected.
If any changes need to be made then the user can click on the ‘Back’ button to go to the previous steps and accordingly make the changes.
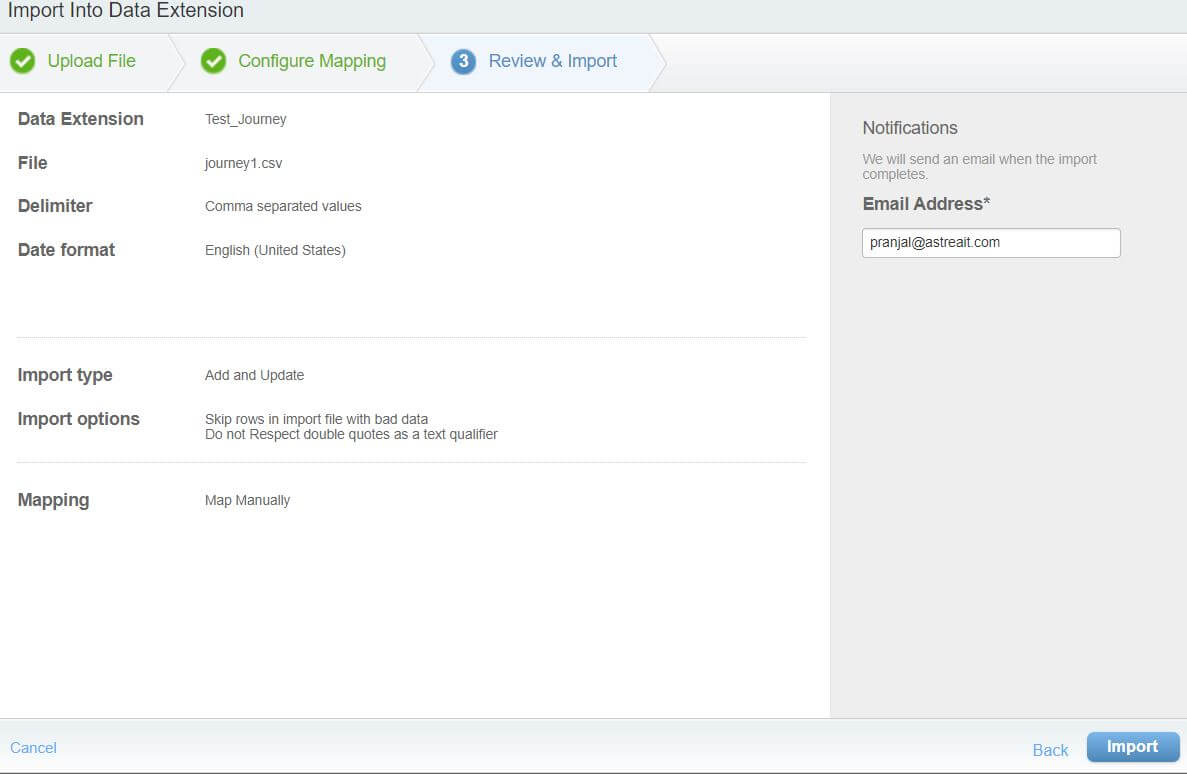
Email address has to be entered to receive the import notification. Notification will be sent to the email every time containing import results whenever an import is performed no matter if the import is successful or not.
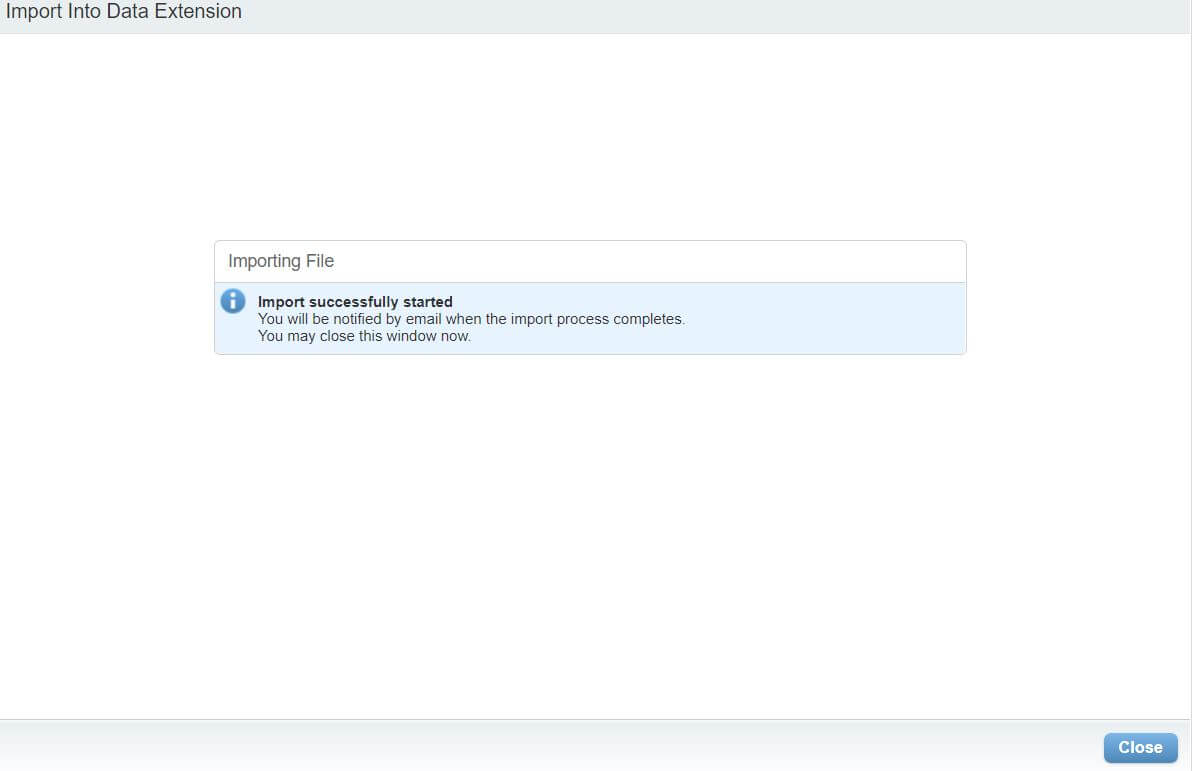
Once the import starts it will show a notification on the next window.
Since the import is done let’s have a look into the notification email received.
As mentioned earlier, the result of the import will be sent to the email in both the cases (import is successful or failed).
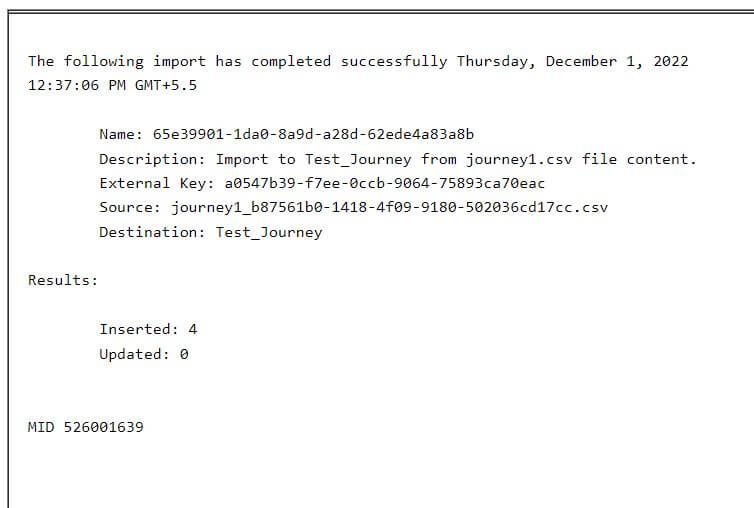
The above image is of the notification email received for the import performed.
From the result received it can be clearly seen that the import was successful and the inserted result is showing as 4.
Salesforce Marketing Cloud offers a powerful platform for managing customer data, automating marketing campaigns, and delivering personalized customer experiences. Features such as Data Extensions, Automation Studio, AMPscript, and APIs allow businesses to build sophisticated marketing workflows and data-driven engagement strategies. To explore more tutorials, guides, and best practices related to Salesforce Marketing Cloud, visit our Salesforce Marketing Cloud page.
The above image attached shows the records imported into the data extension.