If you ever tried Creating a recruiting website or Publishing a catalogue of products to a public site. You are aware of the process where you were supposed to do loads and loads of work from setting up a Web Server to programming your pages for data validation. But Salesforce Sites Service helps us to create public applications integrated with our Salesforce organization in an easy manner. Various Advantages of using Salesforce Sites include:
- Personalized Site URLA
- Automatic validation of data on collected Information
- User login without username and password
- No data integration issues as sites are hosted on the Lightning Platform
Now the question arises which organization you should use and what are the functionalities provided in each organization. We will also discuss the limitations of the Salesforce site in each Organization.
Salesforce Site Usage and Limits
The organization is an instance of the Editions provided by Salesforce and Salesforce Sites are websites created using the force.com Sites Service. So, we have to decide the Edition which is best suited for our conditions. At present, force.com Site service is included in the following Editions or Organizations: Enterprise Edition, Unlimited Edition, Developer Edition, and Force.com Free Edition Services.
If in a single calendar month your Organizations Monthly Page View reaches 300% or for 4 consecutive calendar months reaches 110%. Your Force.com Sites will be disabled until next month or until you purchase additional page views.
Note: The sum of page views for all force.com Sites in your organization and pages under Origin and Cache Servers determine excess monthly page views limit.
While Salesforce Sites allows organizations to build public-facing applications that expose Salesforce data through Visualforce pages and Lightning components, many businesses also use Salesforce Experience Cloud to build fully interactive portals and communities for customers, partners, and employees. Experience Cloud provides collaboration tools, knowledge sharing capabilities, and secure access to Salesforce data through branded community portals.
Table 1: Sites Allocation bIntroduction to y Edition
|
Edition |
Maximum Page Views per Organization |
Maximum Number of Sites per Domain |
Bandwidth Allocation per 24-Hour Period |
Service Request Time per 24-Hour Period |
|
Developer Edition |
As permitted by bandwidth and service request time limits |
1 |
500MB |
10 min |
|
Enterprise Edition |
500,000 |
25 |
1 GB for Sandbox 40 GB for Production |
30 min for Sandbox 60 hrs for production |
|
Unlimited Edition |
1,000,000 |
25 |
1 GB for sandbox 40 GB for production |
30 min for sandbox 60 hrs for production |
|
Force.com Free Edition |
250,000 |
1 |
10 GB |
60 hrs |
Step by Step Tutorial to Create Salesforce sites
Before you start creating a salesforce site you should know that restricted access on standard and custom objects and site visitors must be authenticated as portal users for any additional access. You should enable Salesforce Sites to avoid errors related to Visualforce pages and Apex classes that refer to a site.
Step: 1 Register Salesforce Site Domain
Setup >> Quick Find Box >> ‘Sites’ >> Register My Salesforce Site Domain as shown:
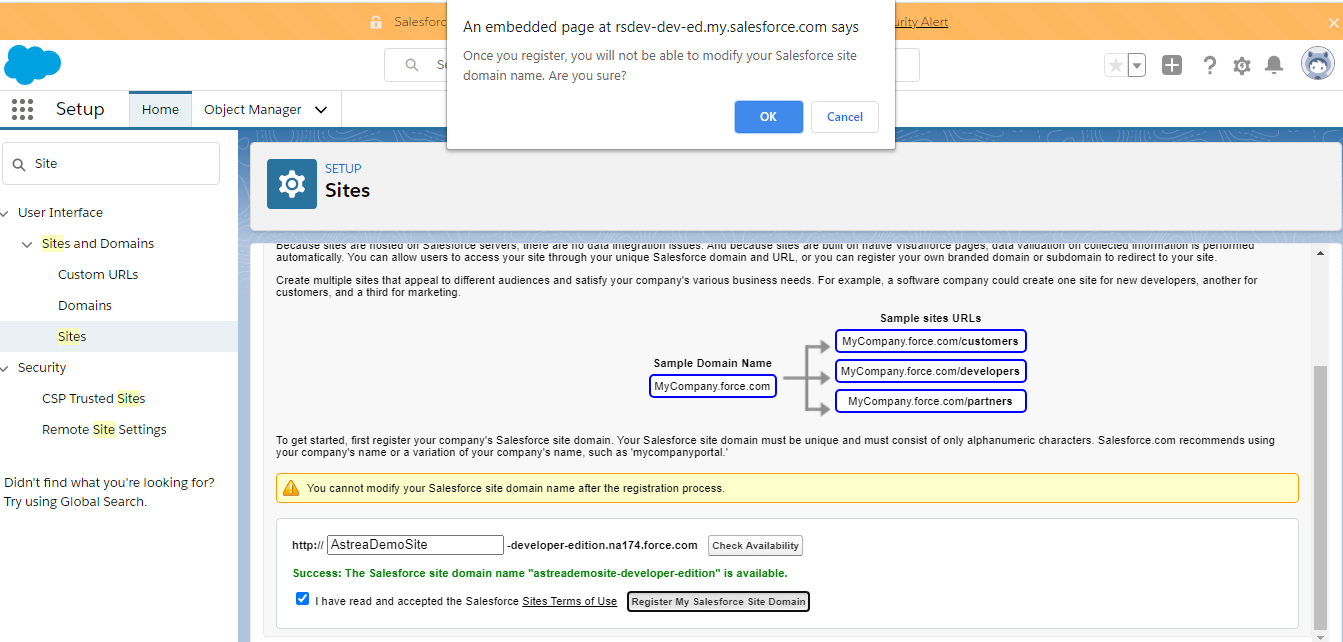
Note: The sub-domain prefix we add is case sensitive and limited to 22 characters for Developer Edition.
Step: 2 Assign Default Record Owner
Setup >> Quick Find Box >> Sites >> Enable ‘Assign new records created by Salesforce Sites guest users to a default owner in the org’.
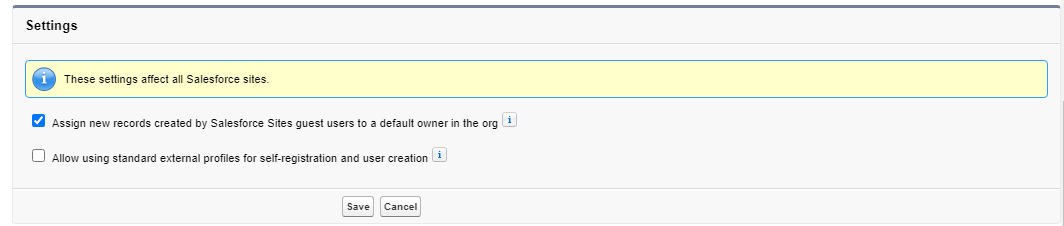
Click ‘Save’.
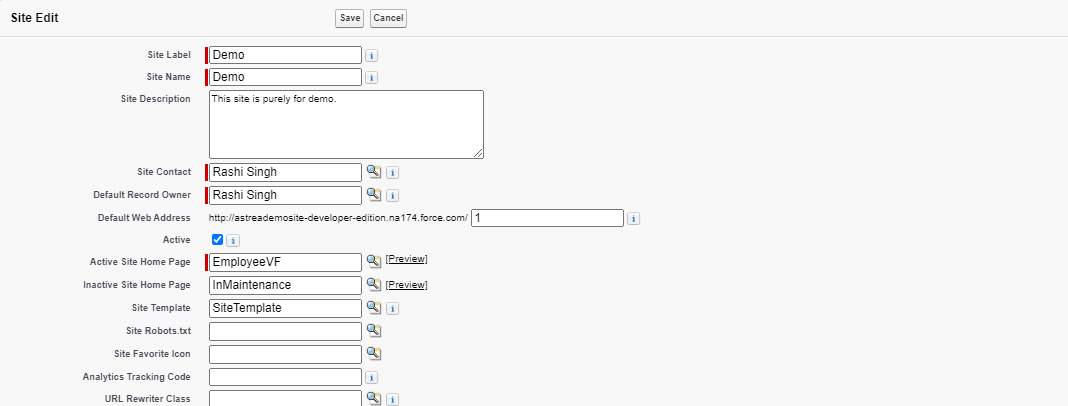
Step: 3 Create a site to Host Visualforce Pages
Click ‘New’.

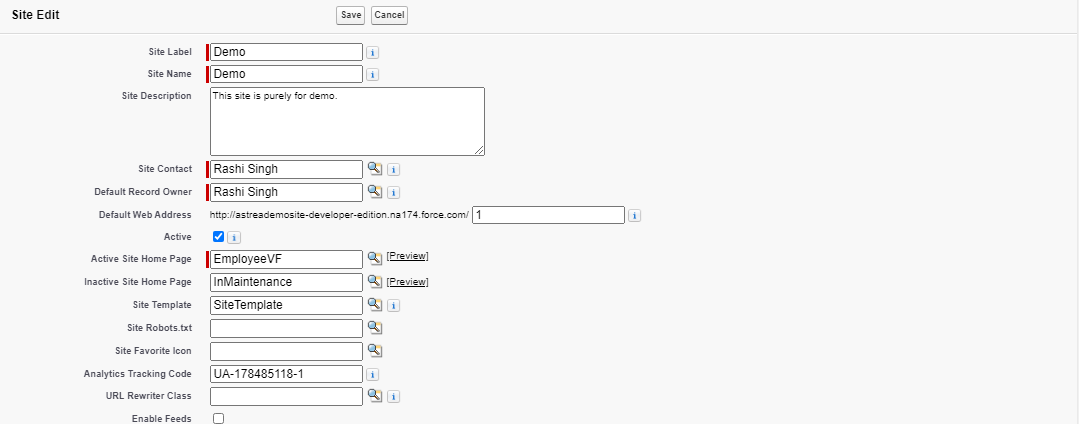
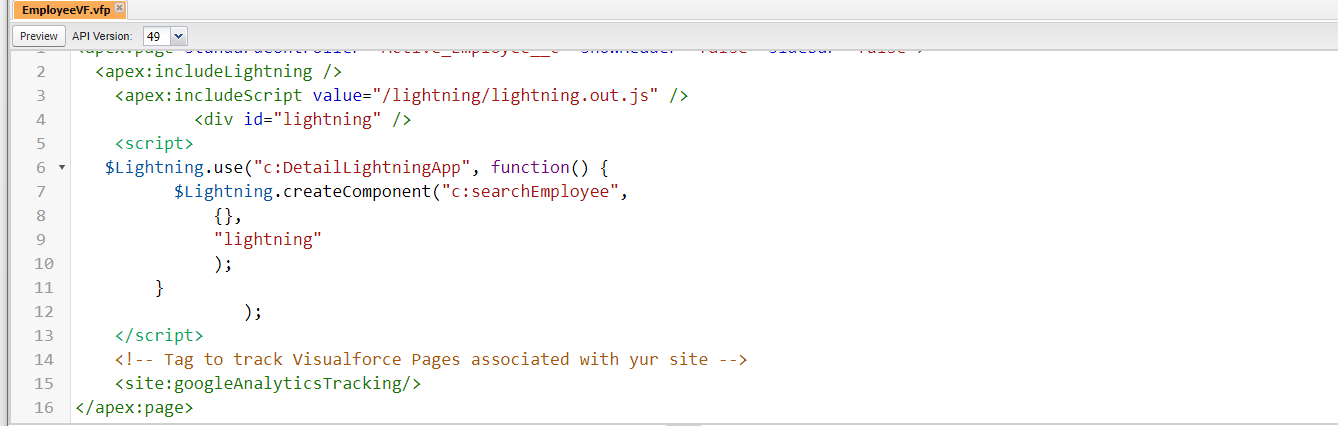
Fill in the form details for New Site as shown in Figure 4 and Figure 5. Here I have added EmployeeVF Visualforce Page as an Active Site Home Page. It is a time tracking Visualforce page which shows how many hours an Employee have worked daily and you can also update your daily working hours from here.
Before clicking on ‘Save’ make sure you have enabled ‘Require Secure Connections (HTTPS)’ and ‘Upgrade all requests to HTTPS’. You can enable other settings as per your requirement.
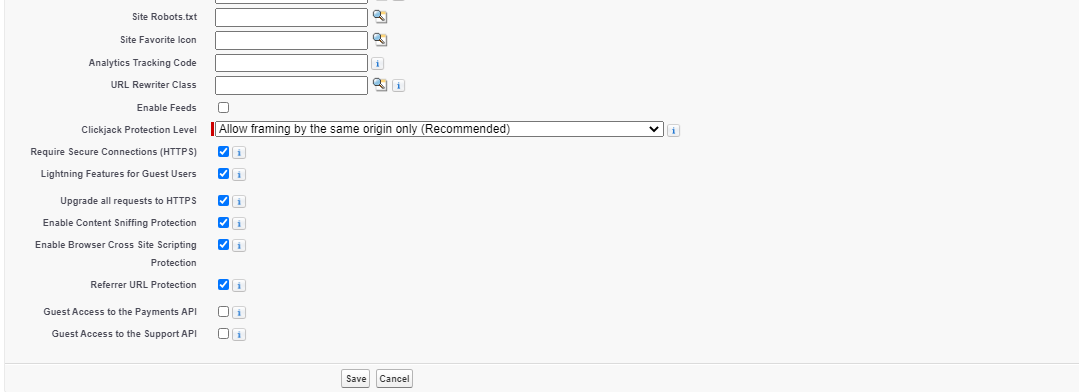
Click ‘Save’. The Functionality of some important features of Salesforce Sites is discussed below:
- Require Secure Connections (HTTPS): After enabling Require Secure Connection(HTTPS) all HTTP site to HTTPS.
- Lightning Features for Guest Users: It enhances security and restricts access to your organization.
- Upgrade all requests to HTTPS: All requests are automatically upgraded to HTTPS but before enabling this feature Require Secure C.
- Enable Content Sniffing Protection: Using this feature we can force the browser to not use the actual content of the response.
Step: 4 Activate your Salesforce Site
You can activate or deactivate your Salesforce site by clicking the ‘Activate/Deactivate’ button under the Action column.

Now, click on Site URL and you will be able to see your site. Here, we have built a very basic site for the Time Tracking system. This site displays the Time Entries when the employee enters the Employee ID.

After entering Employee ID you will be able to see all your working days and hours and can update today’s time entry by clicking on the ‘New Time Entry’ Button.
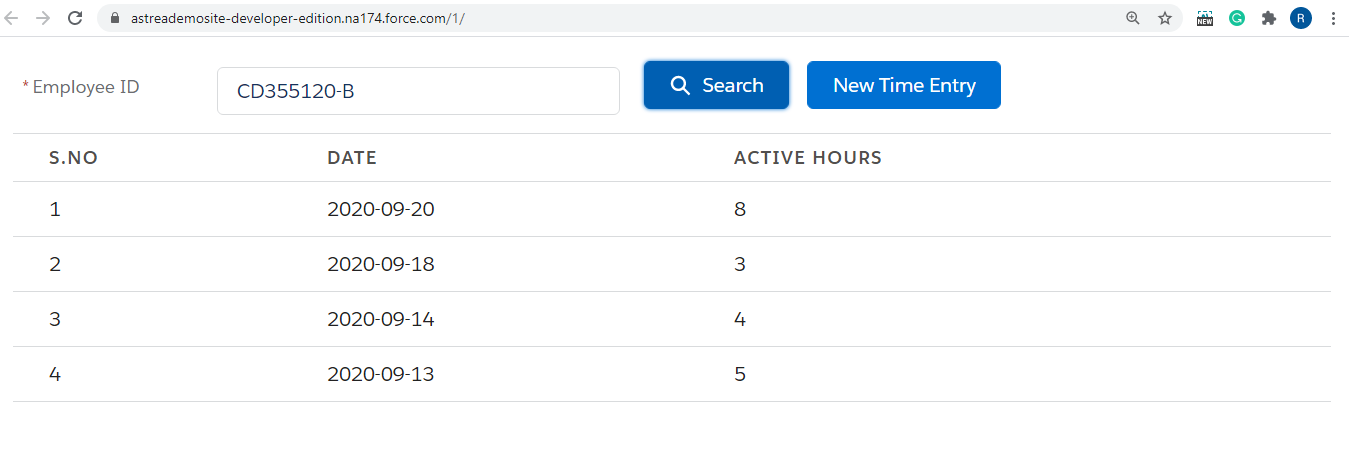
To add a new Time Entry record, you simply have to add Active Hours and your record will be saved under your employee ID for the current day. It is basically a Lightning Component and hosted on Visualforce Page which is then added to Salesforce Site.

Security Measures in Salesforce site
Both Site-Level Security and Organization-level Security play an important role in Salesforce Site. If you want to make your Salesforce Site available to the general public, you should be aware of how to keep your site secure along with providing facilities to your customers.
-
Four Condition based on Require Non-Secure Connections(HTTP) and Require Secure Connections(HTTPS) are:
- Both Require Non-Secure Connections(HTTP) and Require Secure Connections(HTTPS) are Not Enabled
Organization: Can use either HTTP or HTTPS
Sites: Uses HTTP for the post-login session - Enabled Require Non-Secure Connections(HTTP) and Disabled Require Secure Connections(HTTPS)
Organization: Use either HTTP or HTTPS
Sites:Uses HTTP for the post-login session - Disabled Require Non-Secure Connections(HTTP) and Enabled Require Secure Connections(HTTPS)
Organization: Uses HTTPS
Sites: Uses HTTPS for the post-login session - Enabled Require Non-Secure Connections(HTTP) and Enabled Require Secure Connections(HTTPS)
Organization: Uses HTTPS
Sites: Uses HTTPS for the post-login session
-
Few points to keep in mind while adding security to your Salesforce Site are
- Logged in users are not affected until the next login even after changing HTTP to HTTPS.
- Valid secure.force.com SSL certificates for accessing sites using HTTPS are only held by production organizations.
- ‘refURL’ URL parameter has no effect if HTTP or HTTPS has been set for the site.
Track Salesforce Site with Google Analytics
Google Analytics is a powerful tool to track your site's progress and Salesforce Sites provides integration with Google Analytics. Step by Step Procedure to Track a Salesforce Site using Google Analytics:
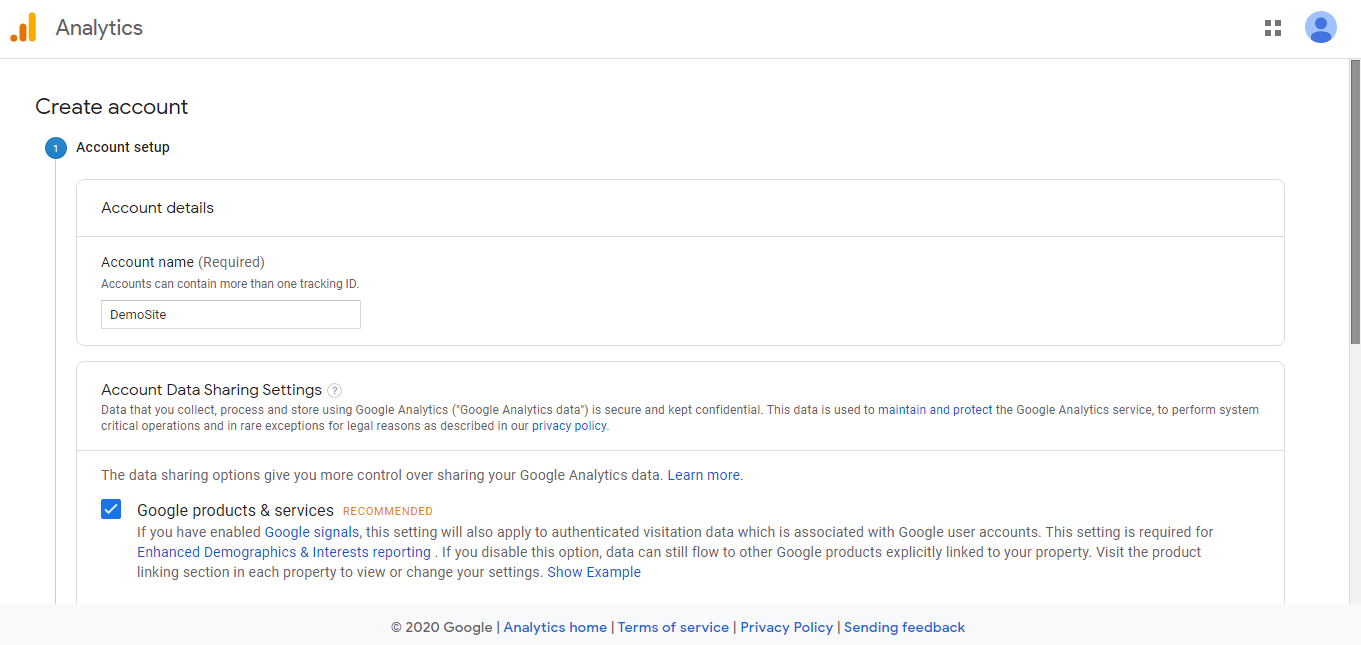
Step: 1 Sign up at Google Analytics and create an account.
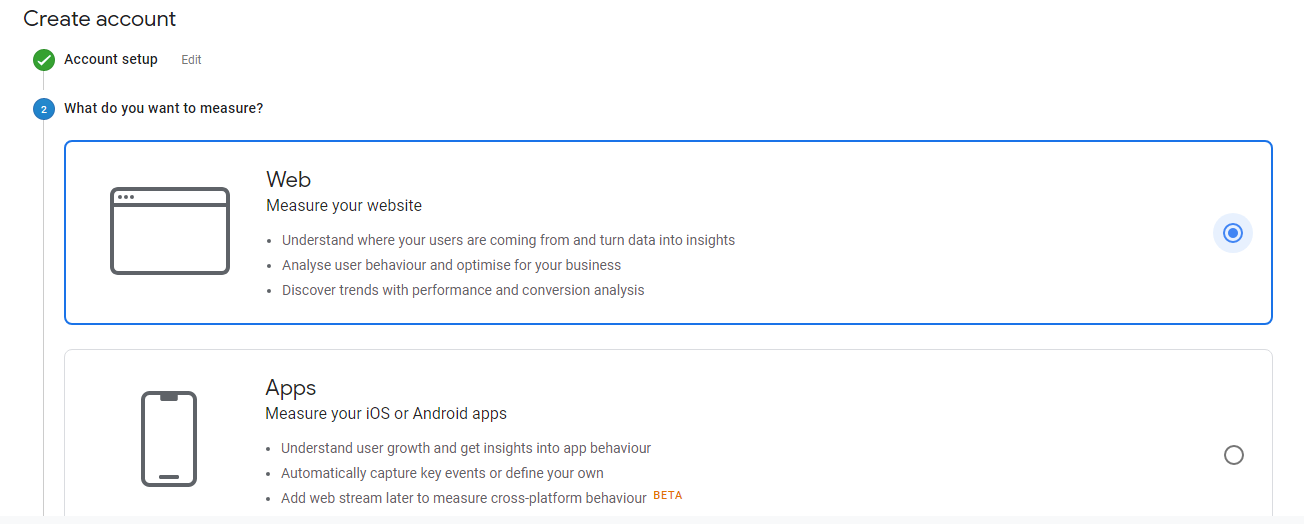
Step: 2 Select if you want to measure a website, an application, or both.
Step: 3 After adding all Property details, enter the URL for the site you want to track.

Step: 4 After agreeing to the terms of service agreement, copy ‘Web Property ID’ from tracking status information of Google Analytics.
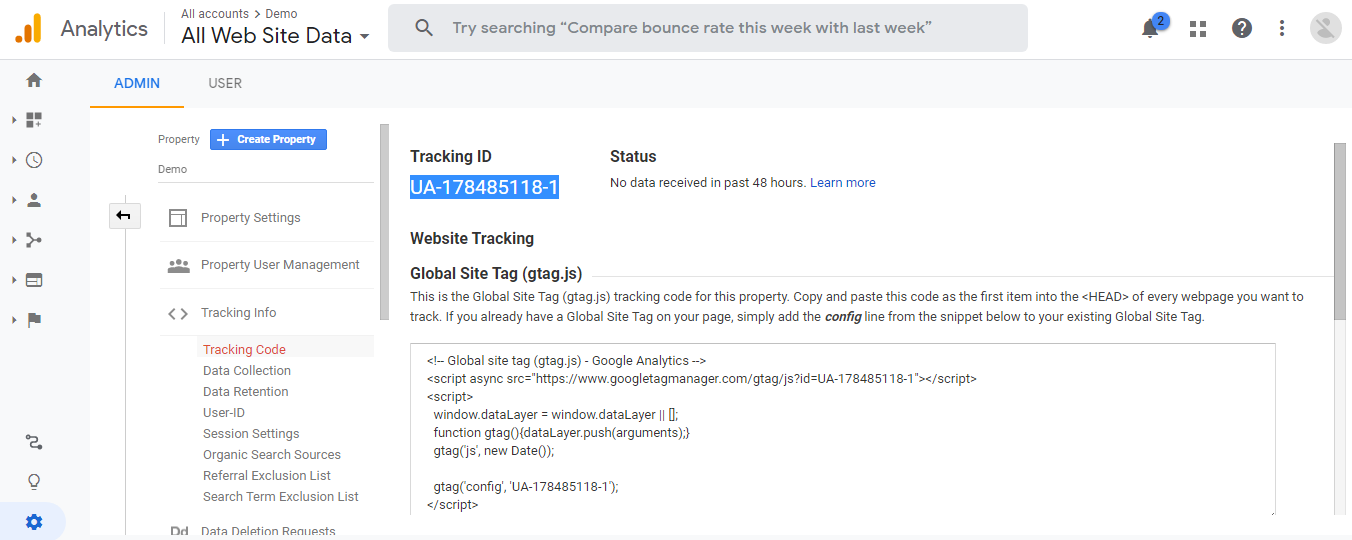
Step: 5 Open Site Edit Page and paste the Id into the Analytics Tracking Code field and Click ‘Save’.
Step: 6 Add
‘
tag at the bottom of the Visualforce page you want to track.
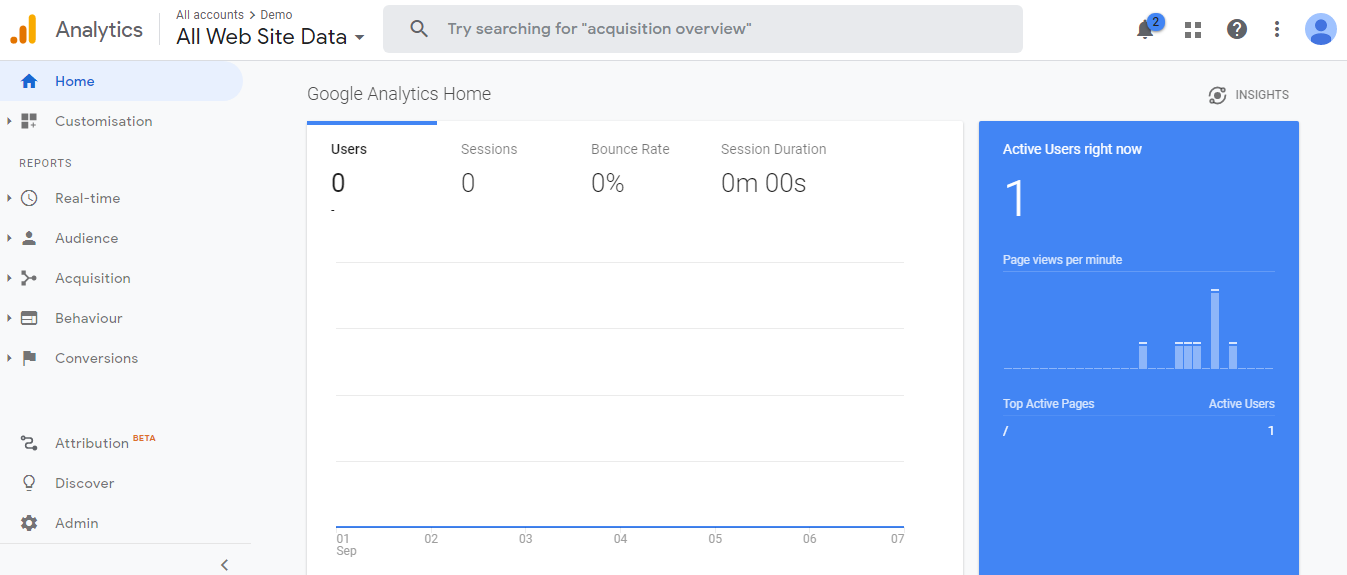
Step: 7 Go to the homepage of Google Analytics and you can all details of your Salesforce sites like Number of page views, average time spent, and more, as shown:
When creating external portals or community websites, design and branding play a critical role in delivering a seamless user experience. While Salesforce Sites allows developers to build custom web pages using Visualforce and Lightning components, Salesforce Experience Cloud provides standard themes and templates that help organizations quickly build visually appealing community portals with consistent branding and responsive layouts.
Conclusion
Salesforce Site is a powerful Web Content Management System whose features vary depending on whether you are a site administrator, designer, or contributor. Features like Sites Usage Reporting Managed Package can help Site Administrators and Designers to add features after analyzing monthly site activity. You can even decide which sites are Google Bots allowed to visit by creating a custom robots.txt file. Salesforce Site provides an environment to create a pixel-perfect custom website and the power to control what your contributors can do with the help of Site.com Studio.
- Salesforce Documentation: Salesforce Site Implementation Guide
- Salesforce Help: Creating a Site.com Site
- Salesforce Help: Planning and Implementing a Site.com Website
- Salesforce Help: Create and Edit Salesforce Sites
Salesforce provides multiple tools to build digital experiences for customers, partners, and employees. From public websites created using Salesforce Sites to fully interactive community portals built with Salesforce Experience Cloud, organizations can design scalable platforms tailored to their needs. Understanding how these technologies work together enables businesses to deliver seamless digital experiences. To explore more tutorials, implementation guides, and best practices related to Salesforce communities and portals, visit our Communities Expertise page.
For any query on Salesforce Sites, contact support@astreait.com