Auto-Response rules in Salesforce make it possible to send an automatic email response to a lead or case based on the record’s attributes. A Salesforce administrator can send an automatic reply to the customers to assure them that someone from your company has acknowledged their query.
You can create as many auto-response rules as you want based on any attribute of the incoming lead or case, but only one rule for the leads and one for cases can be active at a time.
From the Activity History related list, your team can check the email responses for the leads or contacts and can check the Email related list for the cases.

You can generate an auto-response rule for the leads received through the Web-to-Lead form and for the cases seize through the following ways:-
- Self-Service portal
- Customer Portal
- Web-to-Case form
- Email-to-Case message
- On-Demand Email-to-Case message
Also, the case auto-response rules are even available in the Essentials edition.
Steps to create Auto-Response Rules
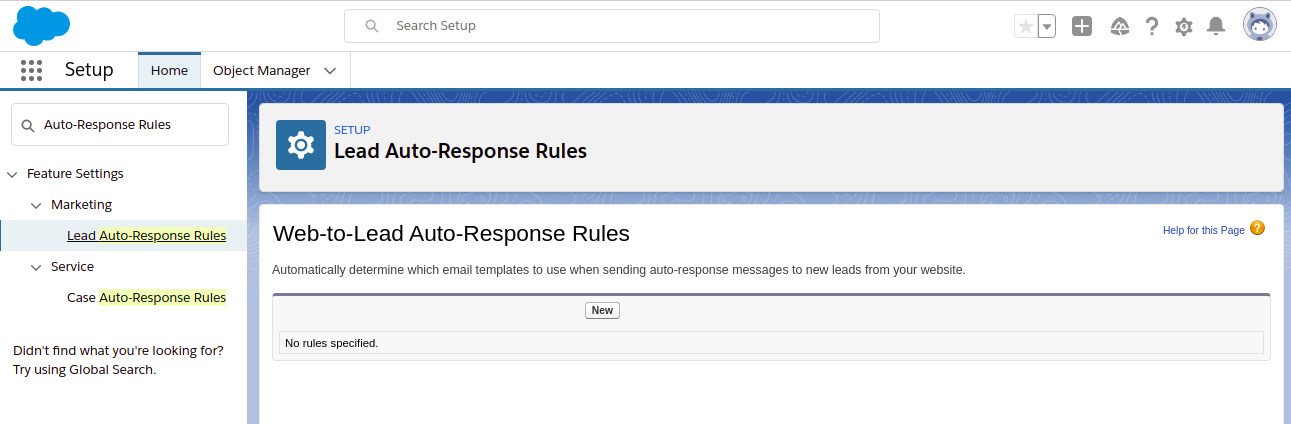
If you want to fabricate a Lead Auto-Response Rule, then Go to Setup, write Auto-Response Rules in the Quick Find box, and then select Lead Auto-Response Rules.
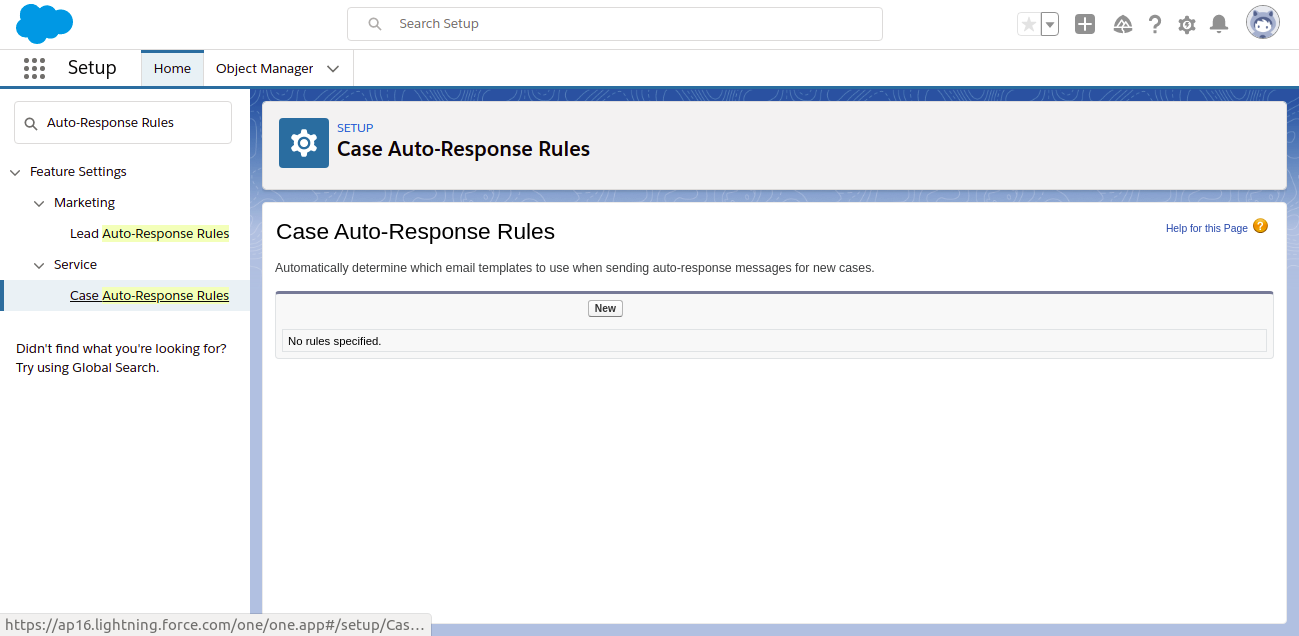
Similarly, If you want to create a Case Auto-Response Rule, then Go to Setup, enter Auto-Response Rules in the Quick Find box and then select Case Auto-Response Rules.
Now follow the below-mentioned steps on the Auto-Response Rules page:-
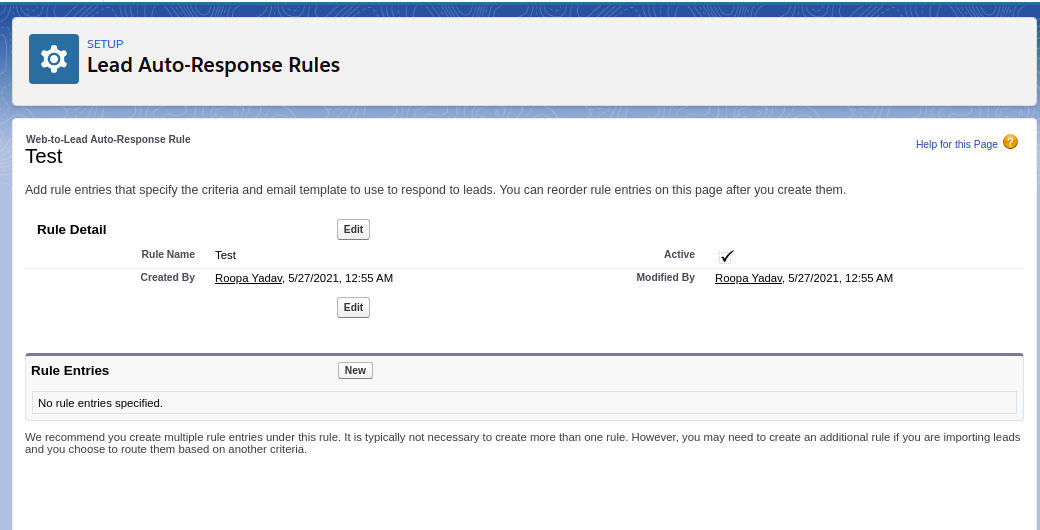
Step 1: Click on the New button.
Step 2: Enter the rule name for the auto-response rules.
Step 3: Select Active, to activate the rule.
Step 4: Click Save.

Step 5: Create rule entries
Ready to Create Auto-Response Rule Entries
After creating Auto-Response rules in Salesforce, follow the below-mentioned steps to create Auto-Response rule entries in Salesforce.
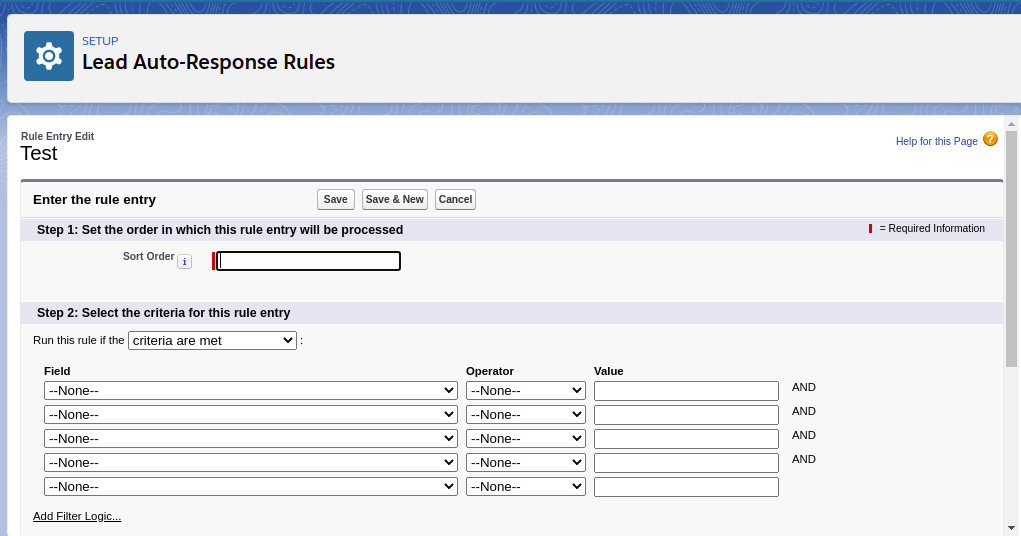
Step 1: Press the New Key from the Rule Detail page.
Step 2: Insert a number to specify in which order the entry will be processed.
- The rule processes the entries in the above-defined order. The rule stops processing at the first matching entry, and then Salesforce sends an email using the specified email template.
- If no auto-response rule applies, then Salesforce sends an email using the default template mentioned on Web-to-Case or Web-to-Lead page
Step 3: Insert the Rule criteria.
Step 4: Now, insert the name which you want to add in the Form line of the auto-response message.
Step 5: Also, insert an Email ID which you want to add in the Form line of the auto-response message. The specified email address should be either from your verified organization-wide email address or the email ID specified in your Salesforce user profile. And the email address should be different from the routing email address which is used for Email-to-Case.
Step 6: You can also add a reply-to address if you wish to.
Step 7: After it, select an email template.
Step 8: If you are creating the Response rule entry for the Email-to-Case then you need to select Send response to all recipients to send the auto-response messages to anyone included in the To and Cc fields in the original message.
Step 9: FInally, Save all the details and Go on.
For any query on Auto-Response Rules, contact support@astreait.com