Email-to-Case in Salesforce is a standard feature that automatically converts an email into a case. It also automatically populates some of the case information which in return saves the manual efforts.
Salesforce Email-to-Case is used when you have more than one support email address that agents handle manually. If your company has multiple support email addresses and processes then you can configure more than one Email-to-Case channel.
Apex eMail services were written in an earlier blog.
There are two ways to implement the Salesforce Email-to-Case technique.
- Email-to-Case - It uses an agent on the machine behind the company network firewall.
- On-Demand Email-to-Case - It uses the Apex email services to convert the email to the cases without any agent behind the company network firewall.
Email-to-Case:-
Email-to-Case resolves lots of customer issues. In Email-to-Case, Salesforce automatically creates the cases and also auto-populates their case fields when customers send mails to the email addresses which you have specified. The key points of the Email-to-Case are as follows:-
- The Email-to-Case can handle attachments of more than 10MB size.
- It maintains the traffic of the email within your firewall.
- It accepts emails larger than 25MB size including the header, message, and attachments.
- It requires an agent to be included behind the company network firewall.
- This also doesn’t contribute to API usage when creating cases.
On-Demand Email-to-Case: -
On-Demand Email-to-Case uses Apex Email Services which resolves the customer queries via email. This technique doesn't require Email-to-Case agent software. When customers send their query to the support email address then the Case will be generated automatically and Case fields will get populated. The key points of the Salesforce On-Demand Email-to-Case are as follows:-
- On-Demand Email-to-Case can only handle attachments upto 10MB in size.
- It can’t maintain the email traffic within the firewall.
- It can’t accept emails larger than 25MB.
- It is a simpler version of the Email-to-Case which doesn’t require an agent.
- This always contributes to API usage when creating cases.
That is enough of talking! Let’s learn how you can set up Email-to-Case in Salesforce.
Steps to setup Salesforce Email-to-Case:-
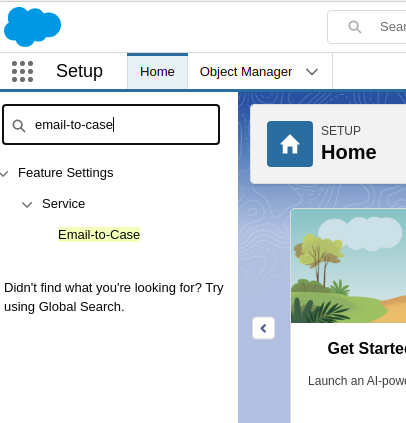
Step 1: From Setup, search Email-to-Case from the QuikFind box and then select Email-to-Case.
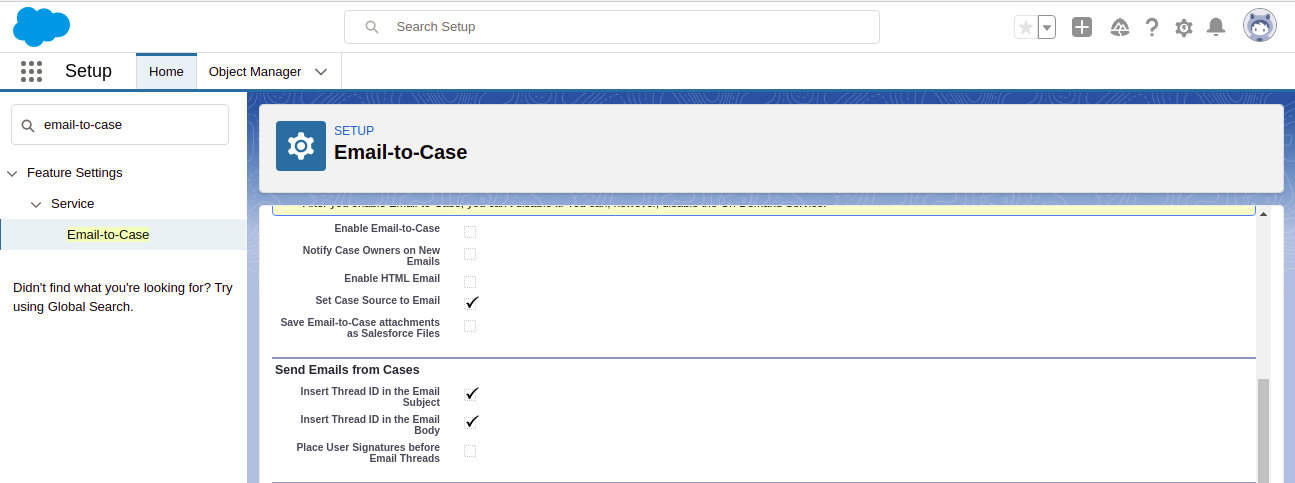
Step 2: Now Configure all of the required Email-to-Case settings.
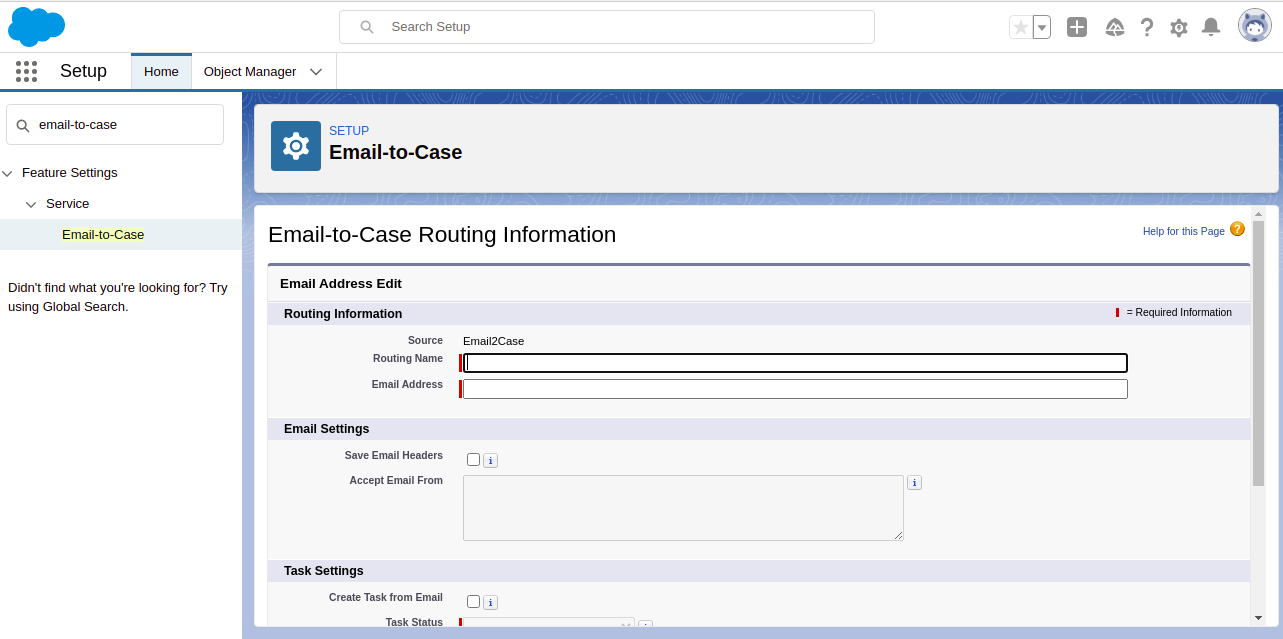
Step 3: After it configures the settings of the Routing Address by clicking on the New button.

Step 4: Test the email routing address by manually sending the emails to the specified address and verify whether the sent emails are being converted to the cases.
Step 5: Now add the email address which you configured to your company's support website. The customers will use that email address to submit the cases to the support team.
Step 6: Add the required Email Quick Actions to the Cases page layout.
Step 7: At last, it is optional that you can create the email templates which the agents will use while replying to the emails.
Steps to setup On-Demand Email-to-Case in Salesforce:-
Step 1: Firstly, you need to set the Default Case Owner & Automated Case Owner for your organization.
In most implementations, cases generated through Email-to-Case are assigned to a Queue rather than directly to an individual agent. Using queues helps distribute workload efficiently and ensures that new cases are visible to the appropriate support team.
Step 2: From Setup, search Email-to-Case from the QuikFind box and then select Email-to-Case.
Step 3: Now Configure all of the required Email-to-Case settings.
Step 4: Also, enable and configure the On-Demand Email-to-Case.
Step 5: Configure the settings of the Routing Address by clicking on the New button.
Step 6: Test the email routing address by manually sending the emails to the specified address and verify that the emails are being converted to the cases.
Step 7: Now add the email address which you’ve configured to your company's support website. The customers will use that email address to submit the cases to the support team.
Step 8: Add the required Email Quick Actions to the Cases page layout.
Step 9: At last, it is optional that you can create the email templates which the agents will use while replying to the emails.
*Note - Salesforce will automatically connect the contact and its associated account to the case if the from email address matches the email address from any of the contact record’s email address.
Voila! A case will be created when an email will be received from following the above steps.
Email-to-Case is just one of the many automation capabilities available within Salesforce Service Cloud. When combined with case assignment rules, queues, knowledge management, and Omni-Channel routing, it forms a powerful customer support ecosystem. To explore more Service Cloud features, best practices, and implementation strategies, visit our Service Cloud page.
Time to rejoice.
Reference:
https://help.salesforce.com/articleView?id=sf.setting_up_email-to-case.htm&type=5
For any query on Email-to-Case, contact support@astreait.com.