In today's digital age, providing exceptional customer support is paramount for businesses looking to thrive in a competitive marketplace. Salesforce, a leading customer relationship management (CRM) platform, offers a powerful tool called Web to Case, which streamlines the process of converting customer inquiries submitted through a website into support cases within Salesforce. In this article, we will explore the benefits of Web to Case and guide you through the process of setting it up in your Salesforce instance.
Web to Case is a feature that enables businesses to capture customer inquiries directly from their website and automatically convert them into support cases within Salesforce. This automation saves time, improves response times, and ensures that customer inquiries are promptly addressed by the appropriate support agents. Now, let's dive into the steps involved in setting up Web to Case in Salesforce:
While Web-to-Case captures customer inquiries directly from a website, many organizations also rely on Email-to-Case in Salesforce to manage support requests received via email. Using both Web-to-Case and Email-to-Case together allows businesses to offer multiple support channels while maintaining centralized case management.
Step 1: Enable Web to Case
To begin, you need to enable the Web to Case feature in your Salesforce organization. Follow these instructions:
- Log in to your Salesforce account with administrative privileges.
- Navigate to the Setup menu by clicking on the gear icon in the upper-right corner of the page.
- In the Setup menu, search for "Web to Case" in the Quick Find box and select "Web to Case" under the Case settings.
- Click on the "Enable Web-to-Case" checkbox to activate the feature.
- Save your changes.
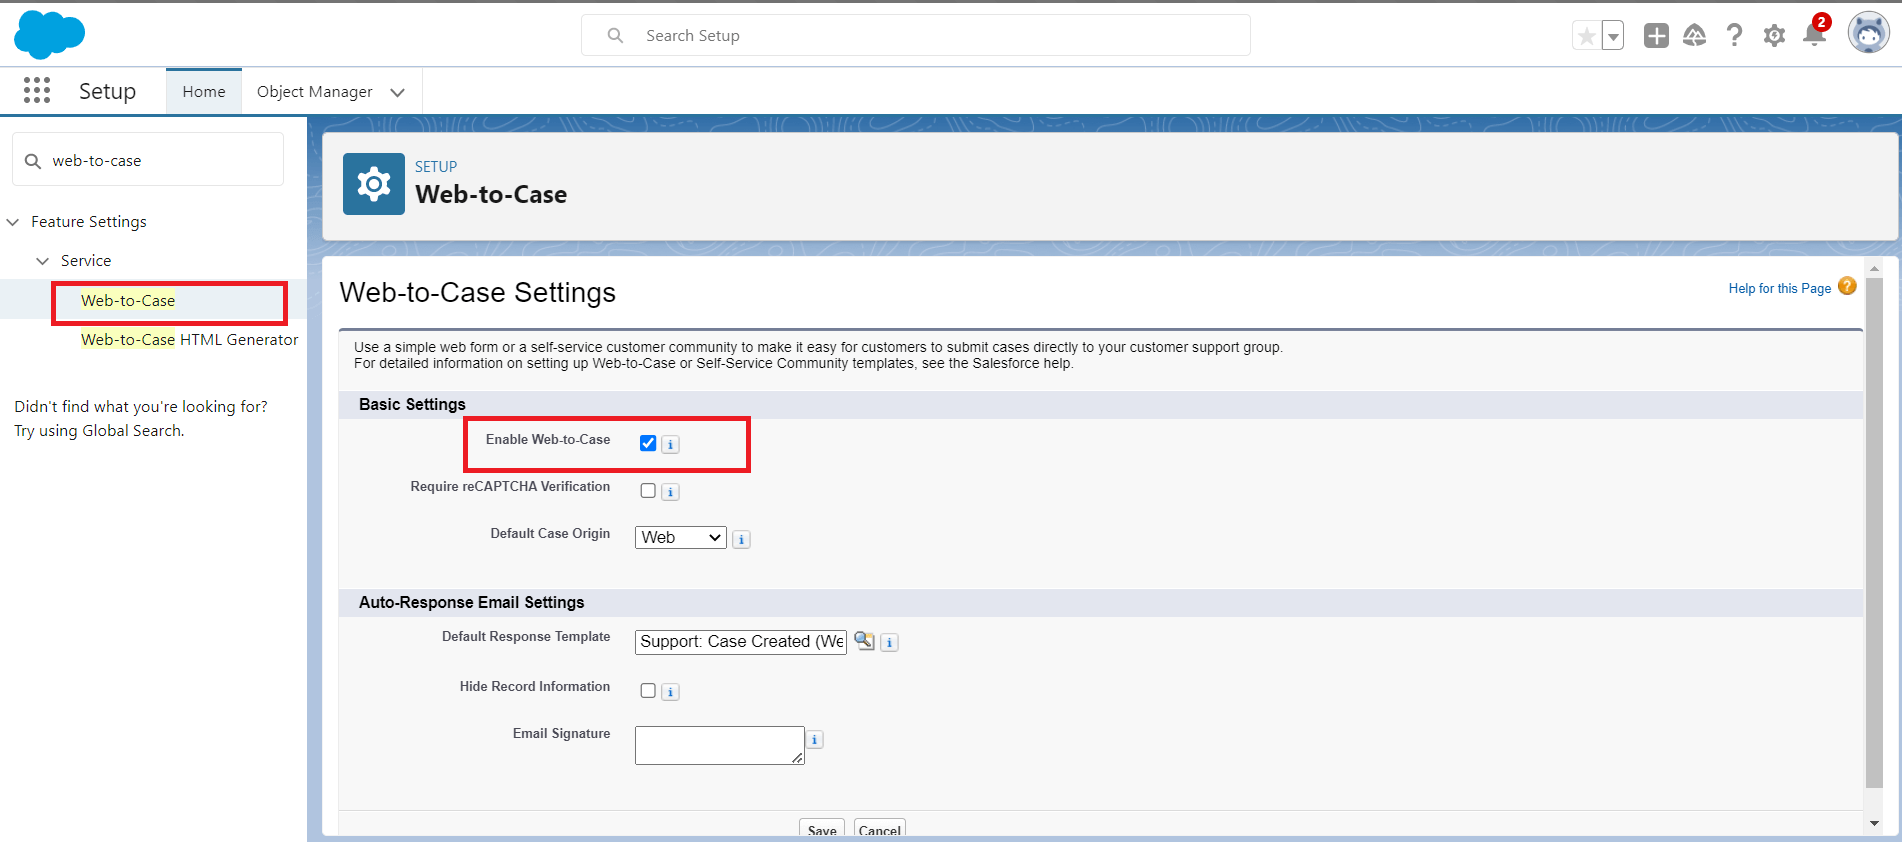
Figure 1: Enable Web-to-case
Step 2: Configure Web-to-Case HTML
Once Web to Case is enabled, you need to generate HTML code that will be placed on your website to capture customer inquiries. Follow these steps:
- In the Quick Find box, Search Web-to-Case HTML Generator click on the "Web-to-Case HTML Generator".
- Configure the settings based on your requirements, such as specifying the fields to be displayed on the web form and setting up validation rules.
- Select Visible in the Self-Service Portal checkbox to enter the URL to which the user will return.
- To provide security, one can add reCAPTCHA to the HTML code.
- Click on the "Generate" button to generate the HTML code.
-
Copy the generated HTML code and provide it to your web developer or add it to the appropriate webpage on your website where you want the customer inquiry form to be displayed.
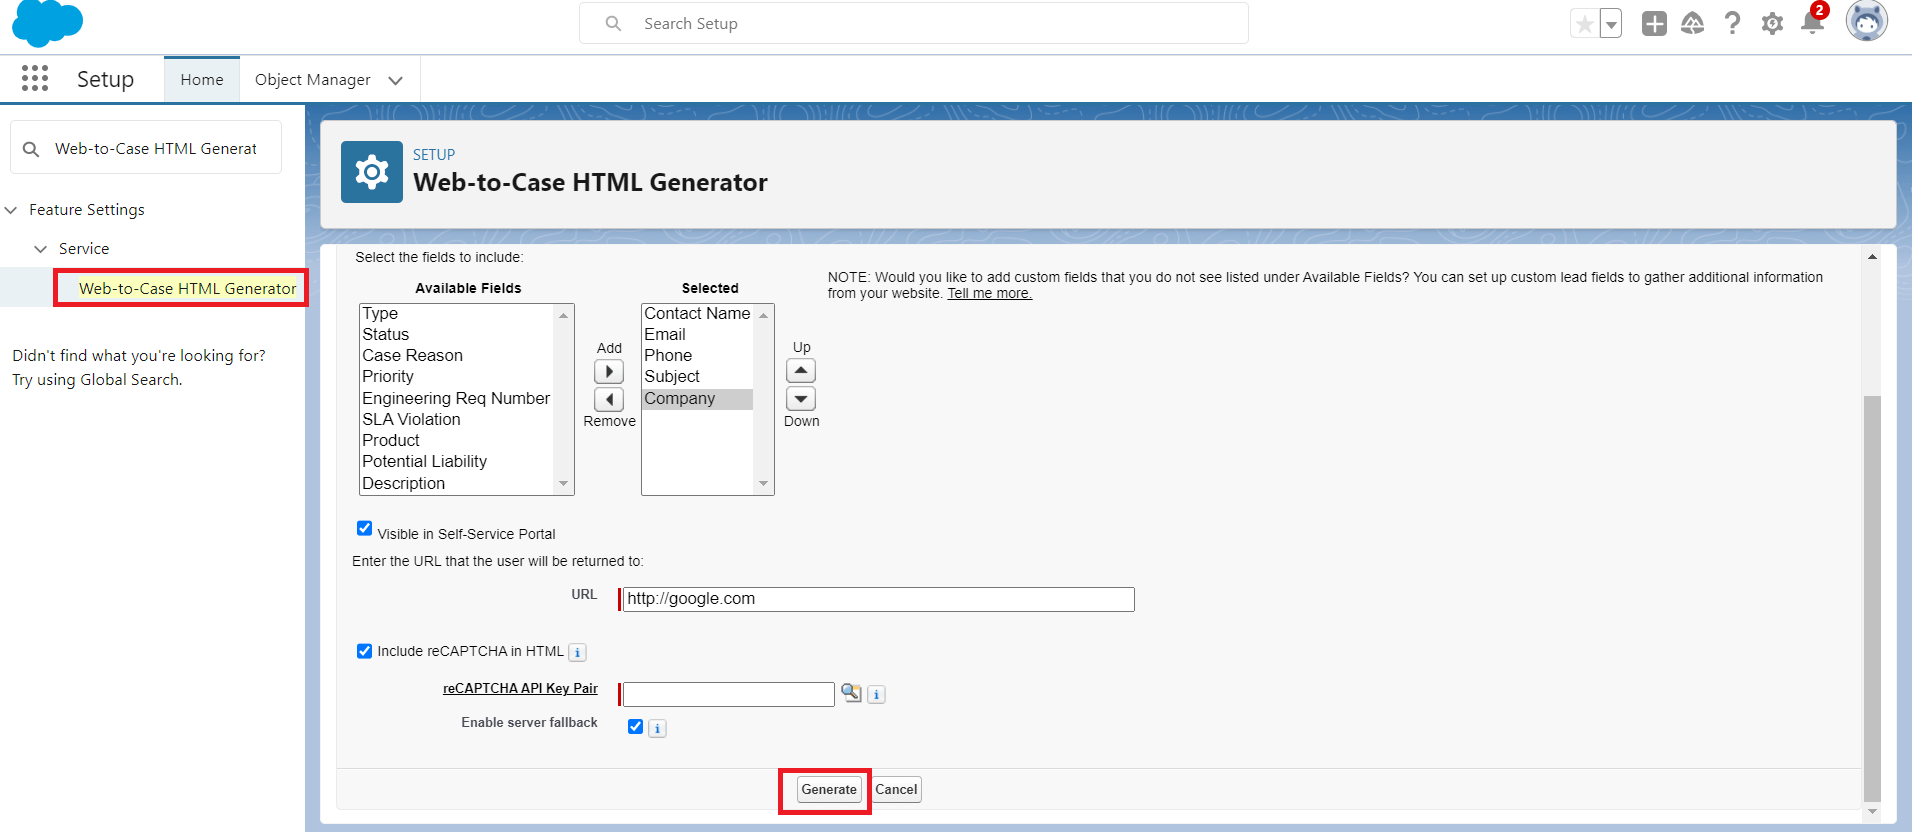
Figure 2: Configure Web-to-Case HTML
- Copy the generated code into the notepad and save it in—HTML format.
- Open the generated document in the browser and enter the records on the page.
Step 3: Configure Web-to-Case HTML
To ensure that customer inquiries captured through Web to Case are created and assigned correctly, you can customize case creation and assignment rules. Follow these steps:
- In the Web to Case settings page, click on the "Case Assignment Rules" or "Web-to-Case Assignment Rules" buttons, depending on your Salesforce edition.
- Define the criteria and actions for case assignment rules. You can use criteria such as criteria for this rule entry, Email Template and Select user to the appropriate support agents or teams automatically.
-
Save your rules.
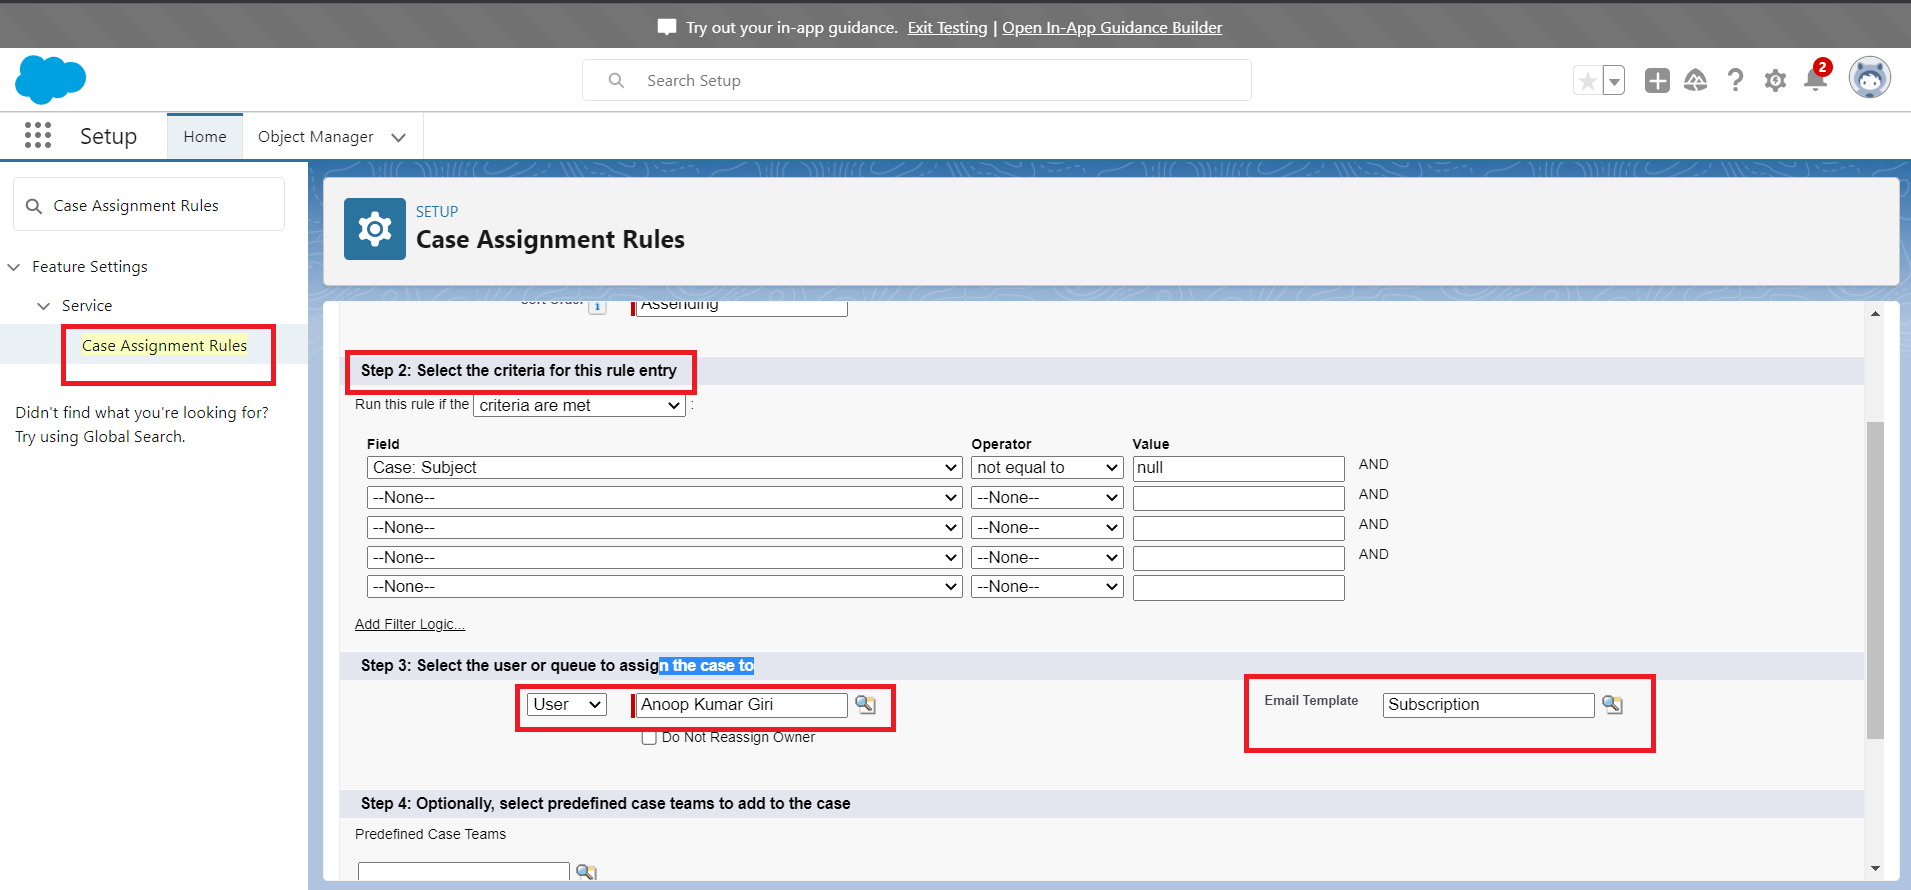
Figure 3: Customize Case Creation and Assignment
Step 4: Test and Monitor
After setting up Web to Case, it is crucial to test and monitor its functionality to ensure a seamless customer support experience. Submit test inquiries through the web form on your website and verify that cases are created accurately within Salesforce. Monitor the process closely to identify any issues or areas for improvement.

Figure 4: Add Details on Web form

Figure 5: New case created according to web form details.
Conclusion
In conclusion, Web to Case in Salesforce is a valuable feature that simplifies the conversion of customer inquiries submitted through a website into support cases. By following the steps outlined above to set up Web to Case, businesses can significantly enhance their customer support efforts, improve response times, and provide a seamless experience for their customers. Implementing Web to Case in Salesforce is a proactive step toward delivering exceptional customer support and streamlining your support processes.
For organizations handling a high volume of email-based support requests, Salesforce Email-to-Case provides advanced capabilities such as automated routing, case threading, and email response management. When combined with Web-to-Case, it ensures a comprehensive omnichannel customer support strategy.
To fully utilize Web-to-Case along with other case intake and automation features, businesses can explore Salesforce Service Cloud, which provides robust tools for case management, automation, and customer engagement.